Processing a Donation
To record a donation given to your pantry, click on the "New Donation" tab.
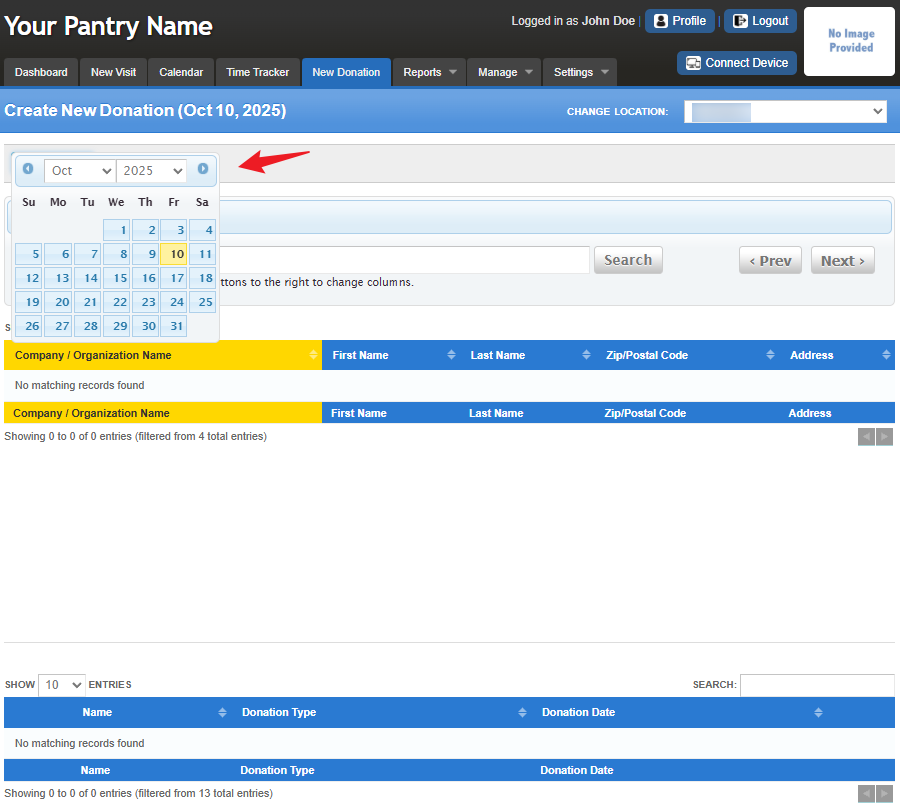
To get started, make sure the date is set to the correct day. By default, the page will display today’s date, which can be found in the blue section just below the "New Donation" tab.
If you need to change the date, click the "Change Date" button — a calendar tool will appear, allowing you to select your preferred date. Once updated, the page will reflect the date you’ve chosen, helping you confirm the exact day you’re recording donations for.

Since FoodBank Manager allows both pre and post-entry of donations, ensuring the correct date is selected is important to maintain accurate reporting.
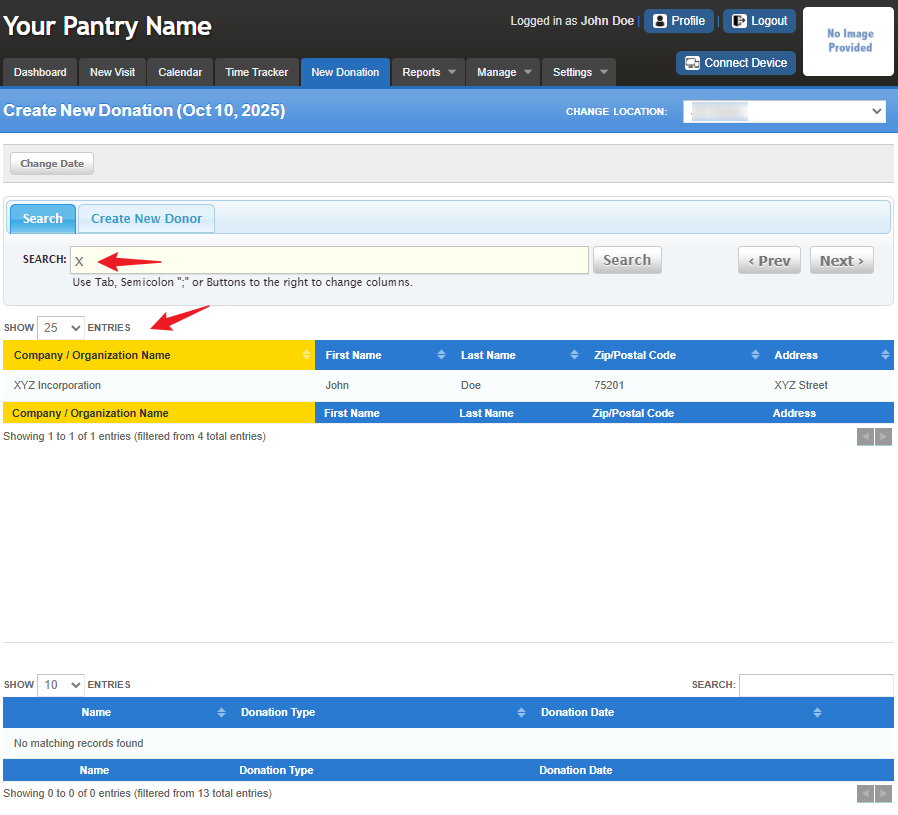
Note: For this article, we are searching by company/organization name, First name, Last Name, Zip/Postal Code, Address. You can customize the “Search by” options to better suit how your pantry is accustomed to searching. For more information, refer to the article Guide to Searching in FBM.Search Tips:
- Click the Search bar area and use the Tab key so you can switch columns
- Pressing the {TAB} key on your keyboard will give you a semi colon symbol in the Search bar (;)
- Type 2–3 letters of the last name, press {TAB}.
- Type 2–3 letters of the first name, press {TAB} .
- You may already see the guest you’re looking for
- If not found, enter Year of Birth, press {TAB} .
- Still not found? Enter part of the address (house number only recommended).
Once you find the donor you are looking for, click on their name.
ChatGPT said:
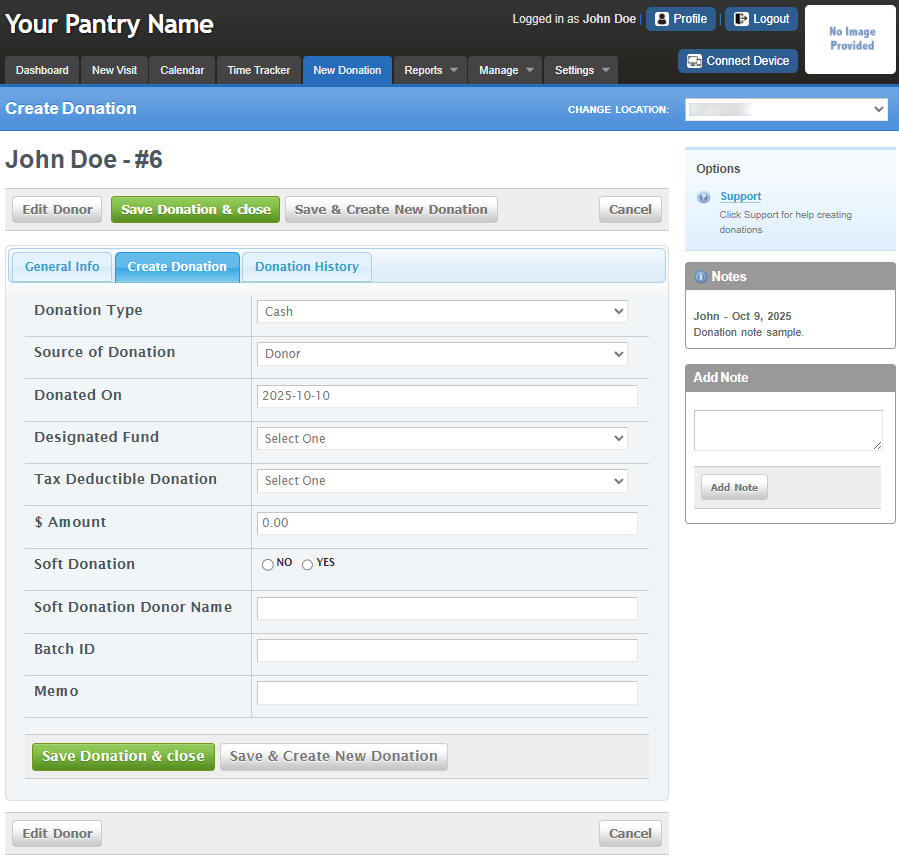

Once you save the donation entry, the system will automatically return to the Search field.
Donors will appear at the bottom of the page — if you don’t see them right away, please scroll down to view the list.

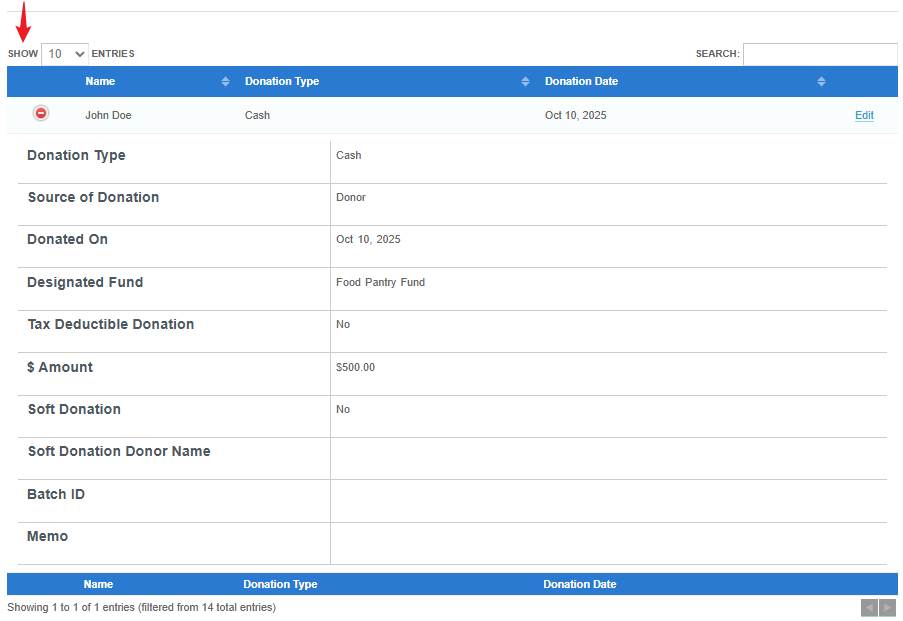
Click the green plus (+) sign next to the donor’s name to view a detailed summary of the recorded donation entry.
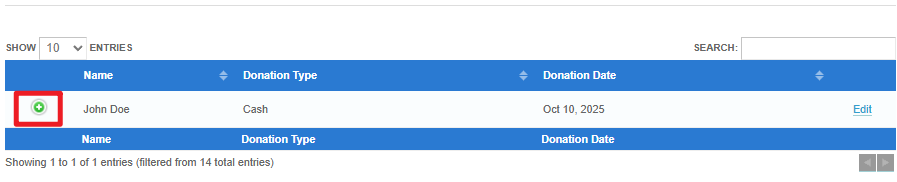
To edit the entry use the field on the right.

Note: If this is your donor’s first time donating, click on the "Create New Donor" tab. Fill in the donor fields and "Save". Once saved, it will default you to the "Create New Donation" page for you to record the donation.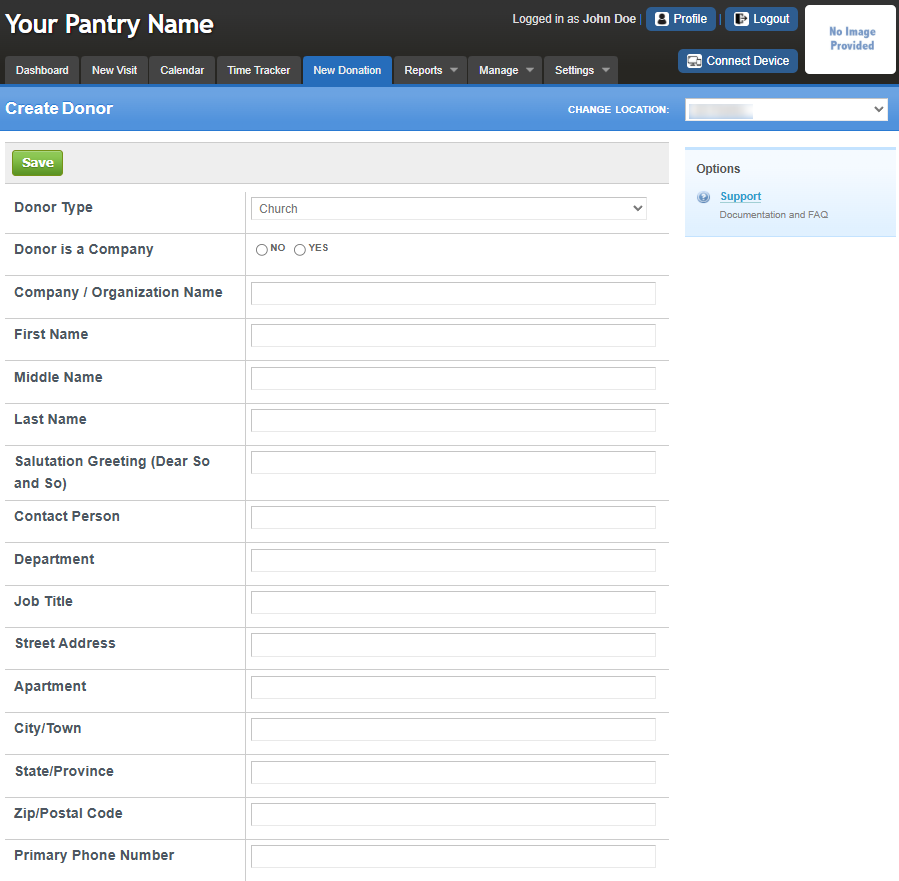
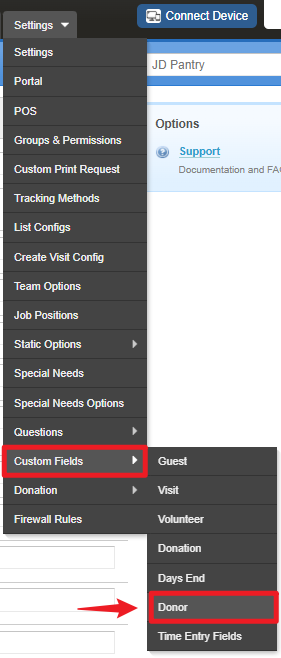
To customize the "Create New Donor" page, go to Settings > Donations > Donor Types & Settings > Custom Fields > Donor.
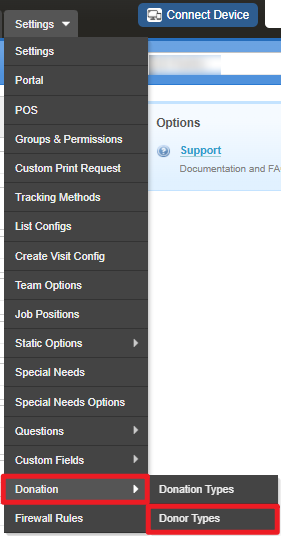
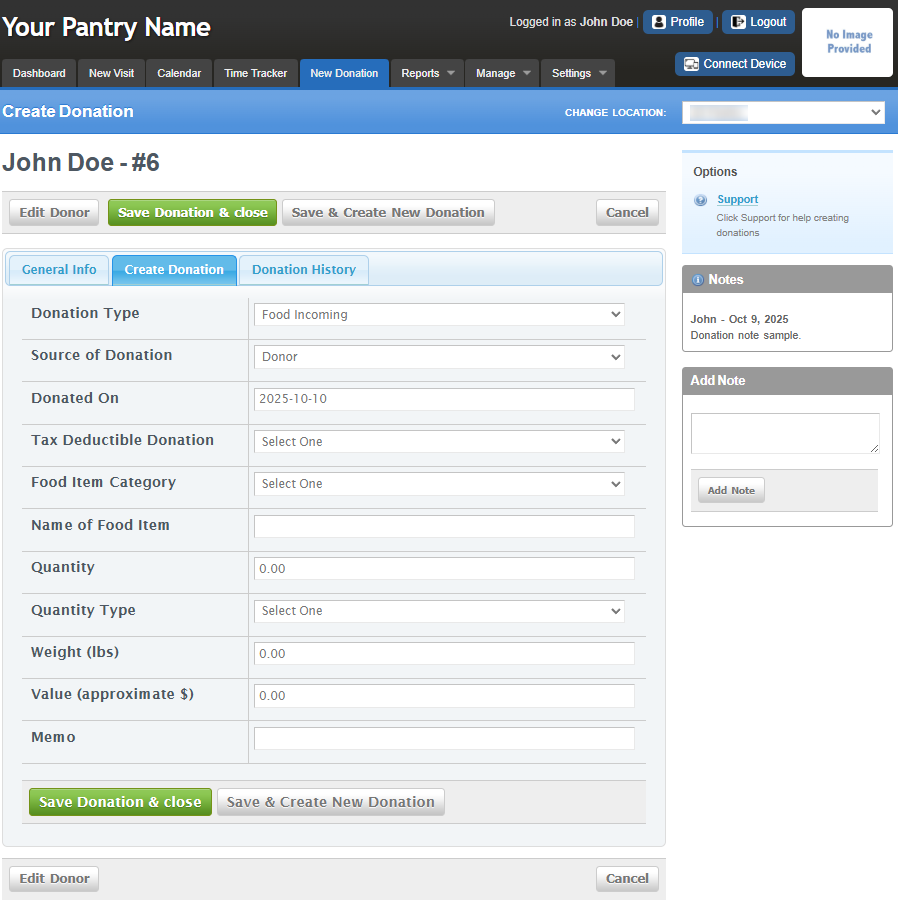
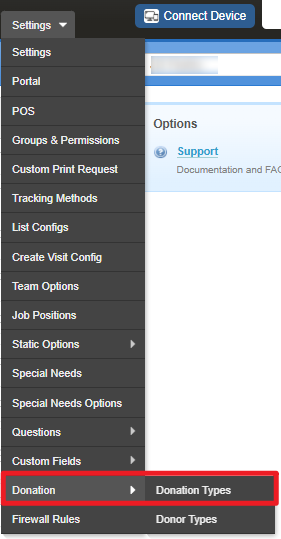
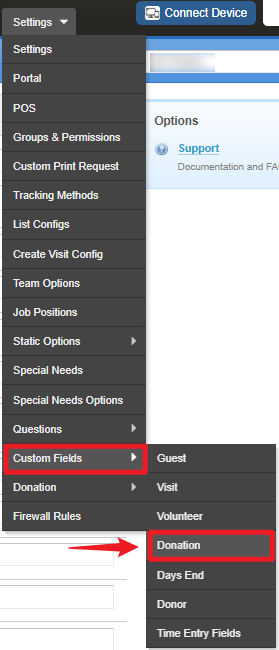
To customize the "Create New Donation" page, go to Settings > Donation > Donation Types & Settings > Custom Fields > Donation.
To learn more about customization using custom fields, CLICK HERE.
Was this article helpful?
That’s Great!
Thank you for your feedback
Sorry! We couldn't be helpful
Thank you for your feedback
Feedback sent
We appreciate your effort and will try to fix the article