TABLE OF CONTENTS
- Manage Donor Page
- Adding a Donor
- Find an Existing Donor
- The "General Info" Tab
- Donation History
- Viewing Donation Details
- Editing a Donation
- Cancelling a Donation
- Donor Notes
- Audit Log
- Delete a Donor
- Adding a Donation
- Merging Donors
- Customize a Donor
Manage Donor Page
To manage your donors, go to the "Manage" tab and click on "Donors".

Adding a Donor
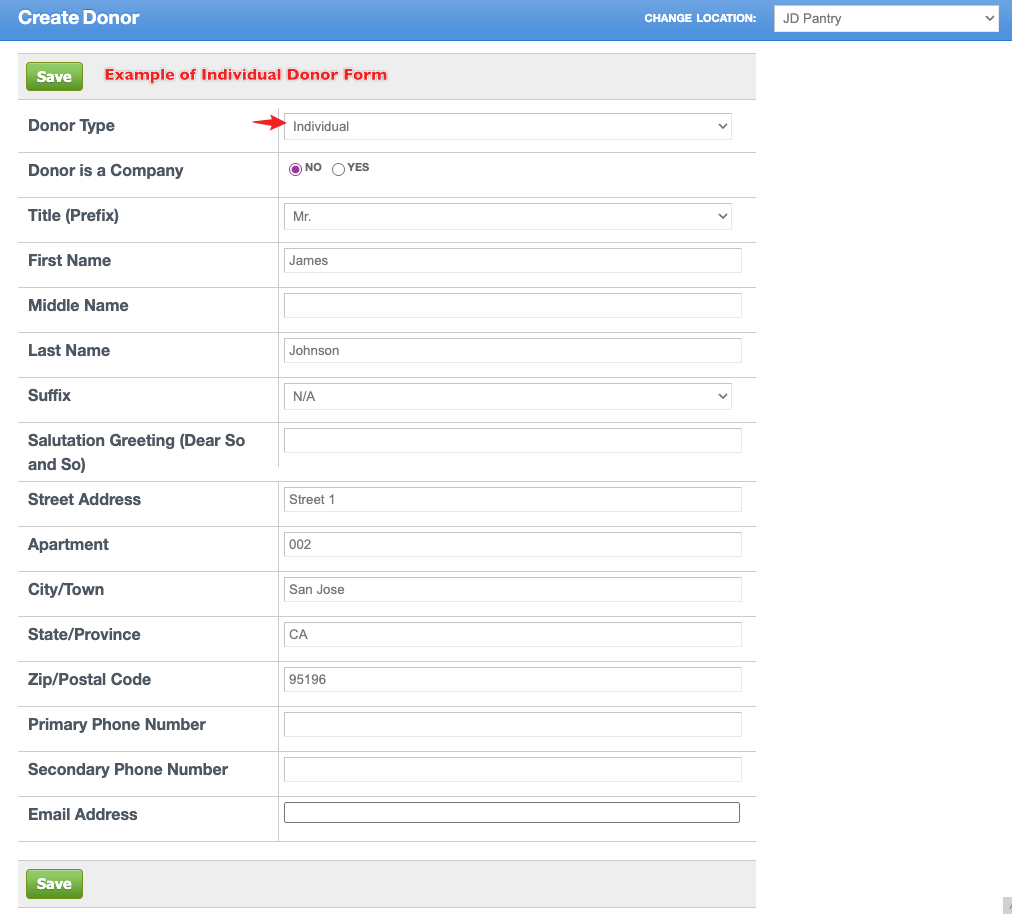
From the "Donors List" page you can add a new donor or search for an existing one.
To add a new donor, click on "Create New" and fill in the information your pantry has customized for the donor record. Work from top to bottom to ensure inputting all the information. Once you are done, click "Save".
Note: First name is the only required field for a donor profile. If you are entering a company/organization, and are using the "Company/Organization Name" field, you will need to input the name into the "First Name" field as well as the "Company/Organization Name" field before saving.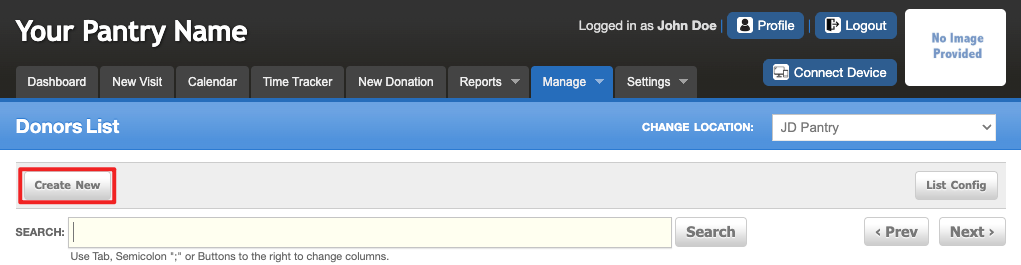
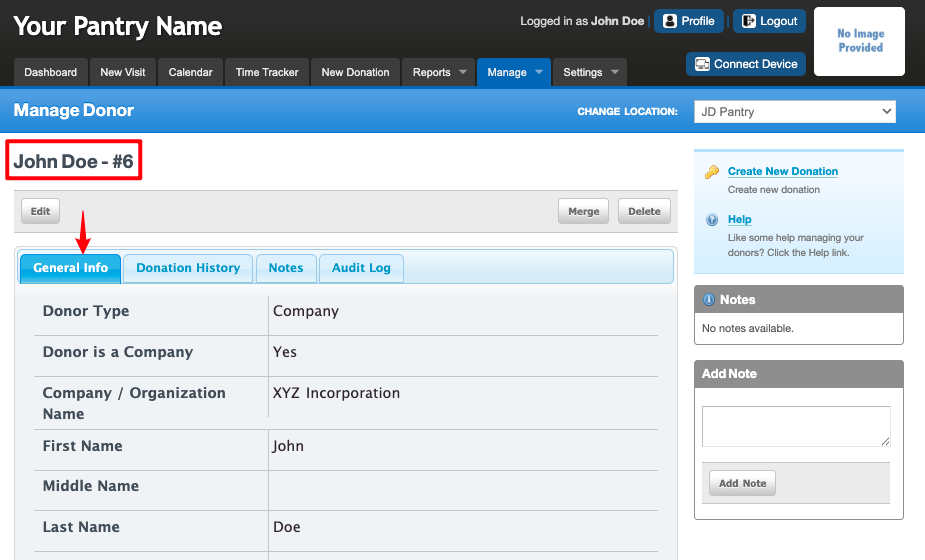
Once saved, FBM will automatically default to the "General Info" tab of the recent donor created. To look for or enter another donor, simply follow the above steps again.
Find an Existing Donor
To search for an existing Donor, click in the "Search" bar.
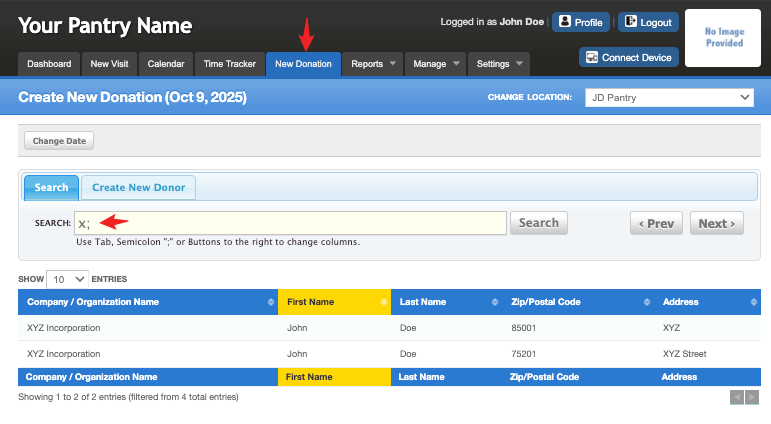
Note: For this article, we are searching for the donor by Company/Organization name, First Name, Last Name, Zip Code and Address. You can customize the "search by" options to better suit how your pantry is accustomed to searching using this article: Guide to Searching in FBMA "less is better" approach to searching for a donor will yield more accurate results than typing in the full name of a donor.
Start by typing in two or three letters of the company/organization name, press the {TAB} key and then two or three letters of the first name and press the {TAB} key again. It’s possible that you may see the donor you are looking for already, but if not, type in the last name and press the {TAB} key again. If you still do not find who you are looking for continue to zip code and address, but remember…just a few characters. Please notice that as you ‘Tab’ through, the column changes to gold. This lets you know what column you are working in. Try it on your system, press tab a few times and {SHIFT} + {TAB} to move backwards.
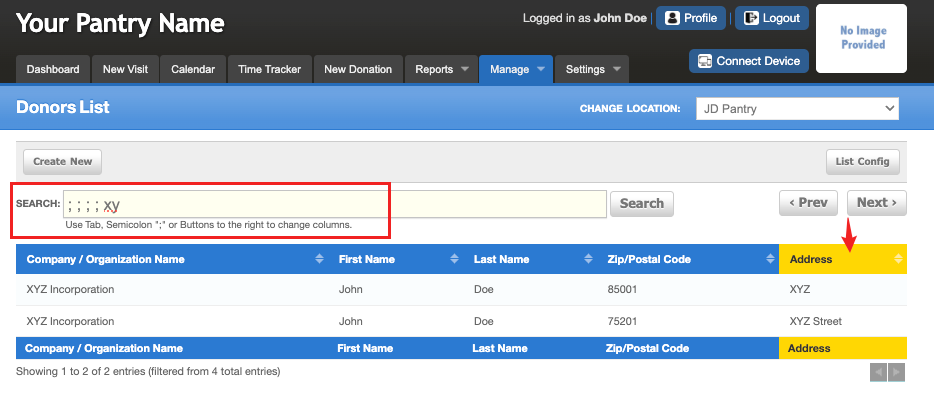
Note that I skipped searching the other columns here and proceeded to searching the Address column instead (highlighted), hence, the 4 semicolon placed on the search bar before the characters I am looking for.
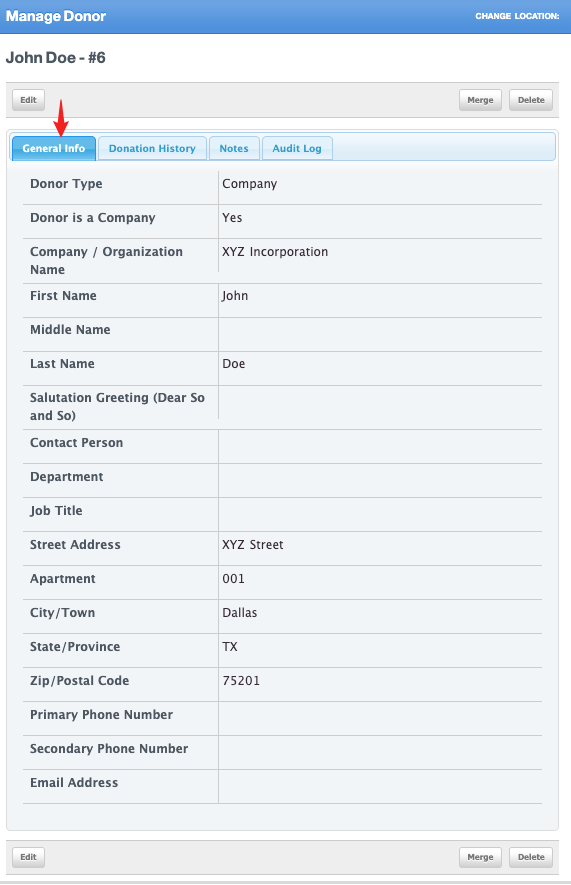
The "General Info" Tab
Once you find the donor you searched for, click on their name. This will take you to their "General Info" tab. This is a view of what is in their record.
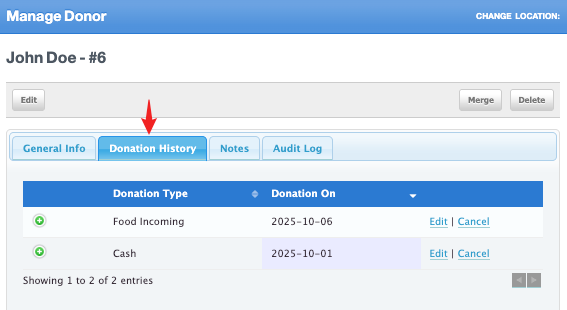
Donation History
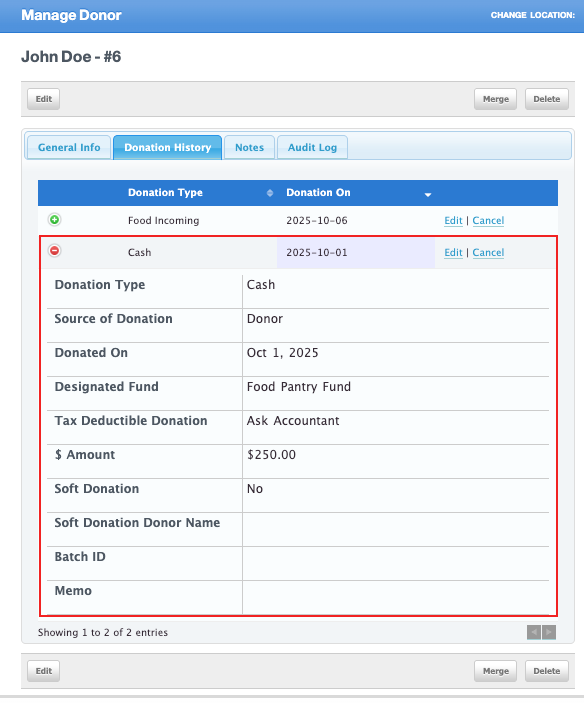
To view the donation history of this donor, click on the "Donation History" tab. This page shows you the type of donation they gave and the date of their donation.
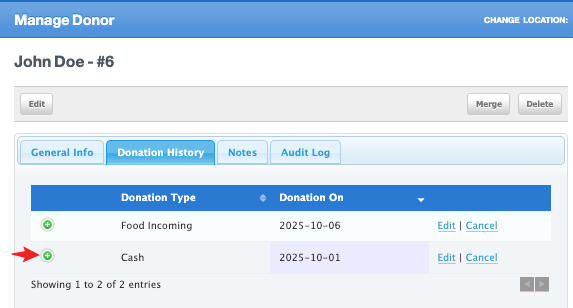
Viewing Donation Details
To view more information about the donation, click on the green button with the white plus sign. To close it after viewing, click on the red button with the white minus sign.
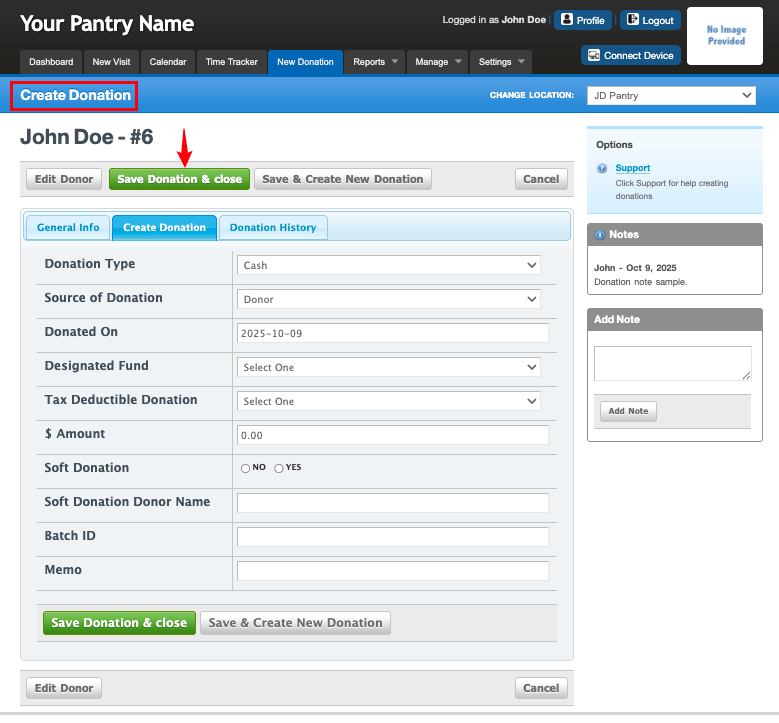
Editing a Donation
To edit a donation, click on the "Edit" link. This will take you back to the donation record. Make the changes needed and click the green "Save Donation & Close" button. Please note you are now in the "New Donation" tab. Once you save the record, you will remain under this tab. Return to "Manage > Donors" if needed.

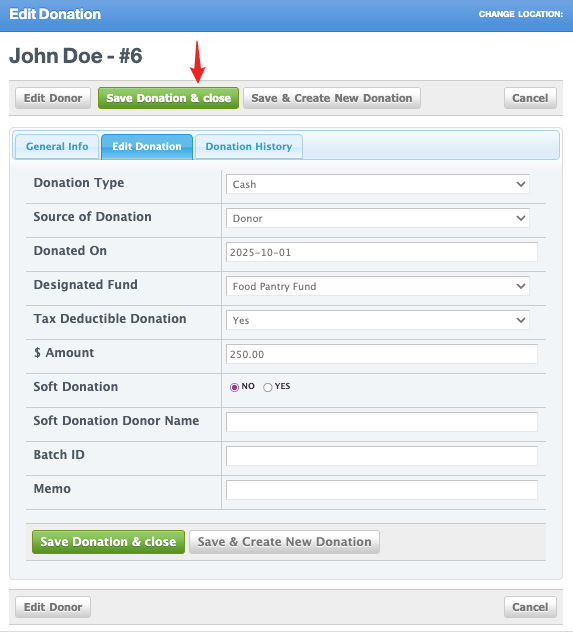
Note that when you are editing a donation, you get redirected to the "New Donation" tab. Once you save the changes, you will remain on the tab. Click on Manage > Donors if needed. 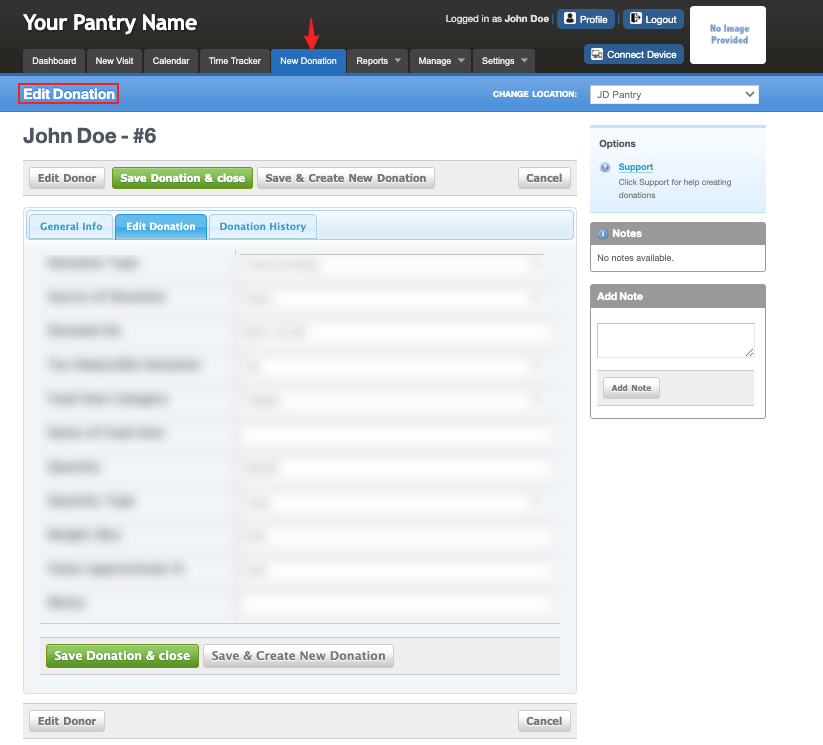
Cancelling a Donation
To cancel a donation, click on the "Cancel" link. A message will pop up asking, "Are you sure you want to cancel this donation?". Click "OK" if you agree.
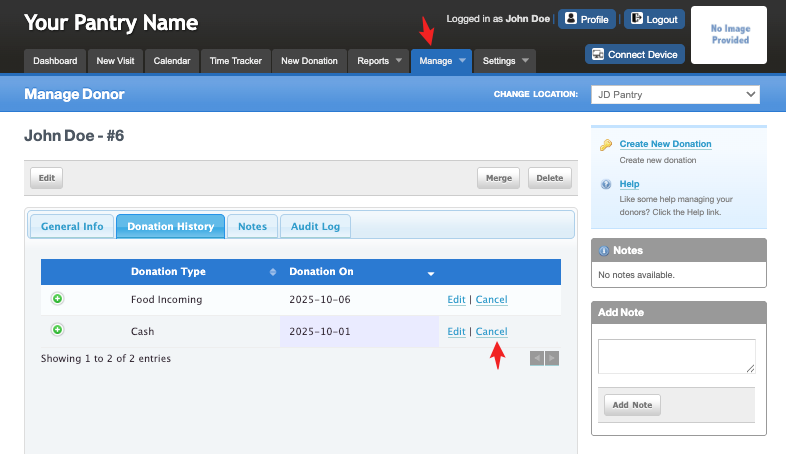
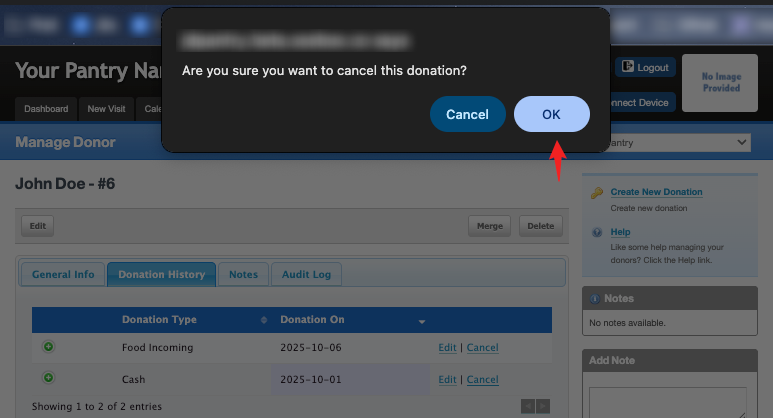
Please note that you will be redirected to the "New Donation" tab after successful donation cancellation. Return to Manage > Donors if needed.
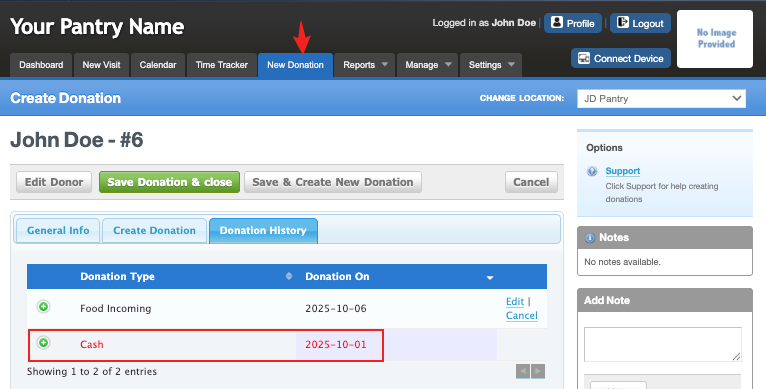
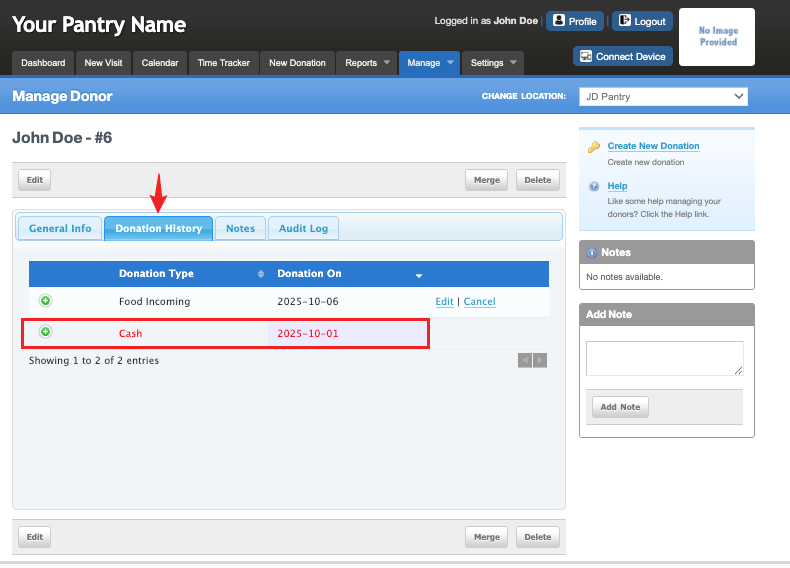
Canceled donations can be viewed in the "Donation History" tab of the donor record. These donations are identified by red lettering and there is no longer an "Edit/Cancel" option. The green button with a white plus sign is available to view the record that was cancelled. If a donation was accidentally cancelled, you can use this information to apply the donation again.
Donor Notes
The "Notes" tab is a view of all the notes that have been entered into the notes field. This page shows you the note, who entered the note and the date.
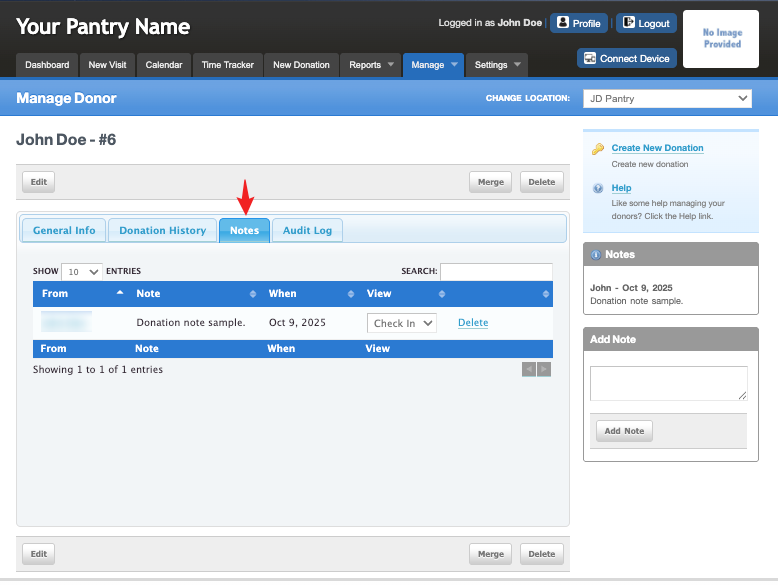
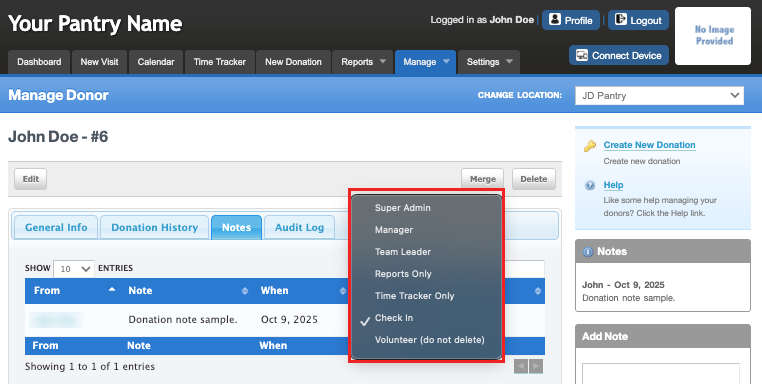
Sometimes notes regarding a donor may be sensitive and only selected roles should be able to view that note. You can set which role will be able to see the note using the "View" setting.
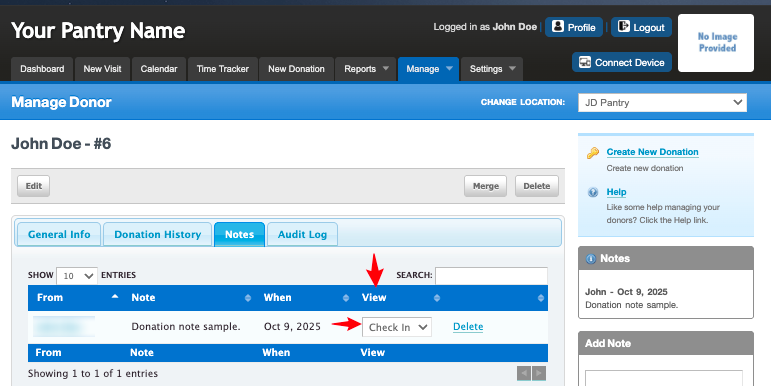
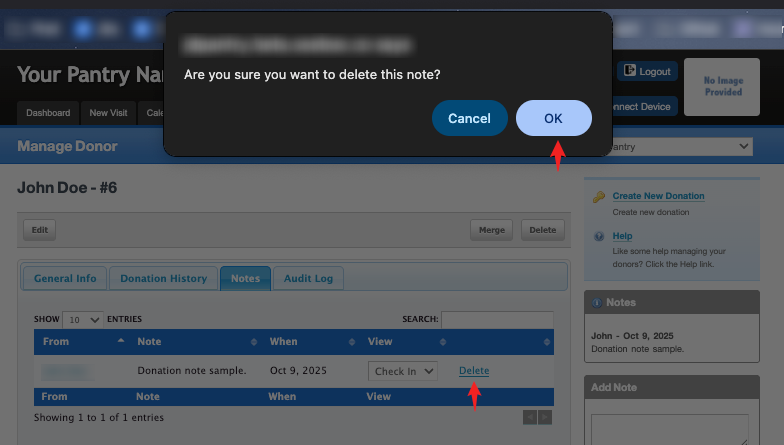
There is a delete option for the note. To delete a note, click on the delete link. A pop-up box will ask "Are sure you want to delete this note?", click "OK".
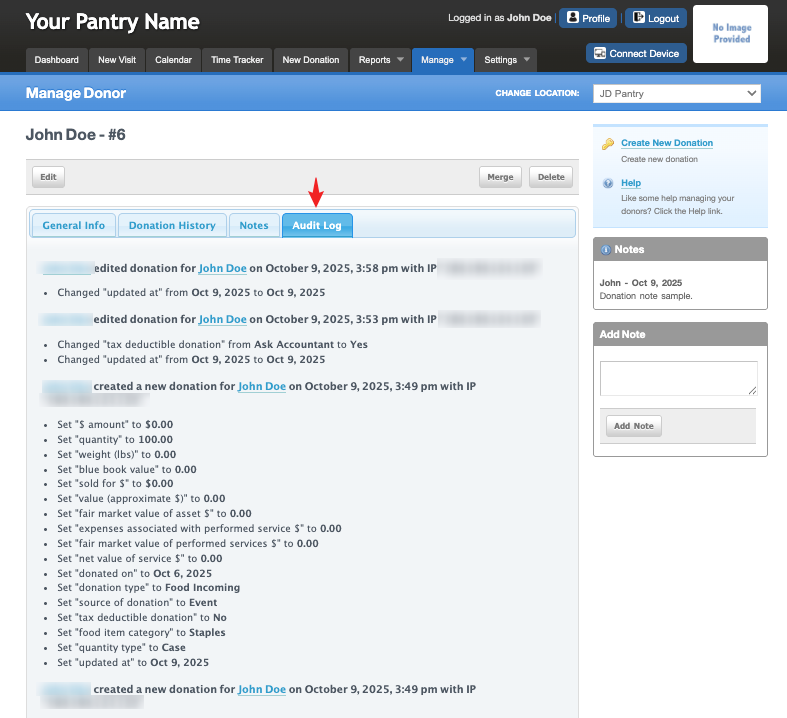
Audit Log
The "Audit Log" provides a list of activities concerning the donor account. You will be able to see who worked in the account and what was updated or changed.
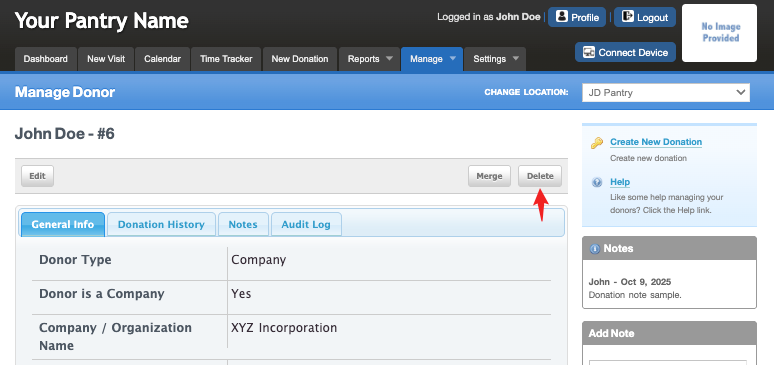
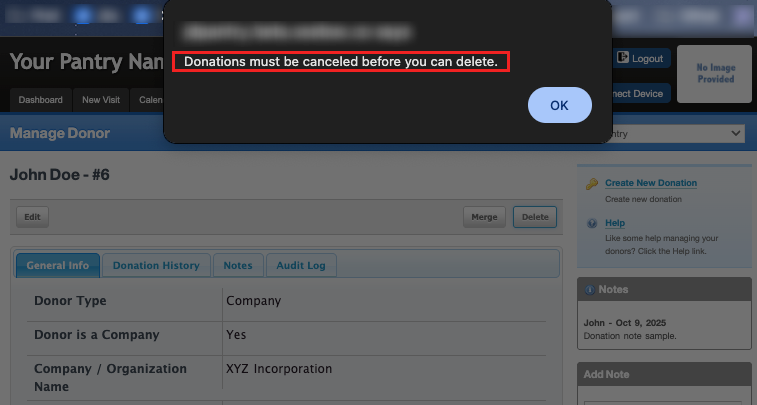
Delete a Donor
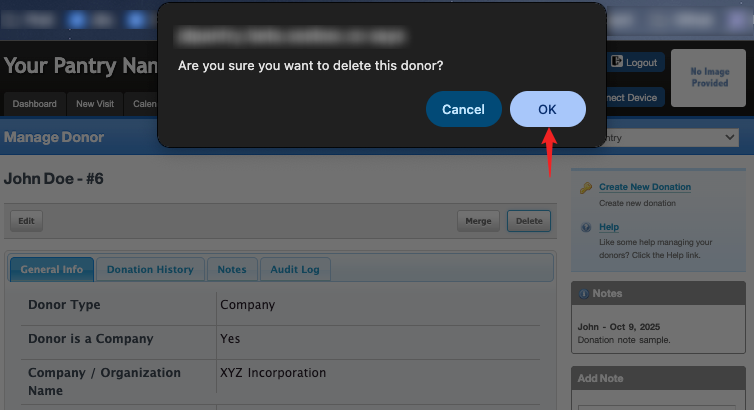
To delete a donor from your system, you must first cancel all the donations in the donation history. Once that is done, click on the "Delete" button. A pop-up message will ask "Are sure you want to delete this donor?", click "OK".
If you did not cancel all the donations, a pop-up message will let you know "Donations must be cancelled before you can delete."
Adding a Donation
There are 2 ways to add a donation to a donor.
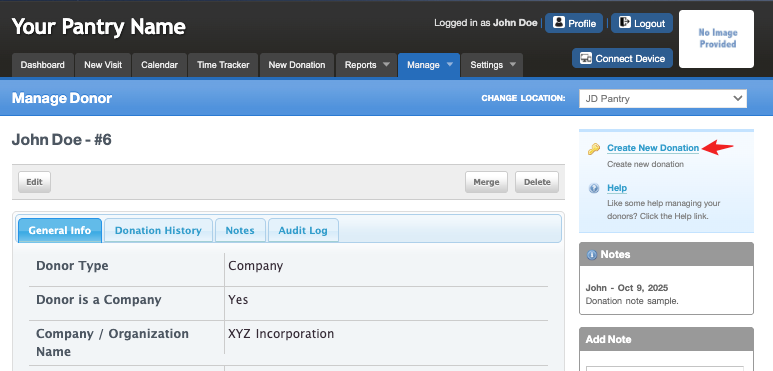
First, in "Manage > Donors > Select a Donor", there is an option to the right to "Create New Donation". Selecting this option redirects you to the "New Donation" tab where you can fill in the donation information.
Second, you can go to "New Donation > Search for a Donor > Click on the Selected Donor", it will open open up the Create Donation window where you can fill in all the information about the donation.

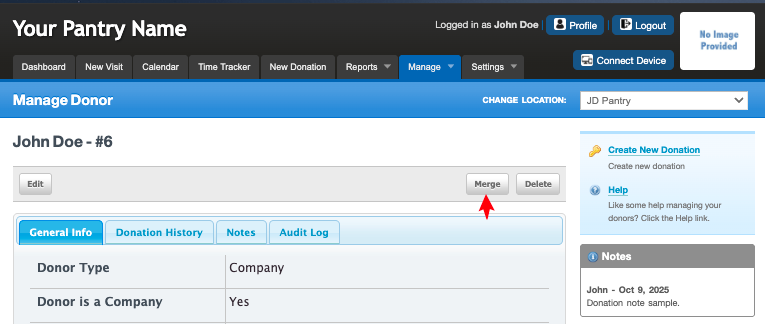
Merging Donors
If you find you have duplicated a donor, there is a "Merge" field for donors. This will merge 2 donor accounts and keep all the records on the primary account.
To do this, go to "Manage > Donors > Select a Donor > Merge"
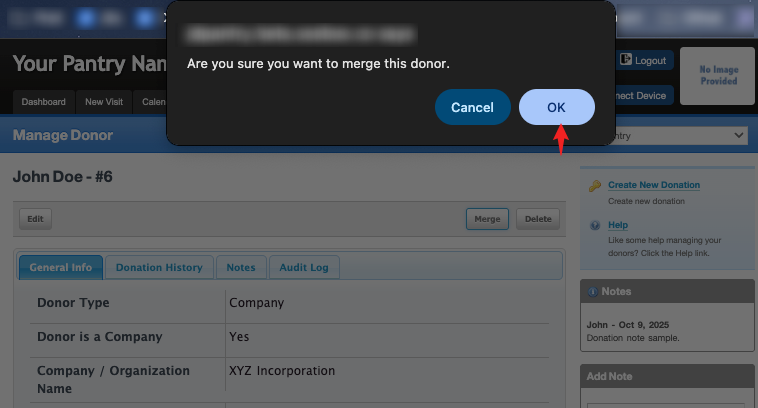
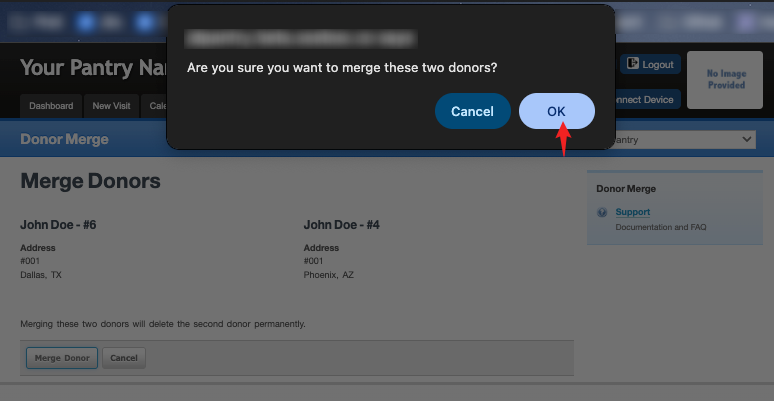
You will be presented with a prompt asking "Are you sure you want to merge this donor." Click "OK" if you agree.
On the next page, you will search for the donor you want to merge.

Another window appears with note "Merging these two donors will delete the second donor permanently." Click on "Merge Donor" if you agree.
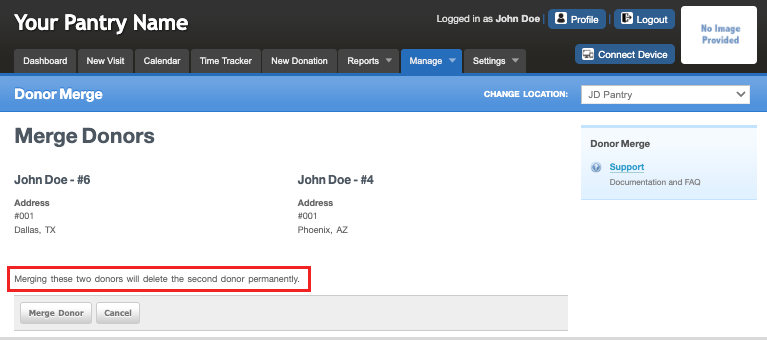
Another prompt is presented for confirmation, click OK. You have now successfully merged two donor records.
Customize a Donor
To customize the donor data, go to "Settings > Custom Fields > Donor".
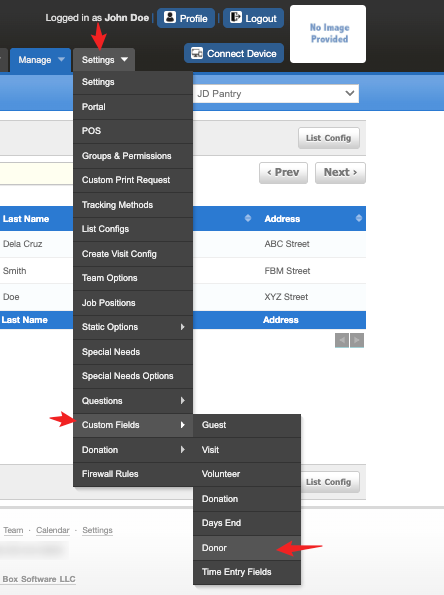
Note: To learn more about customization, see our Custom Fields & Configuration article.
Was this article helpful?
That’s Great!
Thank you for your feedback
Sorry! We couldn't be helpful
Thank you for your feedback
Feedback sent
We appreciate your effort and will try to fix the article