TABLE OF CONTENTS
- Configuring Search Menus
- Adding or Removing Searchable Fields
- Examples of Search Setup and Search Bar for the Different Lists
- Changing the Order of your Search Fields
- Using Search Properly
In FBM, your search experience is driven by how your List Configs are set up. The fields you choose in List Configs determine which columns appear in your search menus (for Donors, Guests, Visits, etc.). Because of this, searching and list configuration go hand in hand—you won’t see or be able to search by a field unless it’s enabled in List Configs.
Use this article to learn how to customize search menus, add or remove searchable fields, order them, and use them effectively in various parts of the system (Manage Guests, New Visit, Team, Donors, etc.).
Configuring Search Menus
Every pantry has its own way of searching for a guest—by name, barcode, or other methods. FBM can be customized to match your preferred search style.
To set up your search preference:
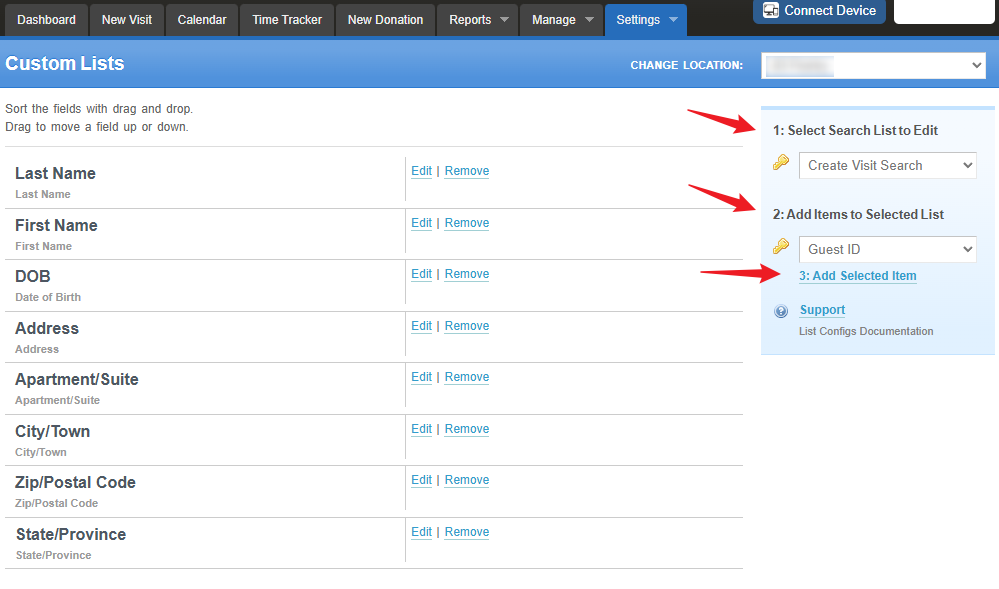
- Go to Settings
- Click List Configs.
- Choose from the Select Search List to Edit to customize.
- Then Add Items to Selected List
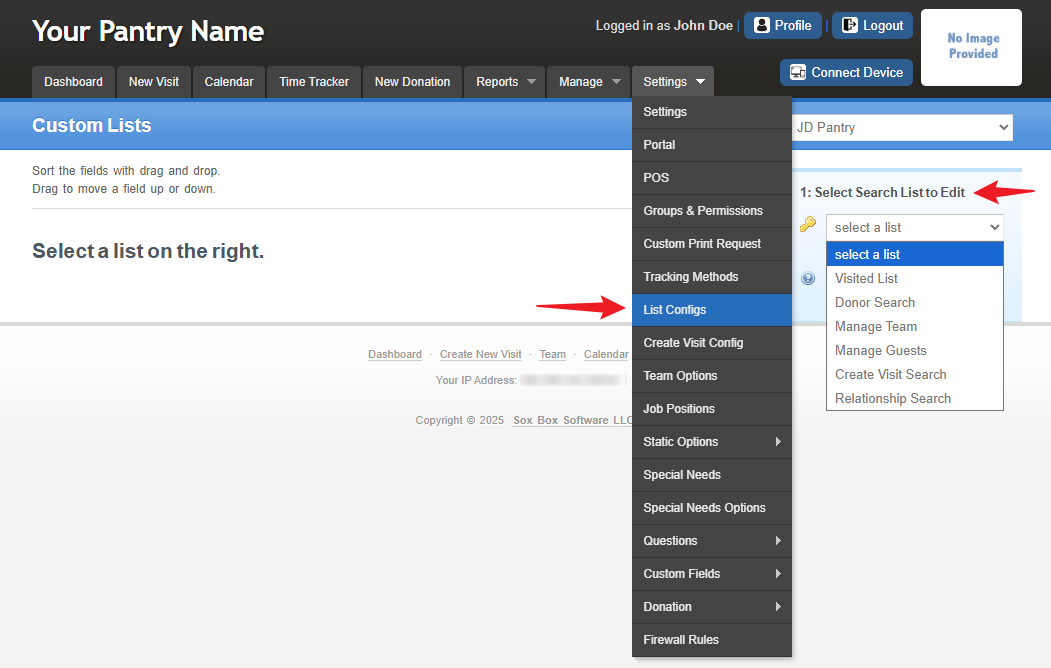
Here is a description of the available searches you can modify that are found in the dropdown list.
Donor Search
- allows you to set up your criteria to search for Donors.
Manage Team
- allows you to set up your criteria to search for Team Members.
Manage Guests
- allows you to set up your criteria to search for Guests under the Manage tab.
Create Visit Search
- allows you to set up your criteria to search for Guests under the New Visit tab.
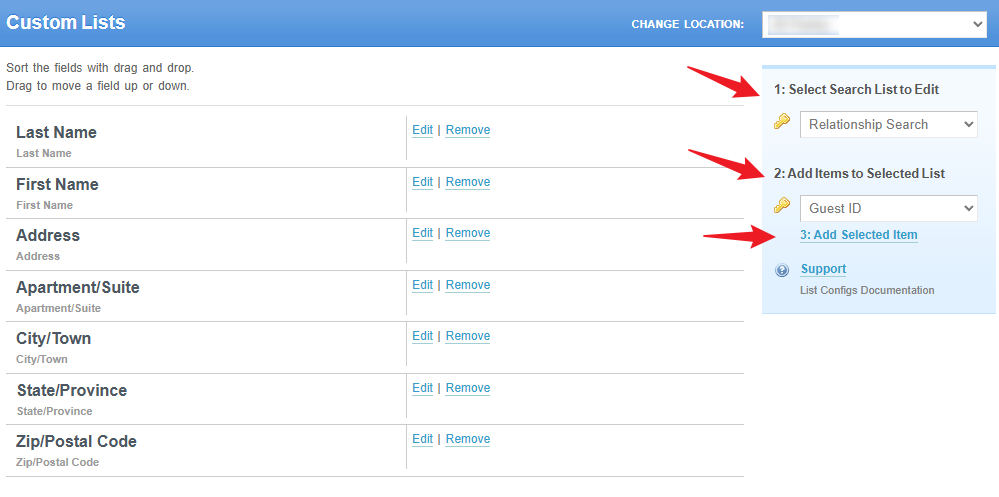
Relationship Search
– allows you to set up criteria when searching by the Relationship field.
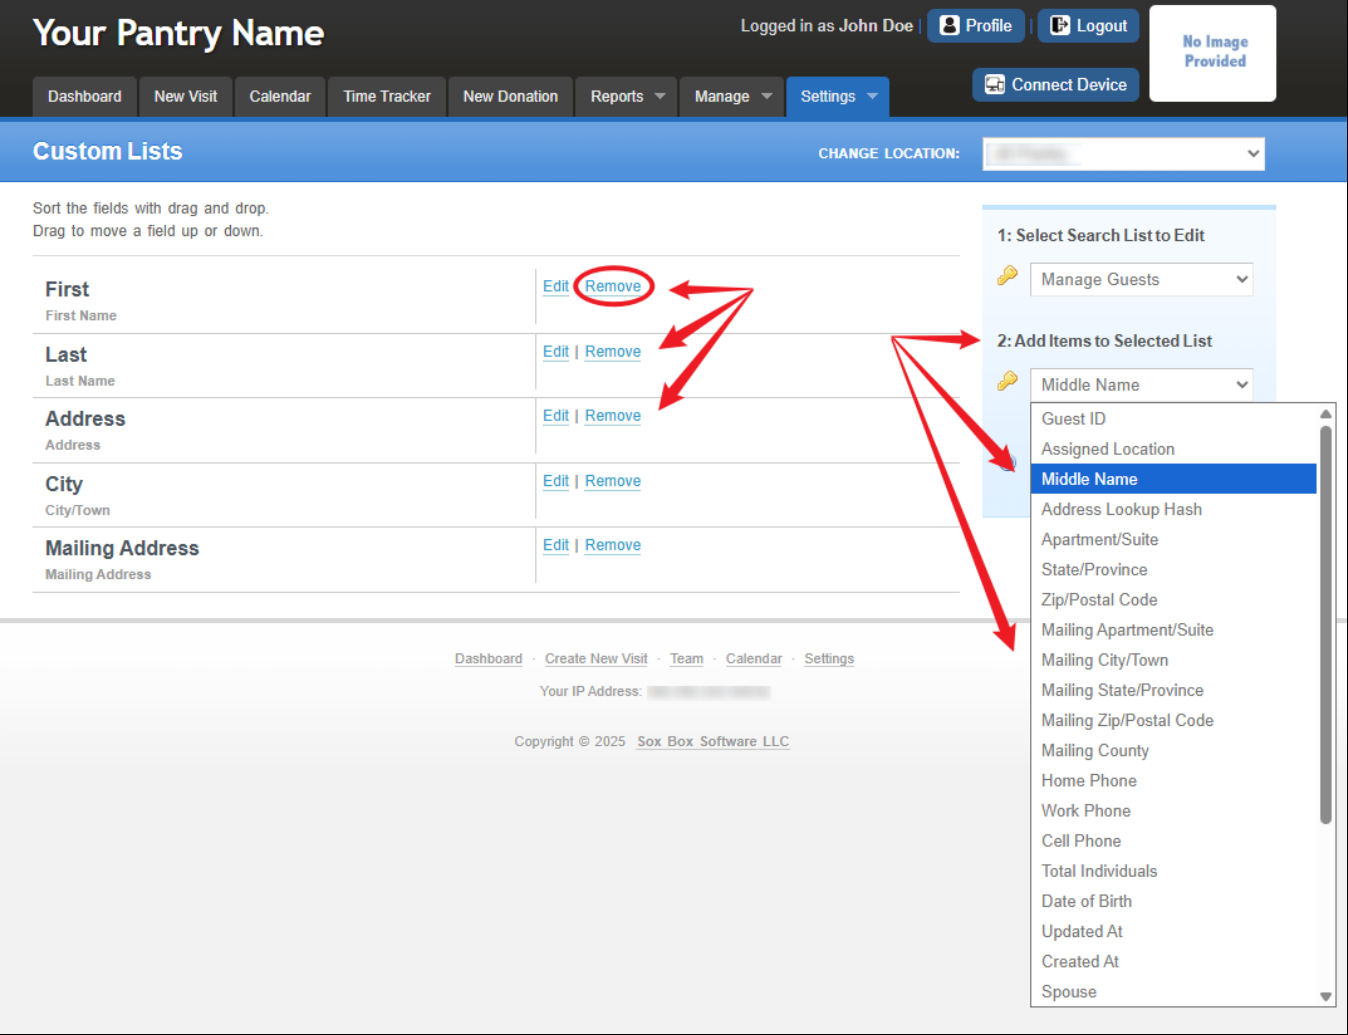
Adding or Removing Searchable Fields
Add guest fields you want to use for searching by clicking the drop-down menu found under 'Add Items to Selected List' then choose the field item after that Click 'Add Selected Item'.
Remove items by clicking on ‘Remove'. Removed items will still be available in the 'Add Items to Selected List' drop-down menu. This allows you to add them back on a future date if desired.
Examples of Search Setup and Search Bar for the Different Lists
Donor Search Setup and Search Bar Results
Set the Search bar Columns under Settings > List Configs > Select Search List to Edit > Donor Search > Choose from Add Items to Selected List > Add Selected Item.
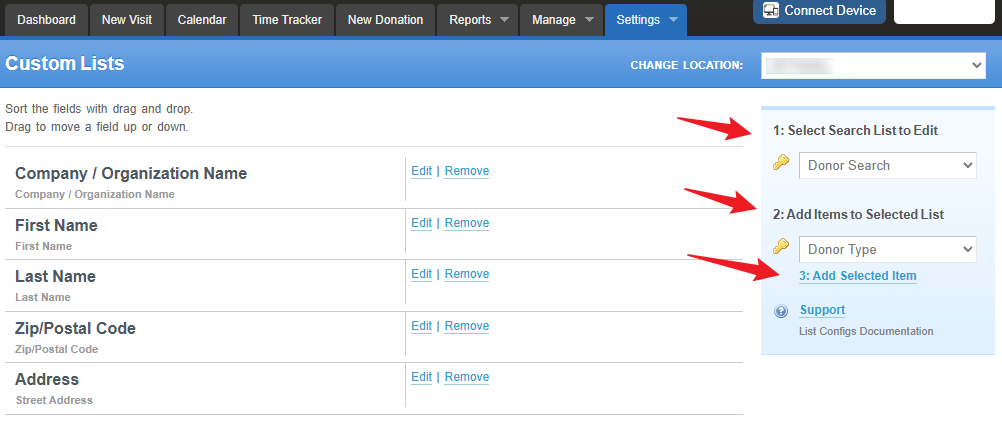
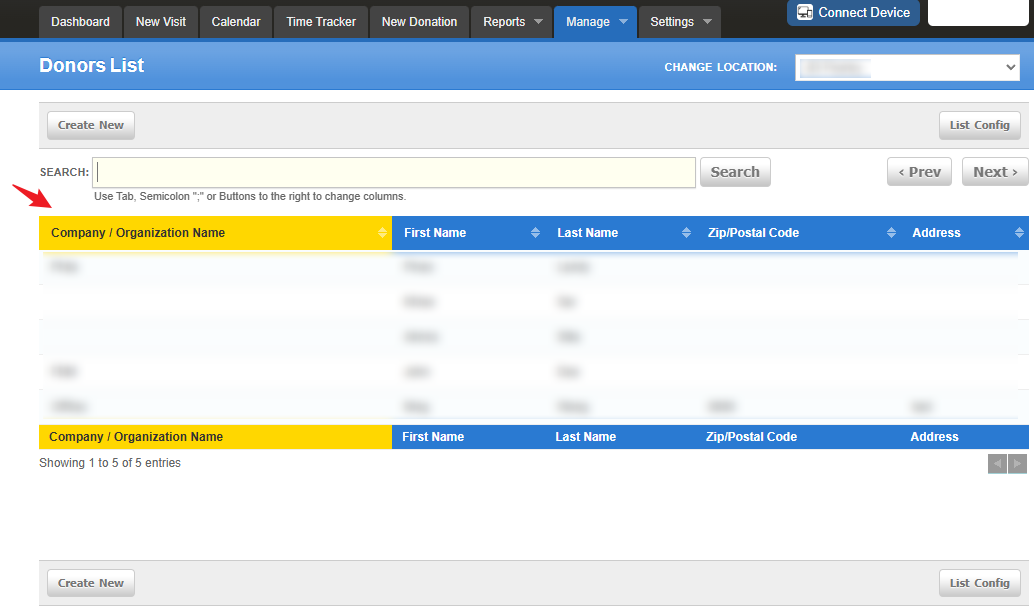
To view the Search bar columns you’ve set: Go to Manage > Donors
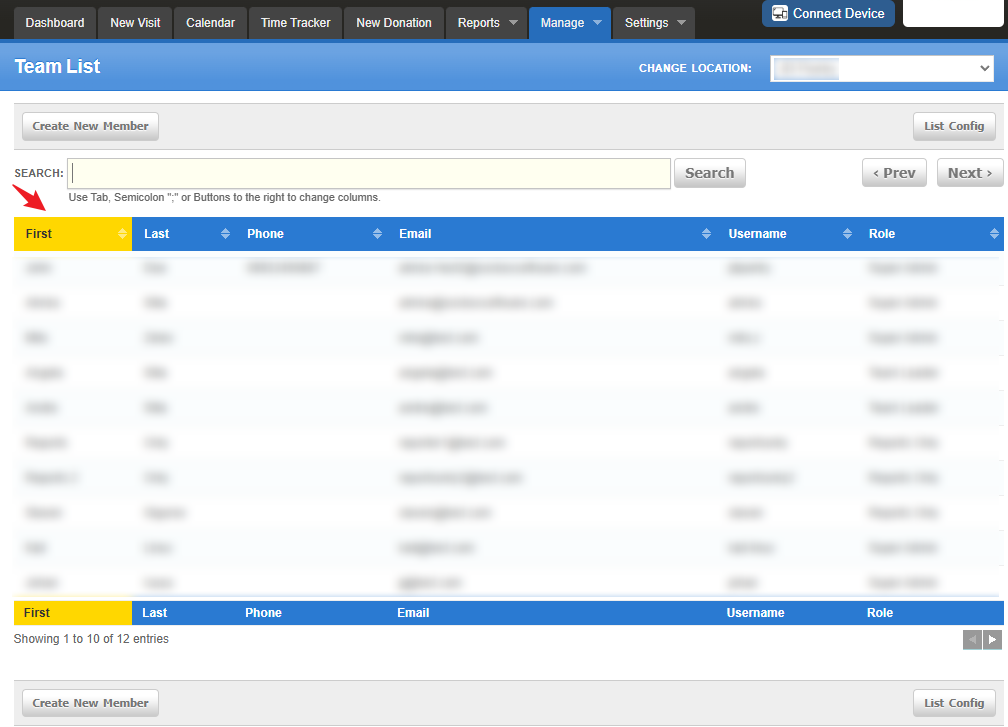
Manage Team Search Setup and Search Bar Results
Set the Search bar Columns under Settings > List Configs > Select Search List to Edit > Manage Team> Choose from Add Items to Selected List > Add Selected Item.
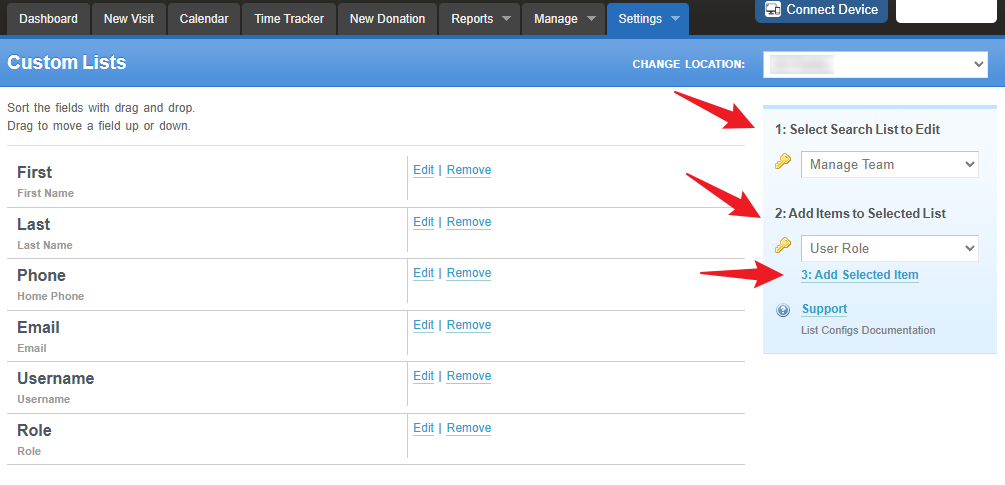
To view the Search bar columns you’ve set: Go to Manage > Team
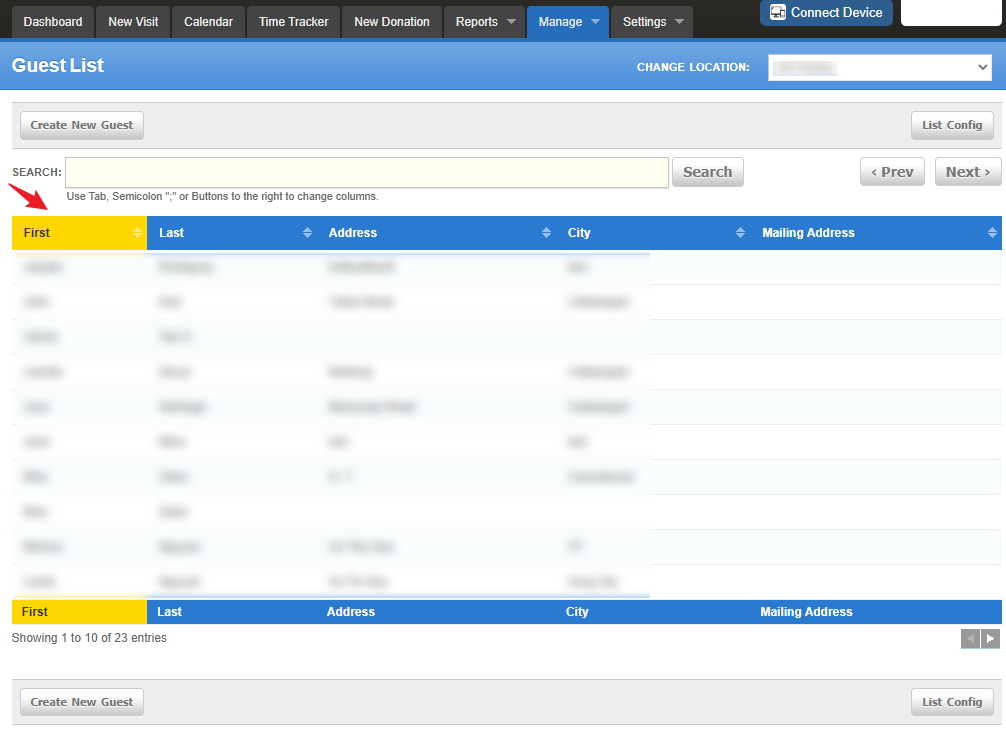
Manage Guests Search Setup and Bar Results
Set the Search bar Columns under Settings > List Configs > Select Search List to Edit > Manage Guests> Choose from Add Items to Selected List > Add Selected Item.
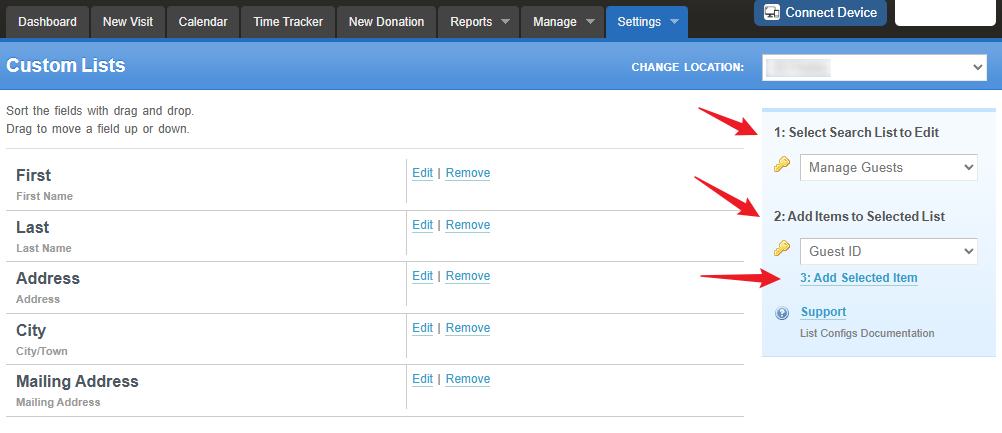
To view the Search bar columns you’ve set: Go to Manage > Guests.
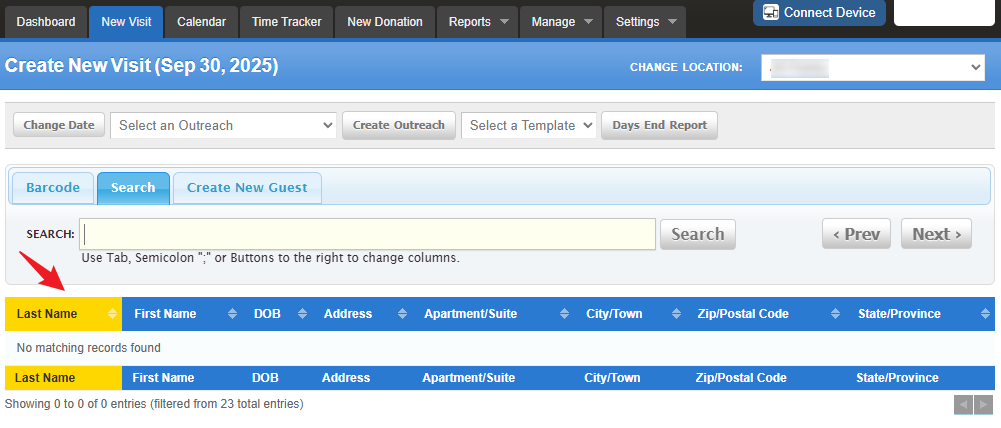
Create Visit Search Setup and Search Bar Results
Set the Search bar Columns under Settings > List Configs > Select Search List to Edit > Create Visit Search> Choose from Add Items to Selected List > Add Selected Item.
To view the Search bar columns you’ve set: Go to New Visit > Search.
Relationship Search Setup and Search Bar Results
Set the Relationship Setup under Settings > List Configs > Select Search List to Edit > Relationship Search> Choose from Add Items to Selected List > Add Selected Item.
Setting Up a Guest Relationship
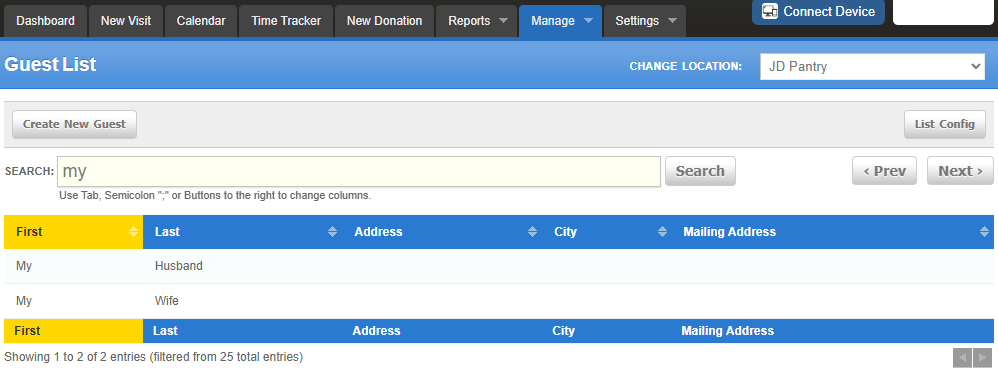
For this example I have created a guests named "My Husband" and "My Wife"
Go to Manage > Guests
Select the guest you want to edit (example: "My Husband" ).
Click Edit.
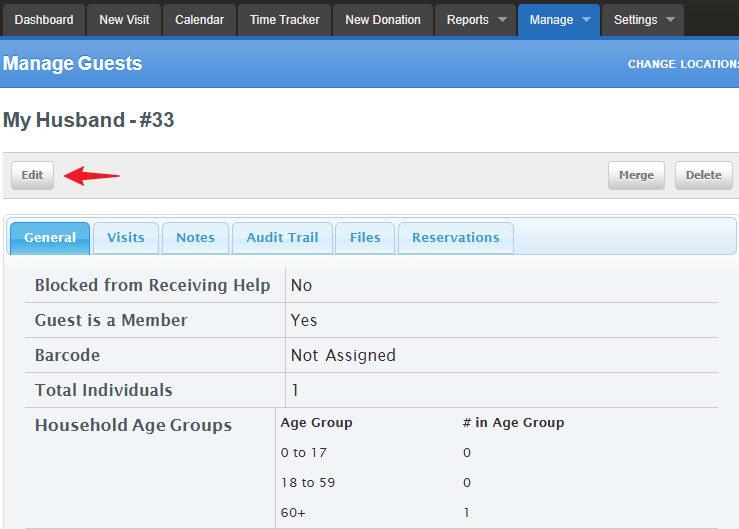
Scroll down to the Relationship Details section.

Click Search and look for the related guest (example: "My Wife").
Select the guest’s name (example: "My Wife").
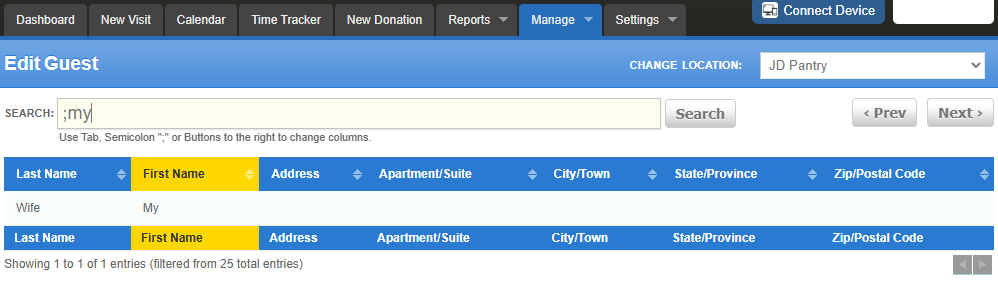
After selecting “My Wife” the relationship will display as shown below.
Click Save at the bottom and now both guests are now linked in a relationship setup.

Changing the Order of your Search Fields
Rearrange fields in the order you want to use them by left clicking on the field you want to move, HOLD the click and drag that field into place and release the mouse.

Using Search Properly
Note: "Less is Better" - Use shorter search terms for better results.
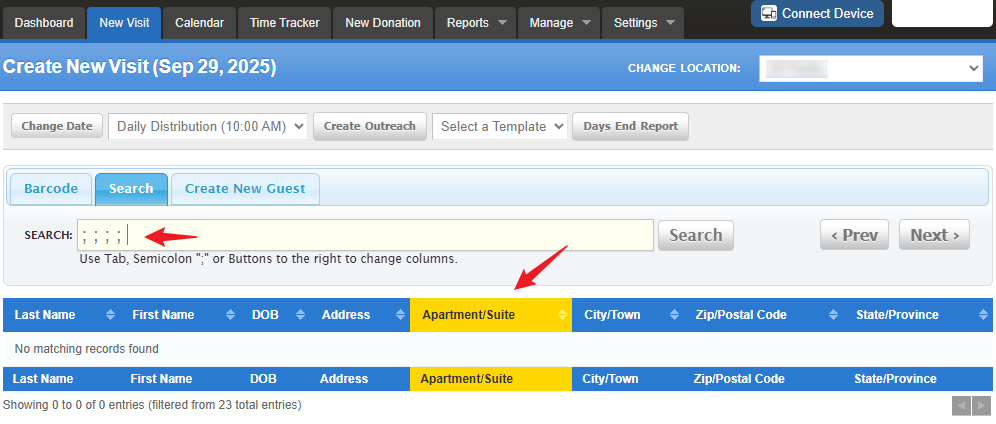
Typing only two to three letters of a guest’s name or donor’s address helps improve accuracy and reduces duplicates.For this example we will use the 'New Visit Search' to look for a guest. We are searching for the guest by last name, first name, DOB, and city.
Search Tips
- Click the Search bar area and use the Tab key so you can switch columns
- Pressing the {TAB} key on your keyboard will give you a semi colon symbol in the Search bar (;)
- Type 2–3 letters of the last name, press {TAB}.
- Type 2–3 letters of the first name, press {TAB} .
- You may already see the guest you’re looking for
- If not found, enter Year of Birth, press {TAB} .
- Still not found? Enter part of the address (house number only recommended).

Notes on Searching:
- As you press {TAB}, the active column highlights in yellow. This shows which column you’re working in.
- Columns are separated by ; (semicolons).
- Example: To search by DOB only, press {TAB} twice, then enter the date. The results will show all guests with that DOB.
For Tablets or Devices Without {TAB}:
- Use the Prev and Next buttons to move between columns (same as {TAB}).
- Use the Search button anytime to start a search.
Try It:
- Press {TAB} to move forward between columns.
- Press {SHIFT} + {TAB} to move backward.
Was this article helpful?
That’s Great!
Thank you for your feedback
Sorry! We couldn't be helpful
Thank you for your feedback
Feedback sent
We appreciate your effort and will try to fix the article