TABLE OF CONTENTS
Overview
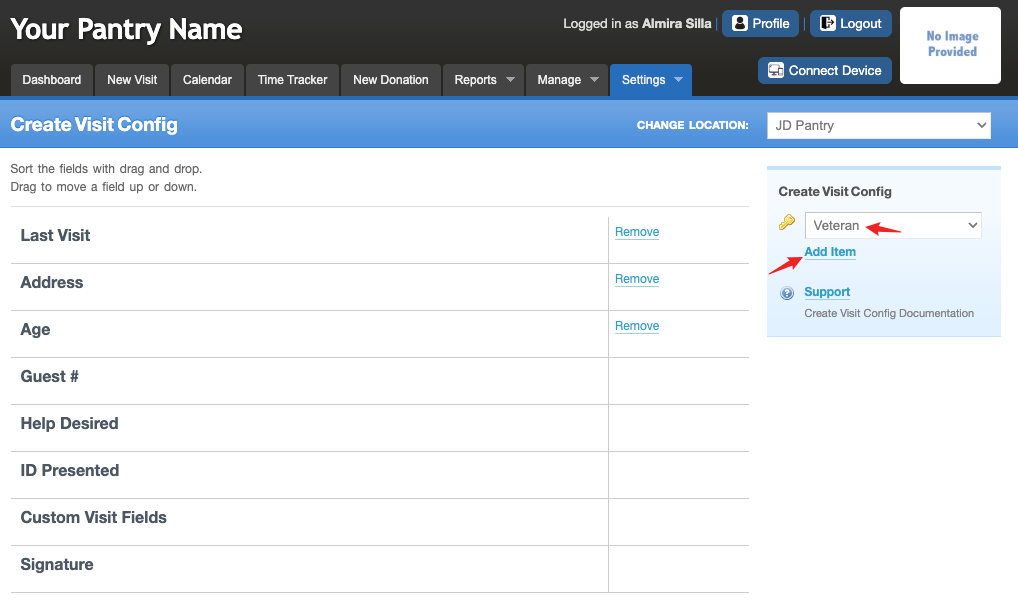
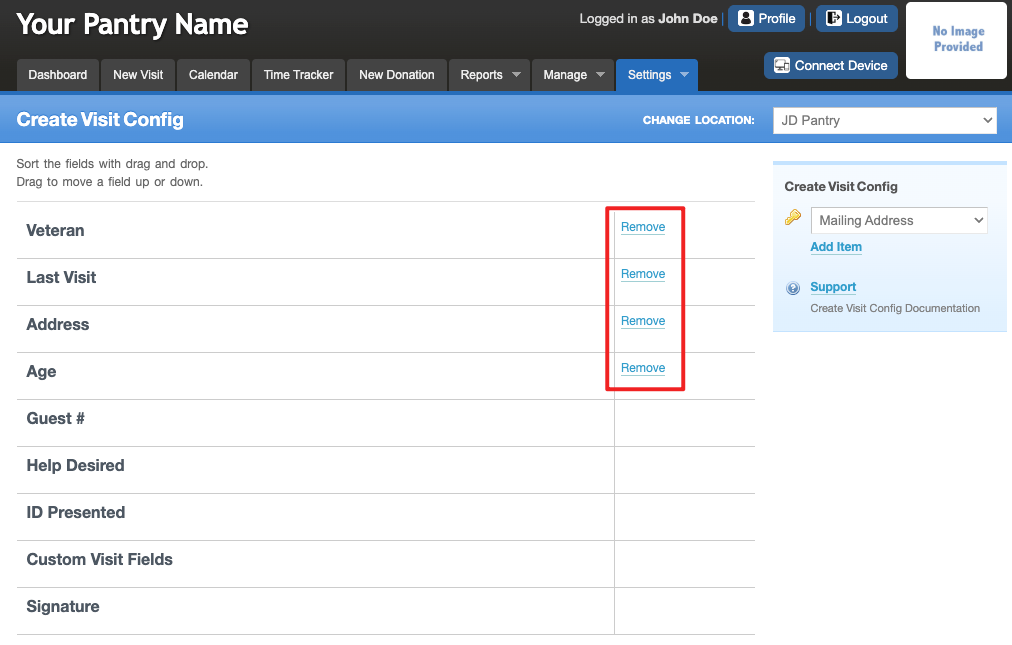
Create Visit Config allows you to set up your visit page in an order that flows best for your pantry. To customize the order of the visit fields, go to Settings > Create Visit Config.
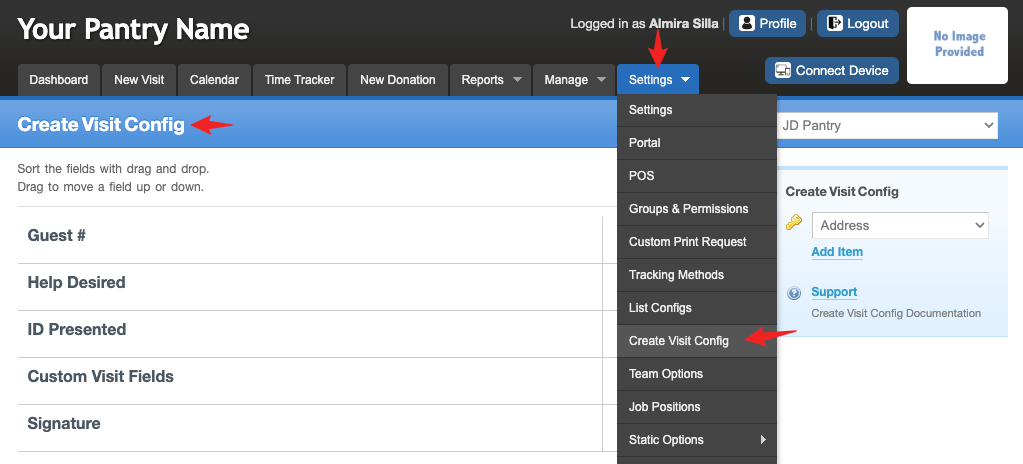
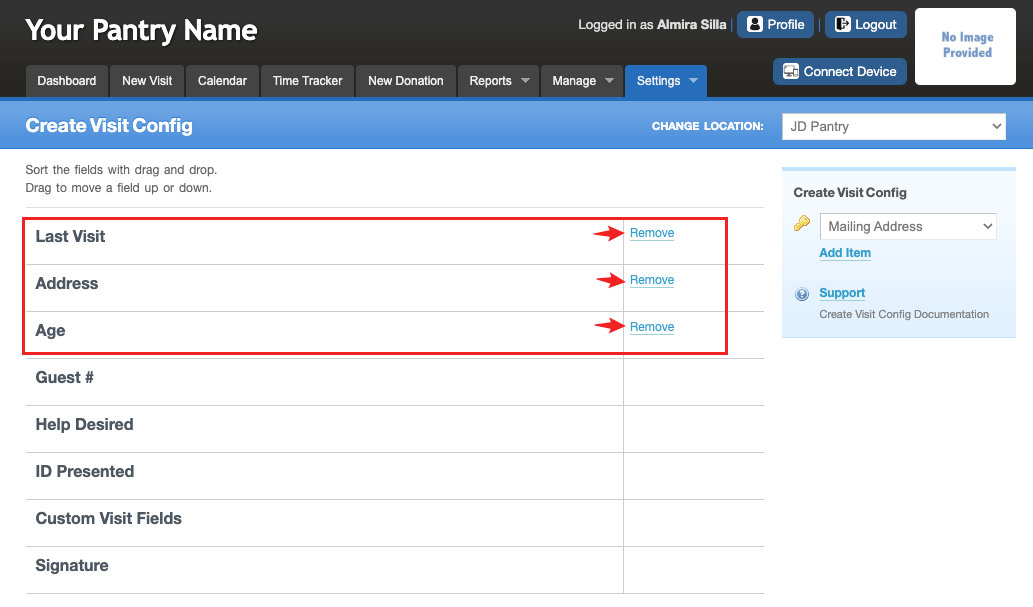
In the image above, there are three fields with a "Remove" option next to them and five fields that do not.
The five fields without a "Remove" option — Guest #, Help Desired, ID Presented, Custom Visit Fields, and Signature — are system fields. While these fields cannot be removed, some of them can be set to "Hide" so they won’t appear on the visit page.
Please note that Help Desired cannot be hidden, as it is required to process a visit.
To make changes to:
Guest #: Go to Settings > Settings > Create Visit > Basic Settings > Guest # > Set to Show or Hide > Save.
Custom Visit Fields: Go to Settings > Custom Fields > Visit. From here, you can create new visit fields or hide existing ones you no longer want to use.
(For more information, click here for details on custom fields.)
ID Presented: Go to Settings > Settings > Create Visit > Identification.
Here, you’ll see three customizable options that can be set to Show or Hide > Save.
Signature: There are two areas where you can adjust signature settings, which determine how signatures function within your visit process. You can make a signature required, optional, or hidden, depending on your configuration.
1. Make a signature required or not required
Go to Settings > Tracking Methods > Edit or Create a Tracking Method → Set Signature to Required or Not Required → Save.
• Required: Always displays the signature box and requires a signature before saving the visit.
• Not Required: The visibility of the signature box depends on the next setting (see #2 below).
2. Hide or make a signature optional
Go to Settings > Settings > Create Visit > Basic Settings > Signature → Set to Show When Required or Always Show → Save.
• Hide the Signature Box: Set to Show When Required – hides the signature box unless it’s required.
• Make the Signature Optional: Set to Always Show – displays the signature box but doesn’t require a signature (unless setting #1 is set to Required).
Last Visit, Address, and Age: These fields were added to enhance the visit process and can be removed if they’re not needed.
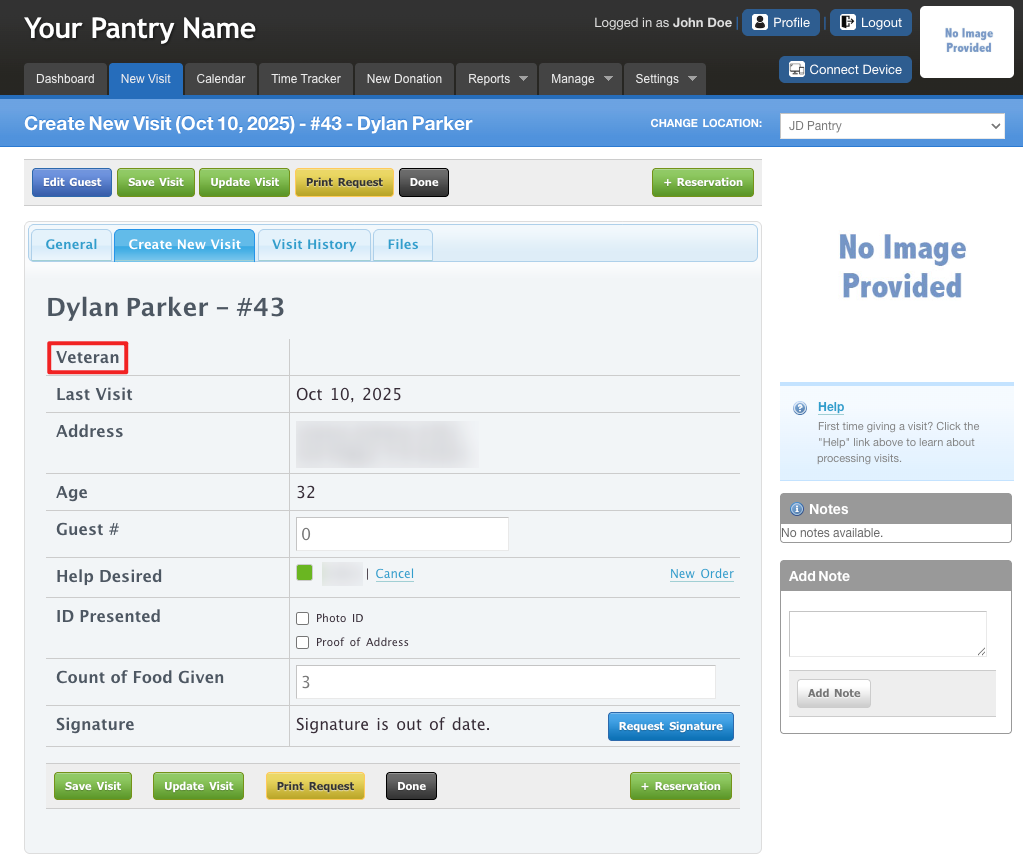
The next screenshot illustrate how the configurations in the Settings page affect the layout and behavior of the Visit page.
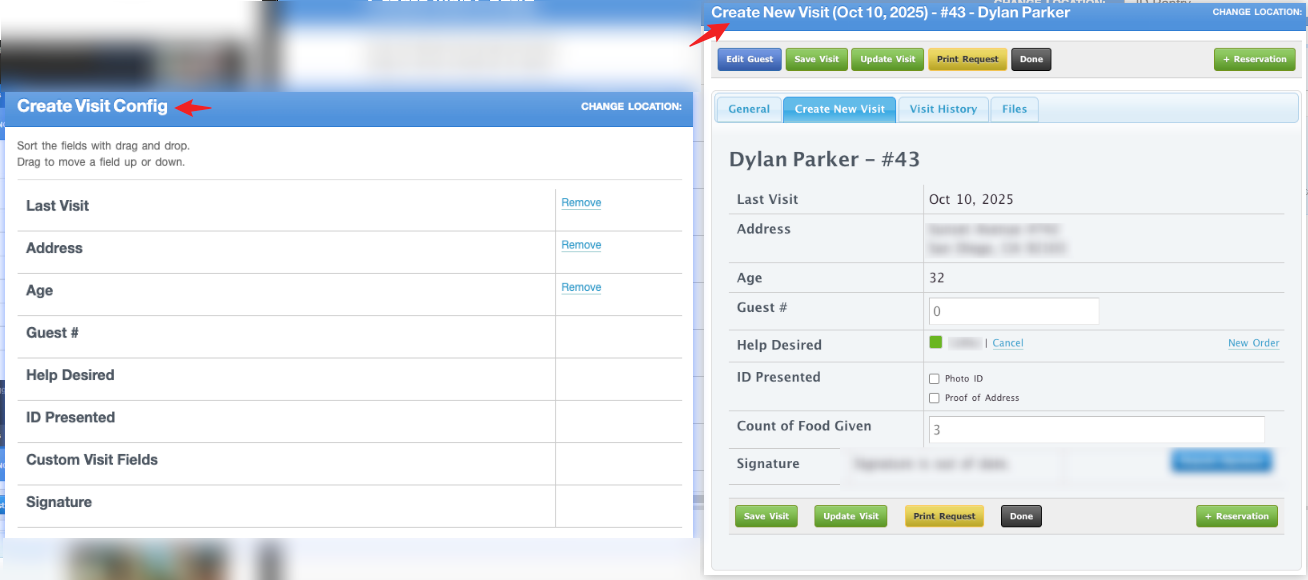
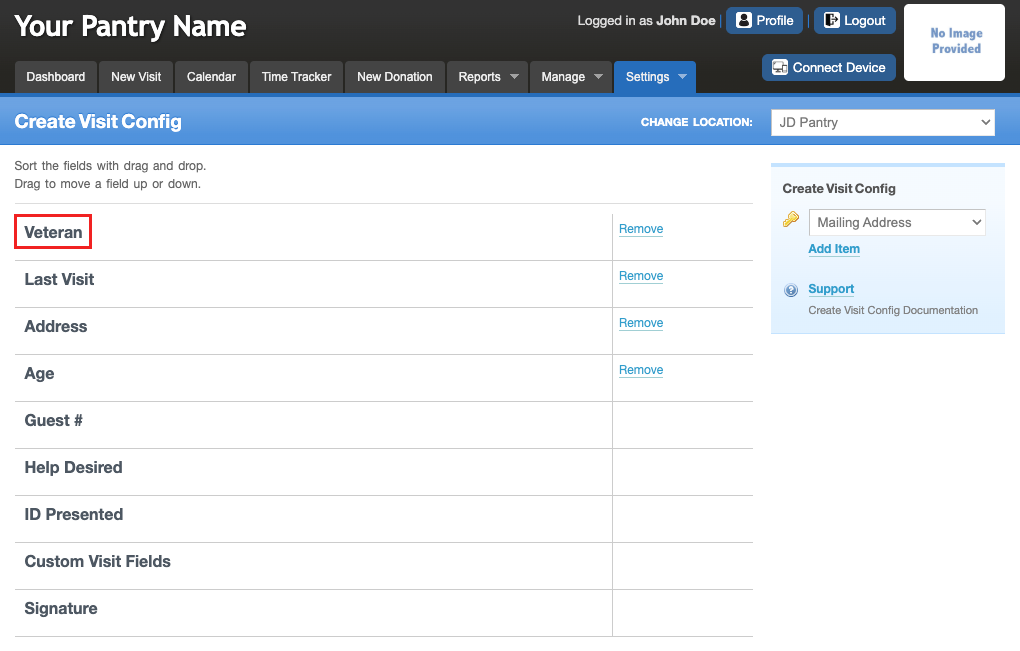
Note: To re-order the fields on the settings page, left click > hold > drag field into place > drop.
A signature box should never be placed above the 'Help Desired' section.
Adding Fields to the Visit Page
To add more fields, click on the drop-down box next to the gold key. Find the field you want to add and click on it.
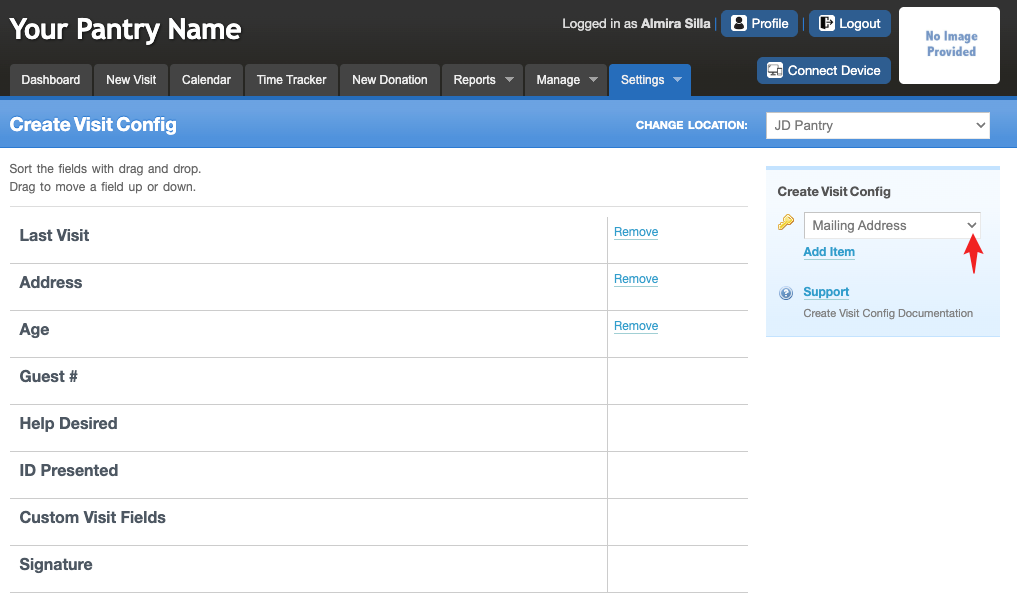
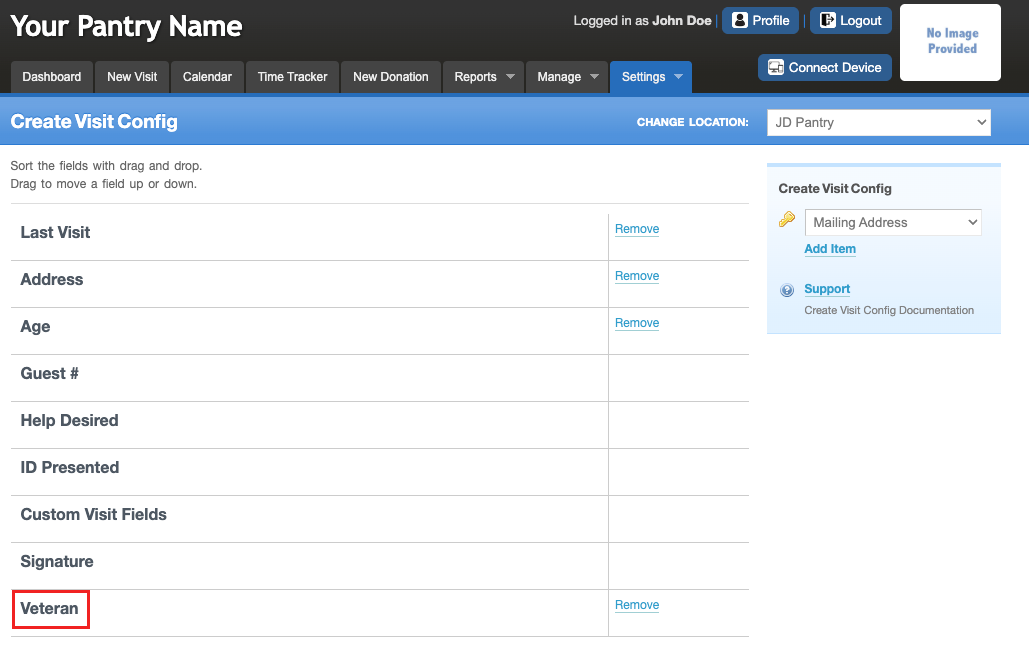
Click on a field you want to add and click on "Add Item".
You will see the newly added field at the bottom of the list.
Position the fields in a flow that works best for you. (Left click > hold > drag field into place > drop) In the example below, thoe field was moved to the top of the visit page.
Removing Fields from the Visit Page
To remove items, click on the "Remove" link next to the field. These items will return to the drop-down menu so they can be added later if needed.
Was this article helpful?
That’s Great!
Thank you for your feedback
Sorry! We couldn't be helpful
Thank you for your feedback
Feedback sent
We appreciate your effort and will try to fix the article