TABLE OF CONTENTS
- Getting Started with Electronic Signatures
- How to Set up Signature Fields
- Setting up your Hardware
- Collecting Guests' Signatures
- Frequently Asked Questions (FAQ)
Getting Started with Electronic Signatures
FoodBank Manager (FBM) lets you collect digital signatures on any touchscreen device or tablet to help your pantry become fully paperless, streamline client check-in, and maintain compliance with USDA programs like TEFAP and CSFP.
Before you begin, review the core signature settings detailed below—Signature Types, Signature Frequency, Signature Lock, and Terms & Conditions—to understand how to best configure FoodBank Manager for your pantry's workflow.
Signature Types
FoodBank Manager offers two distinct ways to collect signatures depending on your workflow:
- System-Defined (Default) Signature: Built-in signature field tied directly to the guest visit record. Because it is system-defined, the label displayed for this signature field is fixed and cannot be renamed.
Custom Field Signatures: Unlike system-defined signatures, these can be renamed to fit any need, making them ideal for capturing secondary signatures (like proxies and authorized representatives) or signing off on volunteer shifts.
Signature Frequency
This setting determines when and how often a signature expires and requires a re-sign.
- Year(s) (By Fiscal Date): Resets after a set number of fiscal years. The reset date aligns with your organization's designated fiscal start date configured in Settings > Settings > General.
- Month(s) (By Fiscal Date): Resets on fixed fiscal calendar intervals (1, 2, 3, 4, or 6 months), based on the fiscal start date configured in Settings > Settings > General.
(e.g., If configured for every 2 months with a fiscal year starting in July 1, client signatures will reset on July 1, September 1, November 1, and so on. ) - Year(s): Resets after a set number of calendar years from the last signed date.
- Month(s): Resets after a set number of calendar months from the last signed date.
- Week(s): Resets after a set number of weeks from the last signed date.
- Visit(s): Resets based on visit count (e.g., every visit or every X number of visits)
Signature Lock and Passcode
This setting is especially useful for the All-in-One Tablet Configuration.
When enabled, the screen automatically locks after a guest submits their signature. A passcode is required to unlock the screen and continue. This helps protect guest privacy by preventing individuals waiting in line from viewing the previous guest’s information after a signature has been submitted.
Signature Terms and Conditions
This setting allows you to define the legal disclaimer, consent text, or acknowledgment message that users must review and agree to before applying their signature. Important Note: Terms and conditions are not updated automatically. Your agency is responsible for reviewing, updating, and maintaining this content as needed.
How to Set up Signature Fields
To configure the default signature field:
Follow these steps to set up or modify the default signature field for guest visit records:
Go to Settings > Settings.
Navigate to the Create Visit tab.
Under Basic Settings, locate Signature and select either Always Show or Only Show When Required from the drop-down menu.
Scroll to the bottom of the page to the Signature section.
(Optional) Enable Signature Lock and configure a passcode.
Set your signature renewal frequency.
(Optional) Enable Terms & Conditions and enter your disclaimer text.
Click Save.
After configuring the default signature settings, you can determine whether a signature is required for each individual program or distribution:
Go to Settings > Tracking Methods.
Click Edit on your selected tracking method.
Under Signature Settings, click the drop-down menu.
Select either Required or Not Required.
Click Save.
Important Behavioral Note: If the signature is Not Required in the tracking method AND the signature setting in Settings > Settings > Create Visit tab is set to Only Show When Required, the signature field will be hidden during check-in for that program.
To create a custom signature field:
If you need an additional signature field beyond the default system settings—such as for a proxy or a volunteer signing off on behalf of a guest—you can create a custom signature field on the visit record:
Go to Settings > Custom Fields > Visits.
On the right-hand side, click Create New Field.
Enter the name for your custom field (e.g., Alternative Sign-off, Proxy Signature).
From the Field Type drop-down menu, select:
Guest Signature Field (for a guest or proxy signature).
Volunteer Signature Field (if a volunteer needs to sign the guest's visit record).
Select the Help Desired categories where you want this signature field to appear.
Select whether the field is Required or Not Required.
Click Submit.
After saving your new field, you can optionally configure the renewal and disclaimer settings. This step is not required, but available if you wish to use it.
Go to Settings > Custom Fields > Visits > Locate the custom signature field you just created.
Click Configure next to the field name.
Set your signature renewal frequency.
Enable Terms & Conditions if required and enter your disclaimer text.
Click Save.
Note: Custom signature fields aren't limited to guest visits—depending on your organization's workflow, you can also add them to Days End Reports (for shift sign-offs and managerial verification).
Setting up your Hardware
FoodBank Manager does not require proprietary signature hardware. Signatures can be captured using a standard computer mouse, a touchscreen monitor, or a tablet device. Choose the setup that best fits your pantry’s intake workflow.
Standalone Desktop Setup
How it works: FoodBank Manager runs directly on a desktop computer or laptop. No secondary devices, tablets, or wireless pairing steps are required.
How to Set it up:
Login to your FoodBank Manager on your preferred browser (Safari, Chrome, Firefox, etc.).
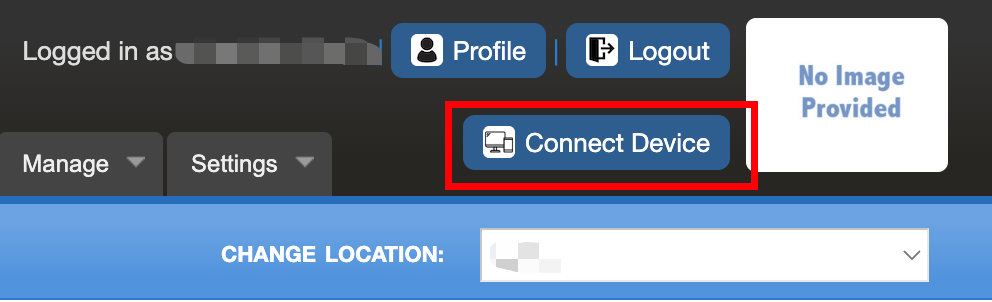
Click Connect Device in the top-right corner, next to your profile picture.
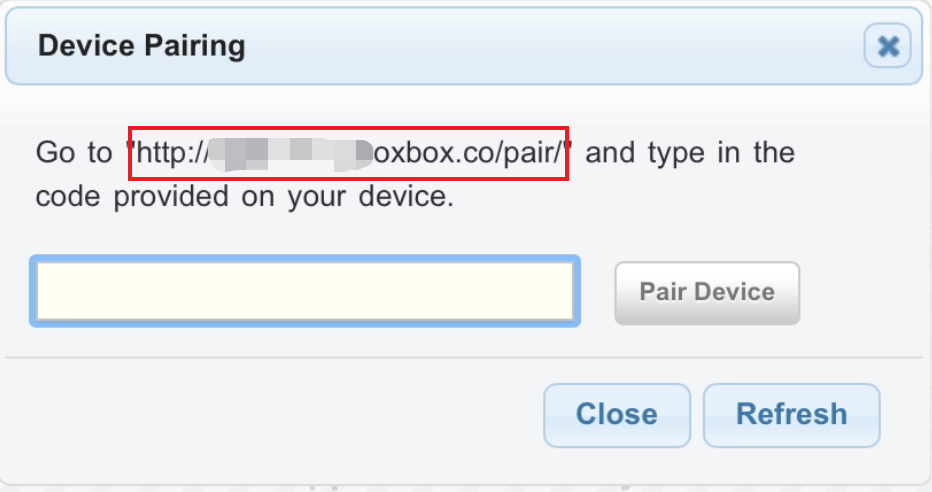
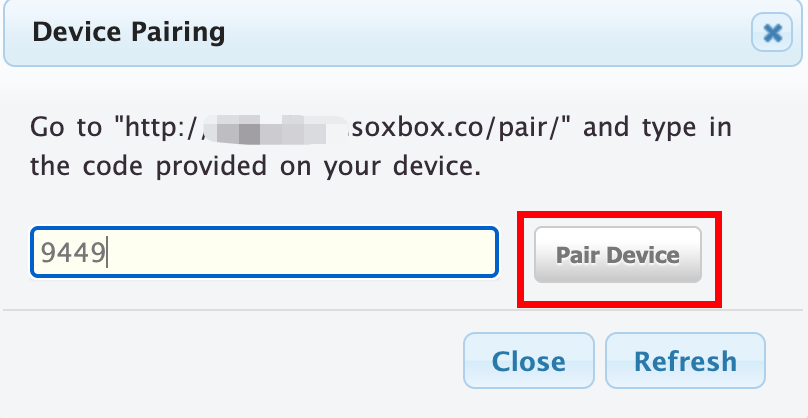
Copy the web address shown in the pairing pop-up window.
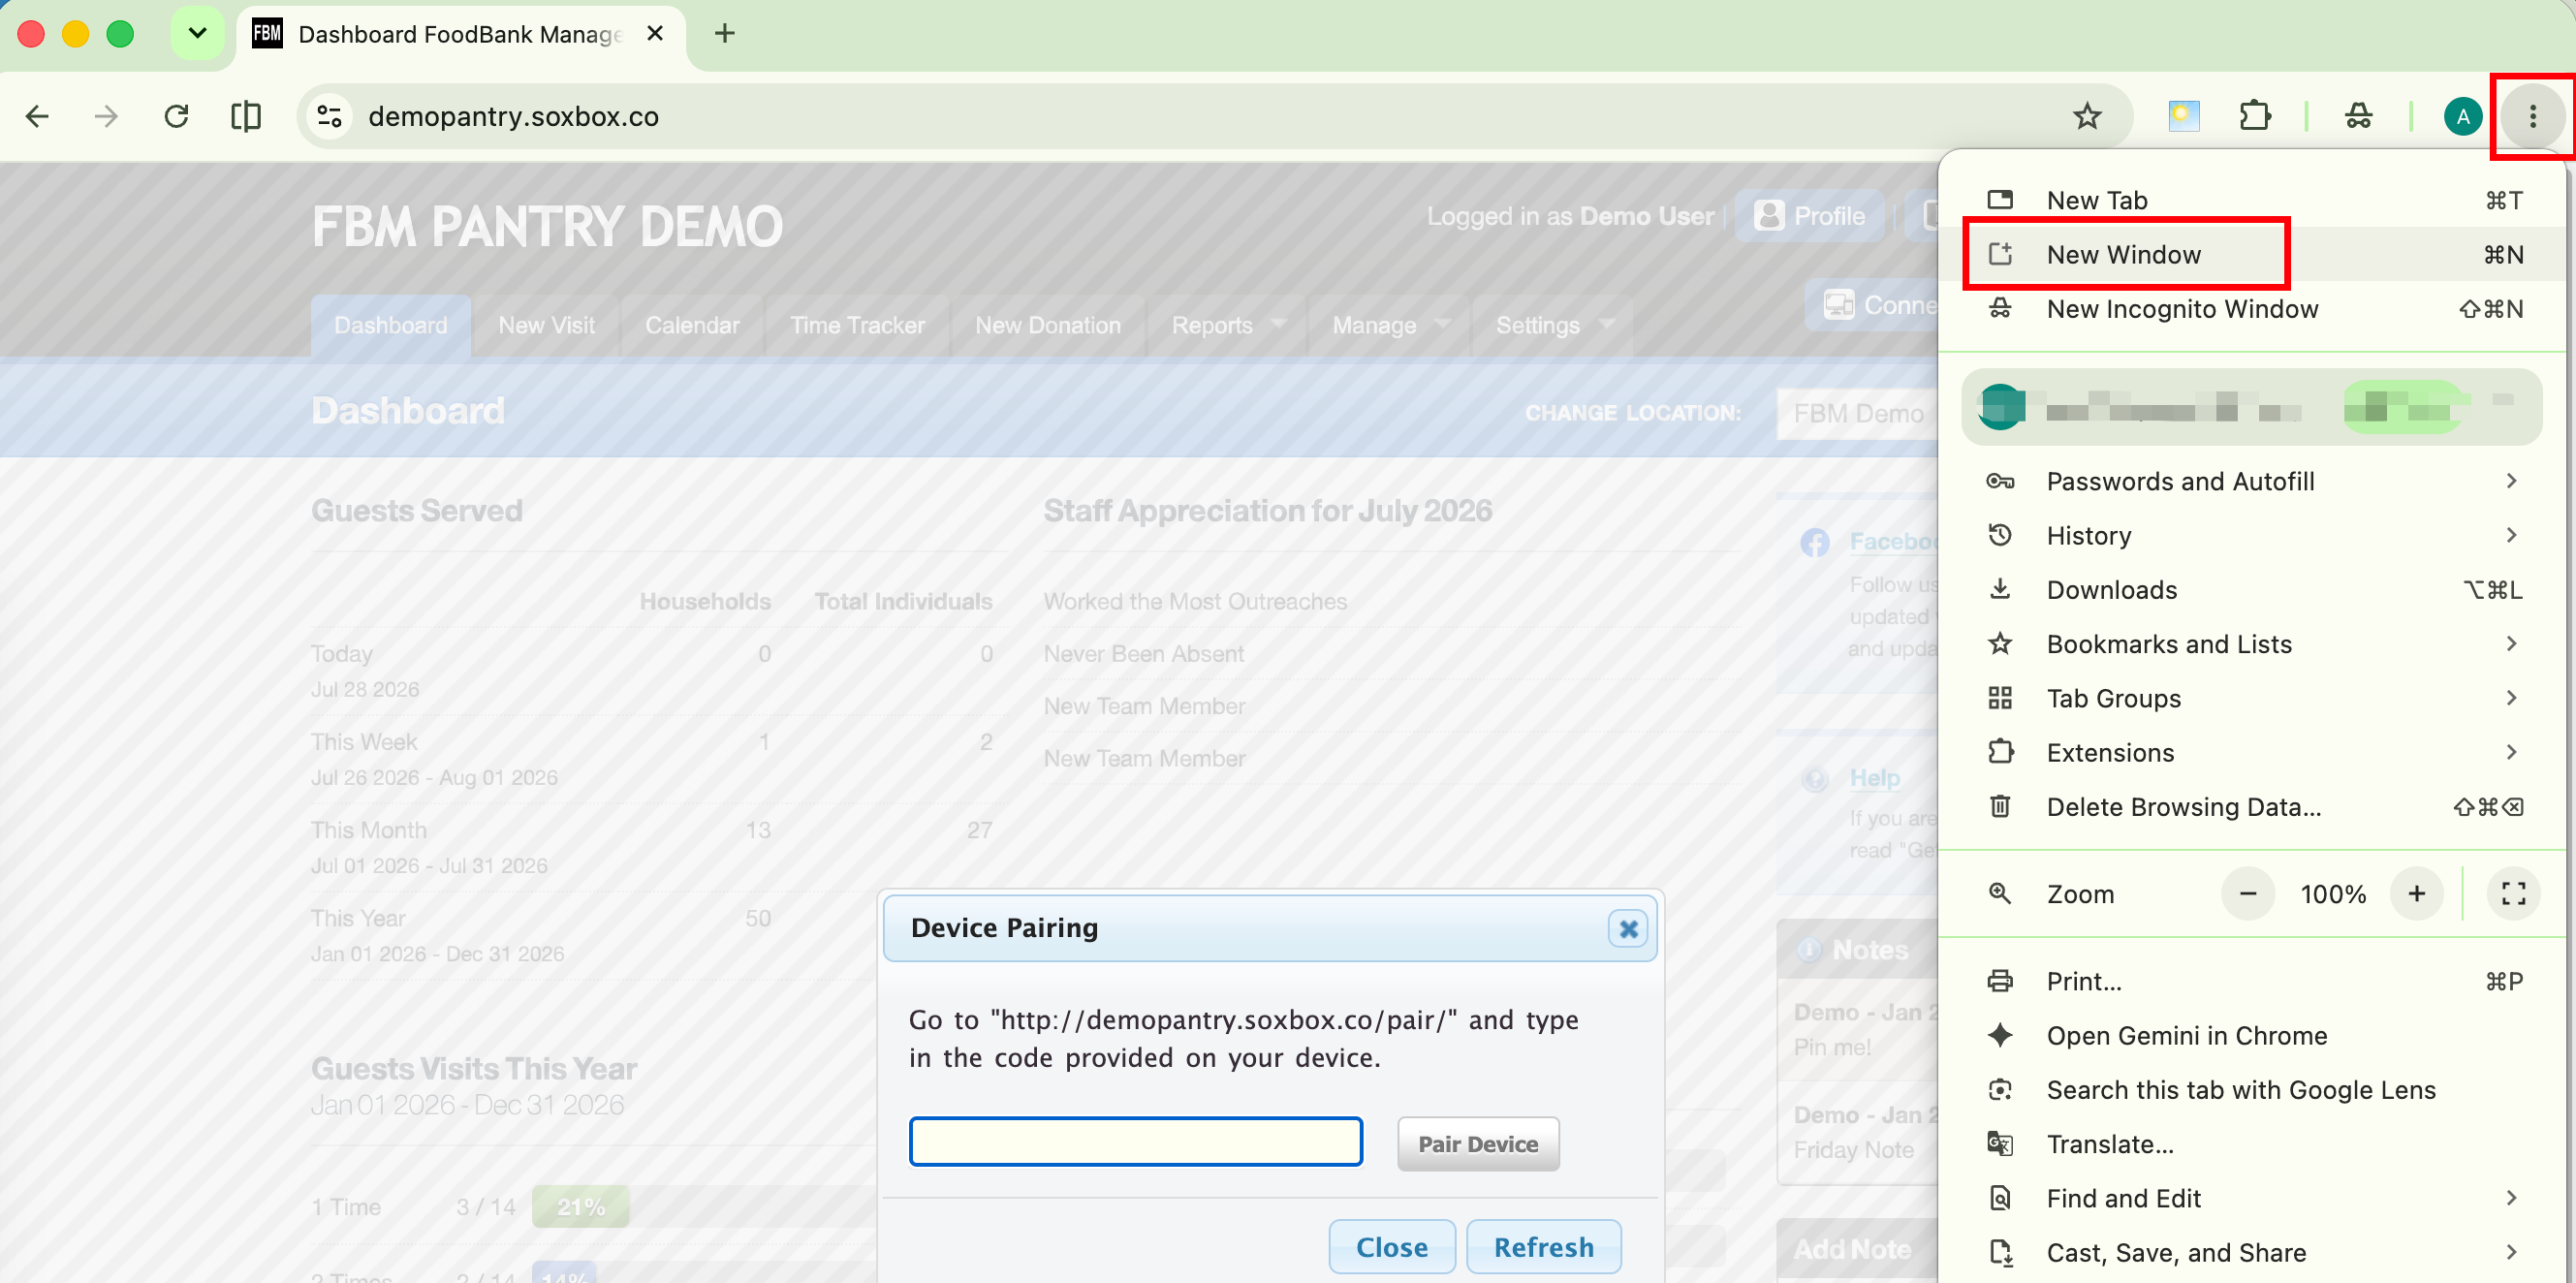
- Open a new browser window (not a new tab):
Chrome, Firefox, or Edge: Click the menu icon (three dots or three horizontal lines) in the top-right corner of your browser and select New Window.
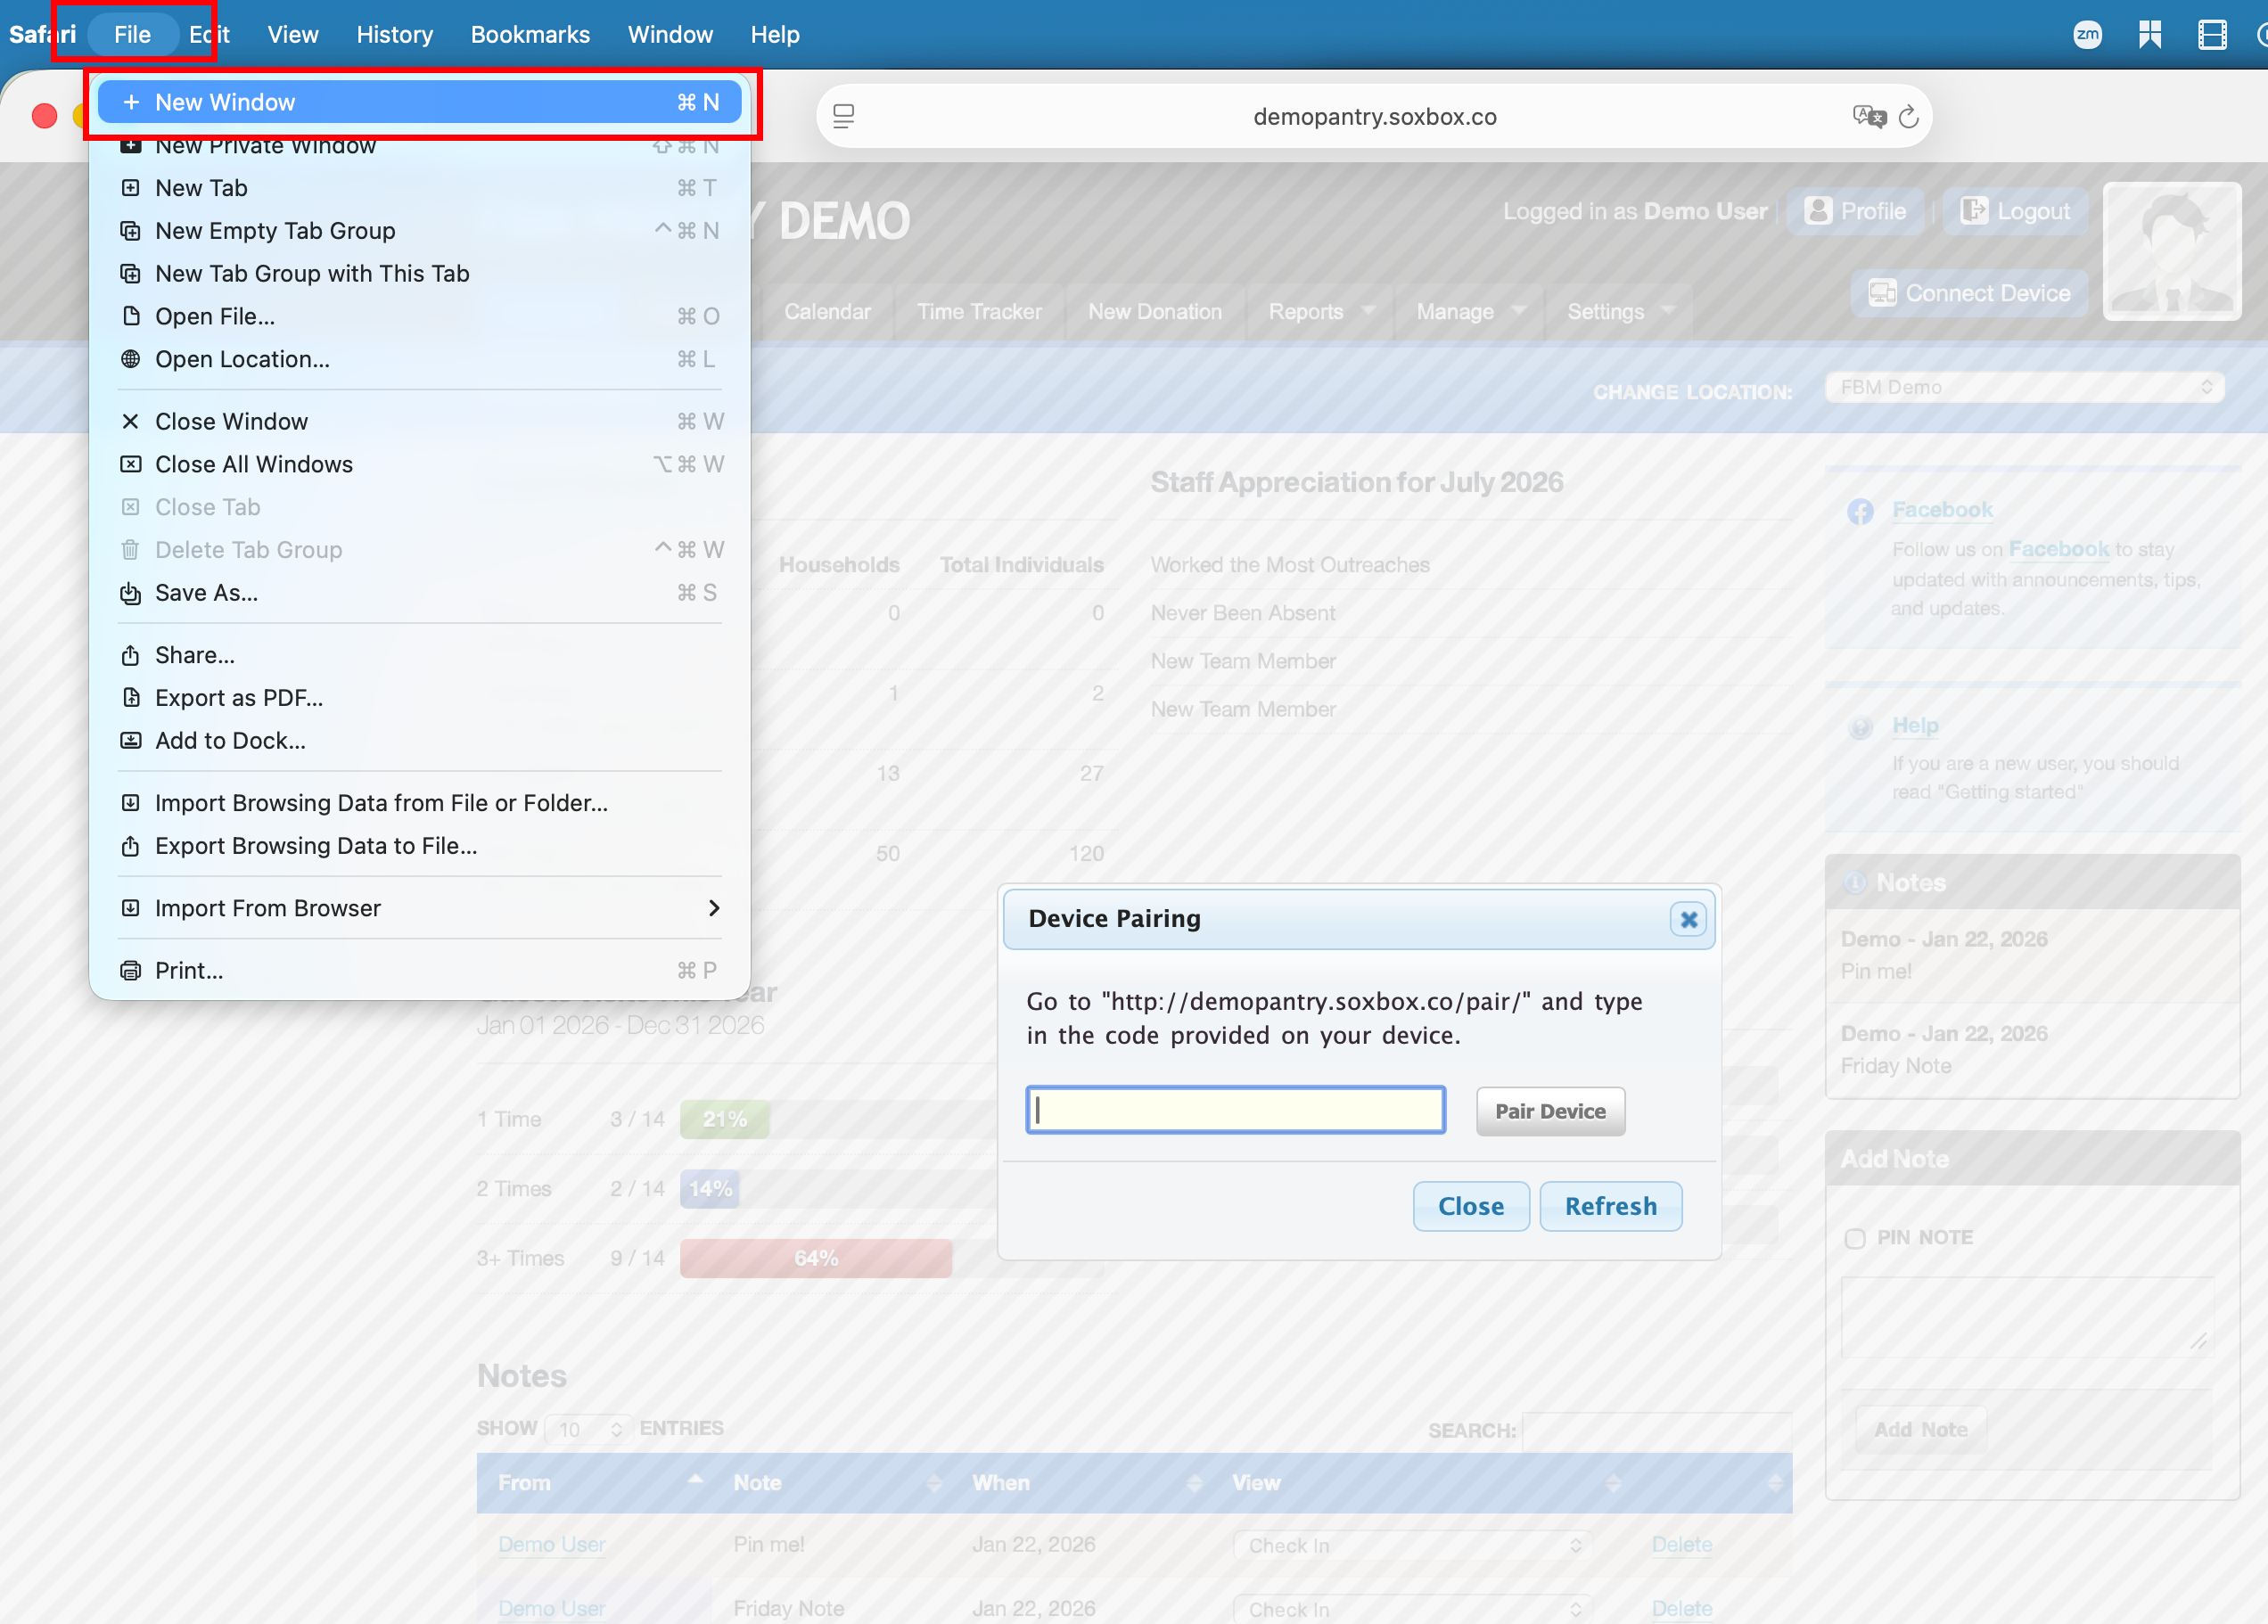
Safari (Mac): Click File in the top screen menu bar and select New Window.
Paste the web address into the new window's address bar and navigate to it. This will open the Secure Signature Capture screen.
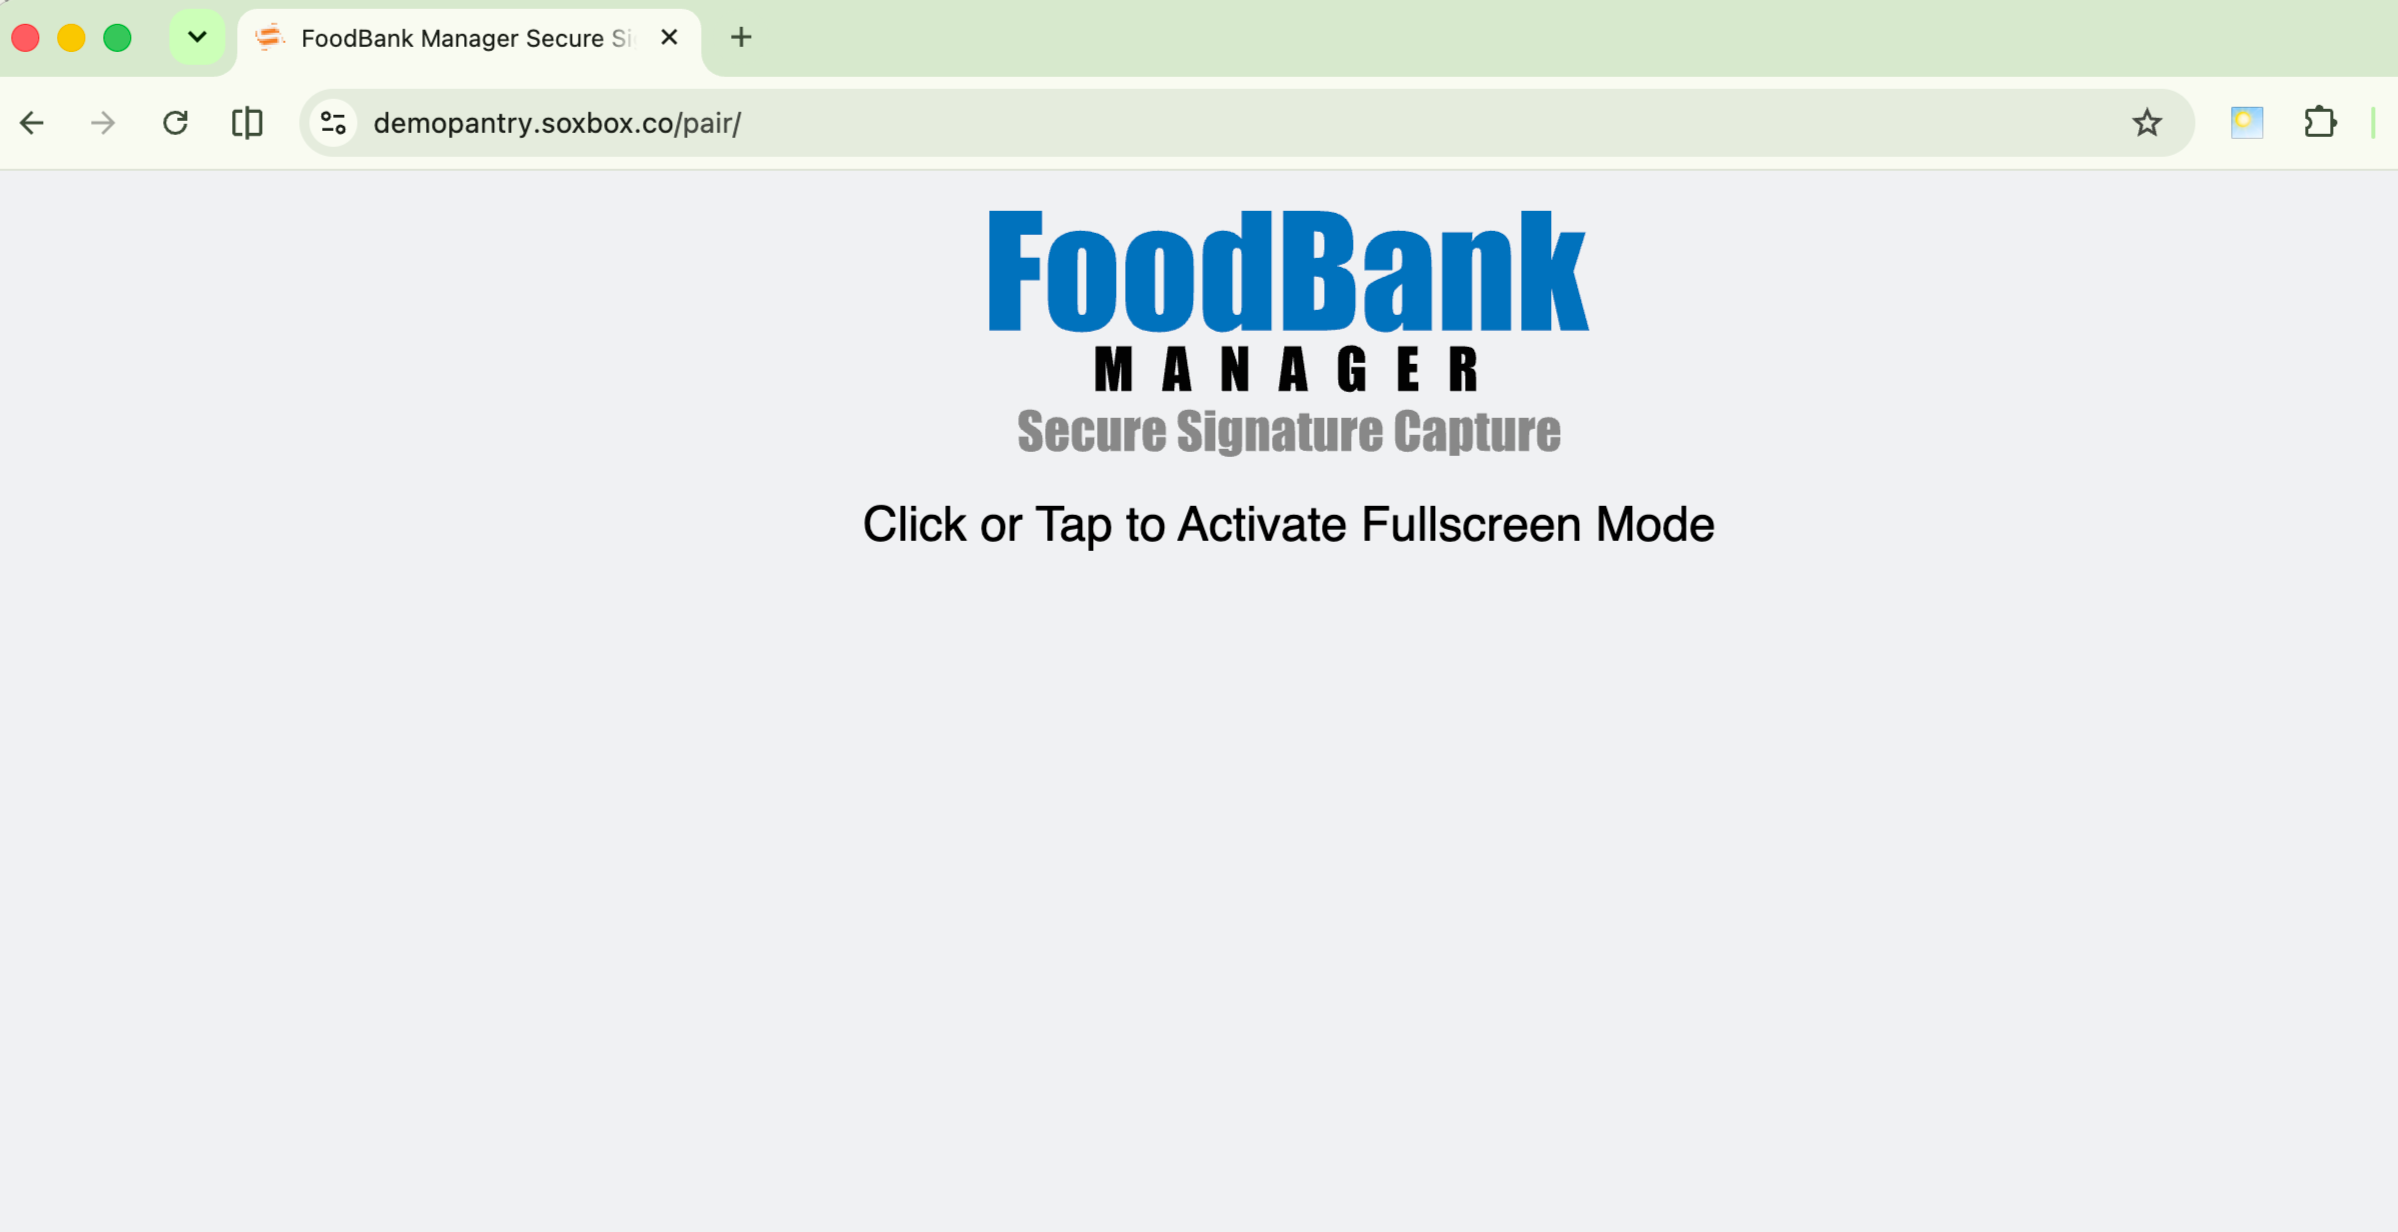
Click anywhere on the screen to activate Full Screen Mode. Keep this window in full screen.
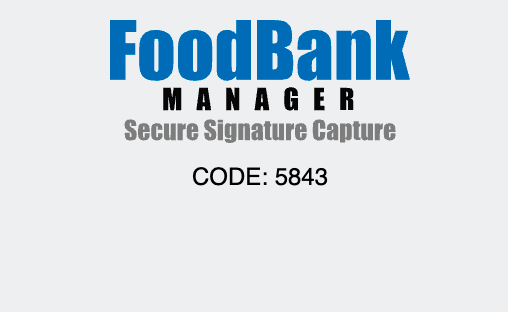
Copy or note the Pairing Code displayed on the Secure Signature Capture screen
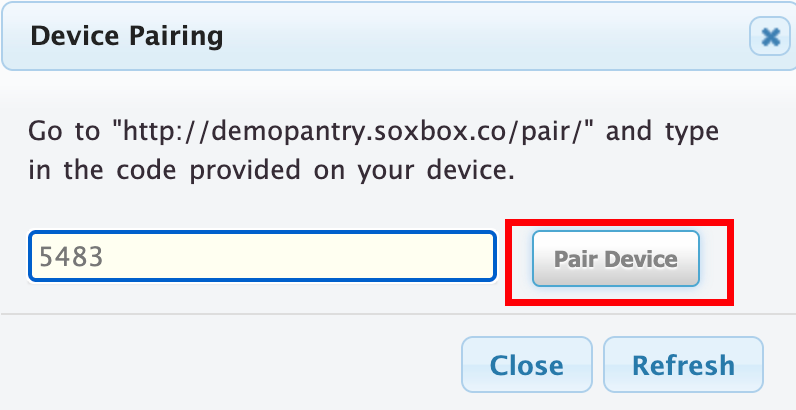
Switch back to your FoodBank Manager window and enter the pairing code into the pairing pop-up.
Click on Pair Device.
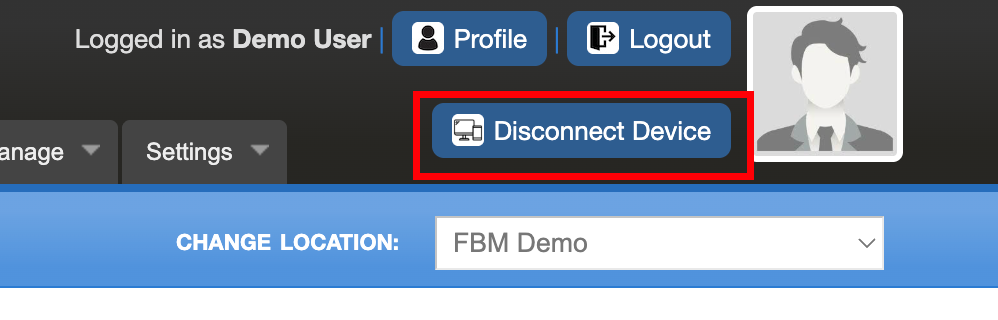
Once connected, the Connect Device button in the upper-right corner will change to Disconnect Device, confirming that your setup is complete and active.
Important: You can use the same browser, but the Secure Signature Capture must be opened in a separate browser window, NOT as a new tab within the same window as FoodBank Manager. Opening the Secure Signature Capture screen in a tab alongside FoodBank Manager will cause errors.
All-in-One Tablet Configuration
Video Tutorial: Click the link to watch a step-by-step guide in action: How to Pair a Wireless Device for Signature Capture
How it works: FoodBank Manager runs directly on a touchscreen tablet (such as an iPad or Android tablet). Staff use the tablet for intake, and turn the device toward the guest or volunteer when a signature is required.
How to Set it up:
Open your tablet's web browser (Safari, Chrome, Firefox, etc.) and log in to FoodBank Manager.
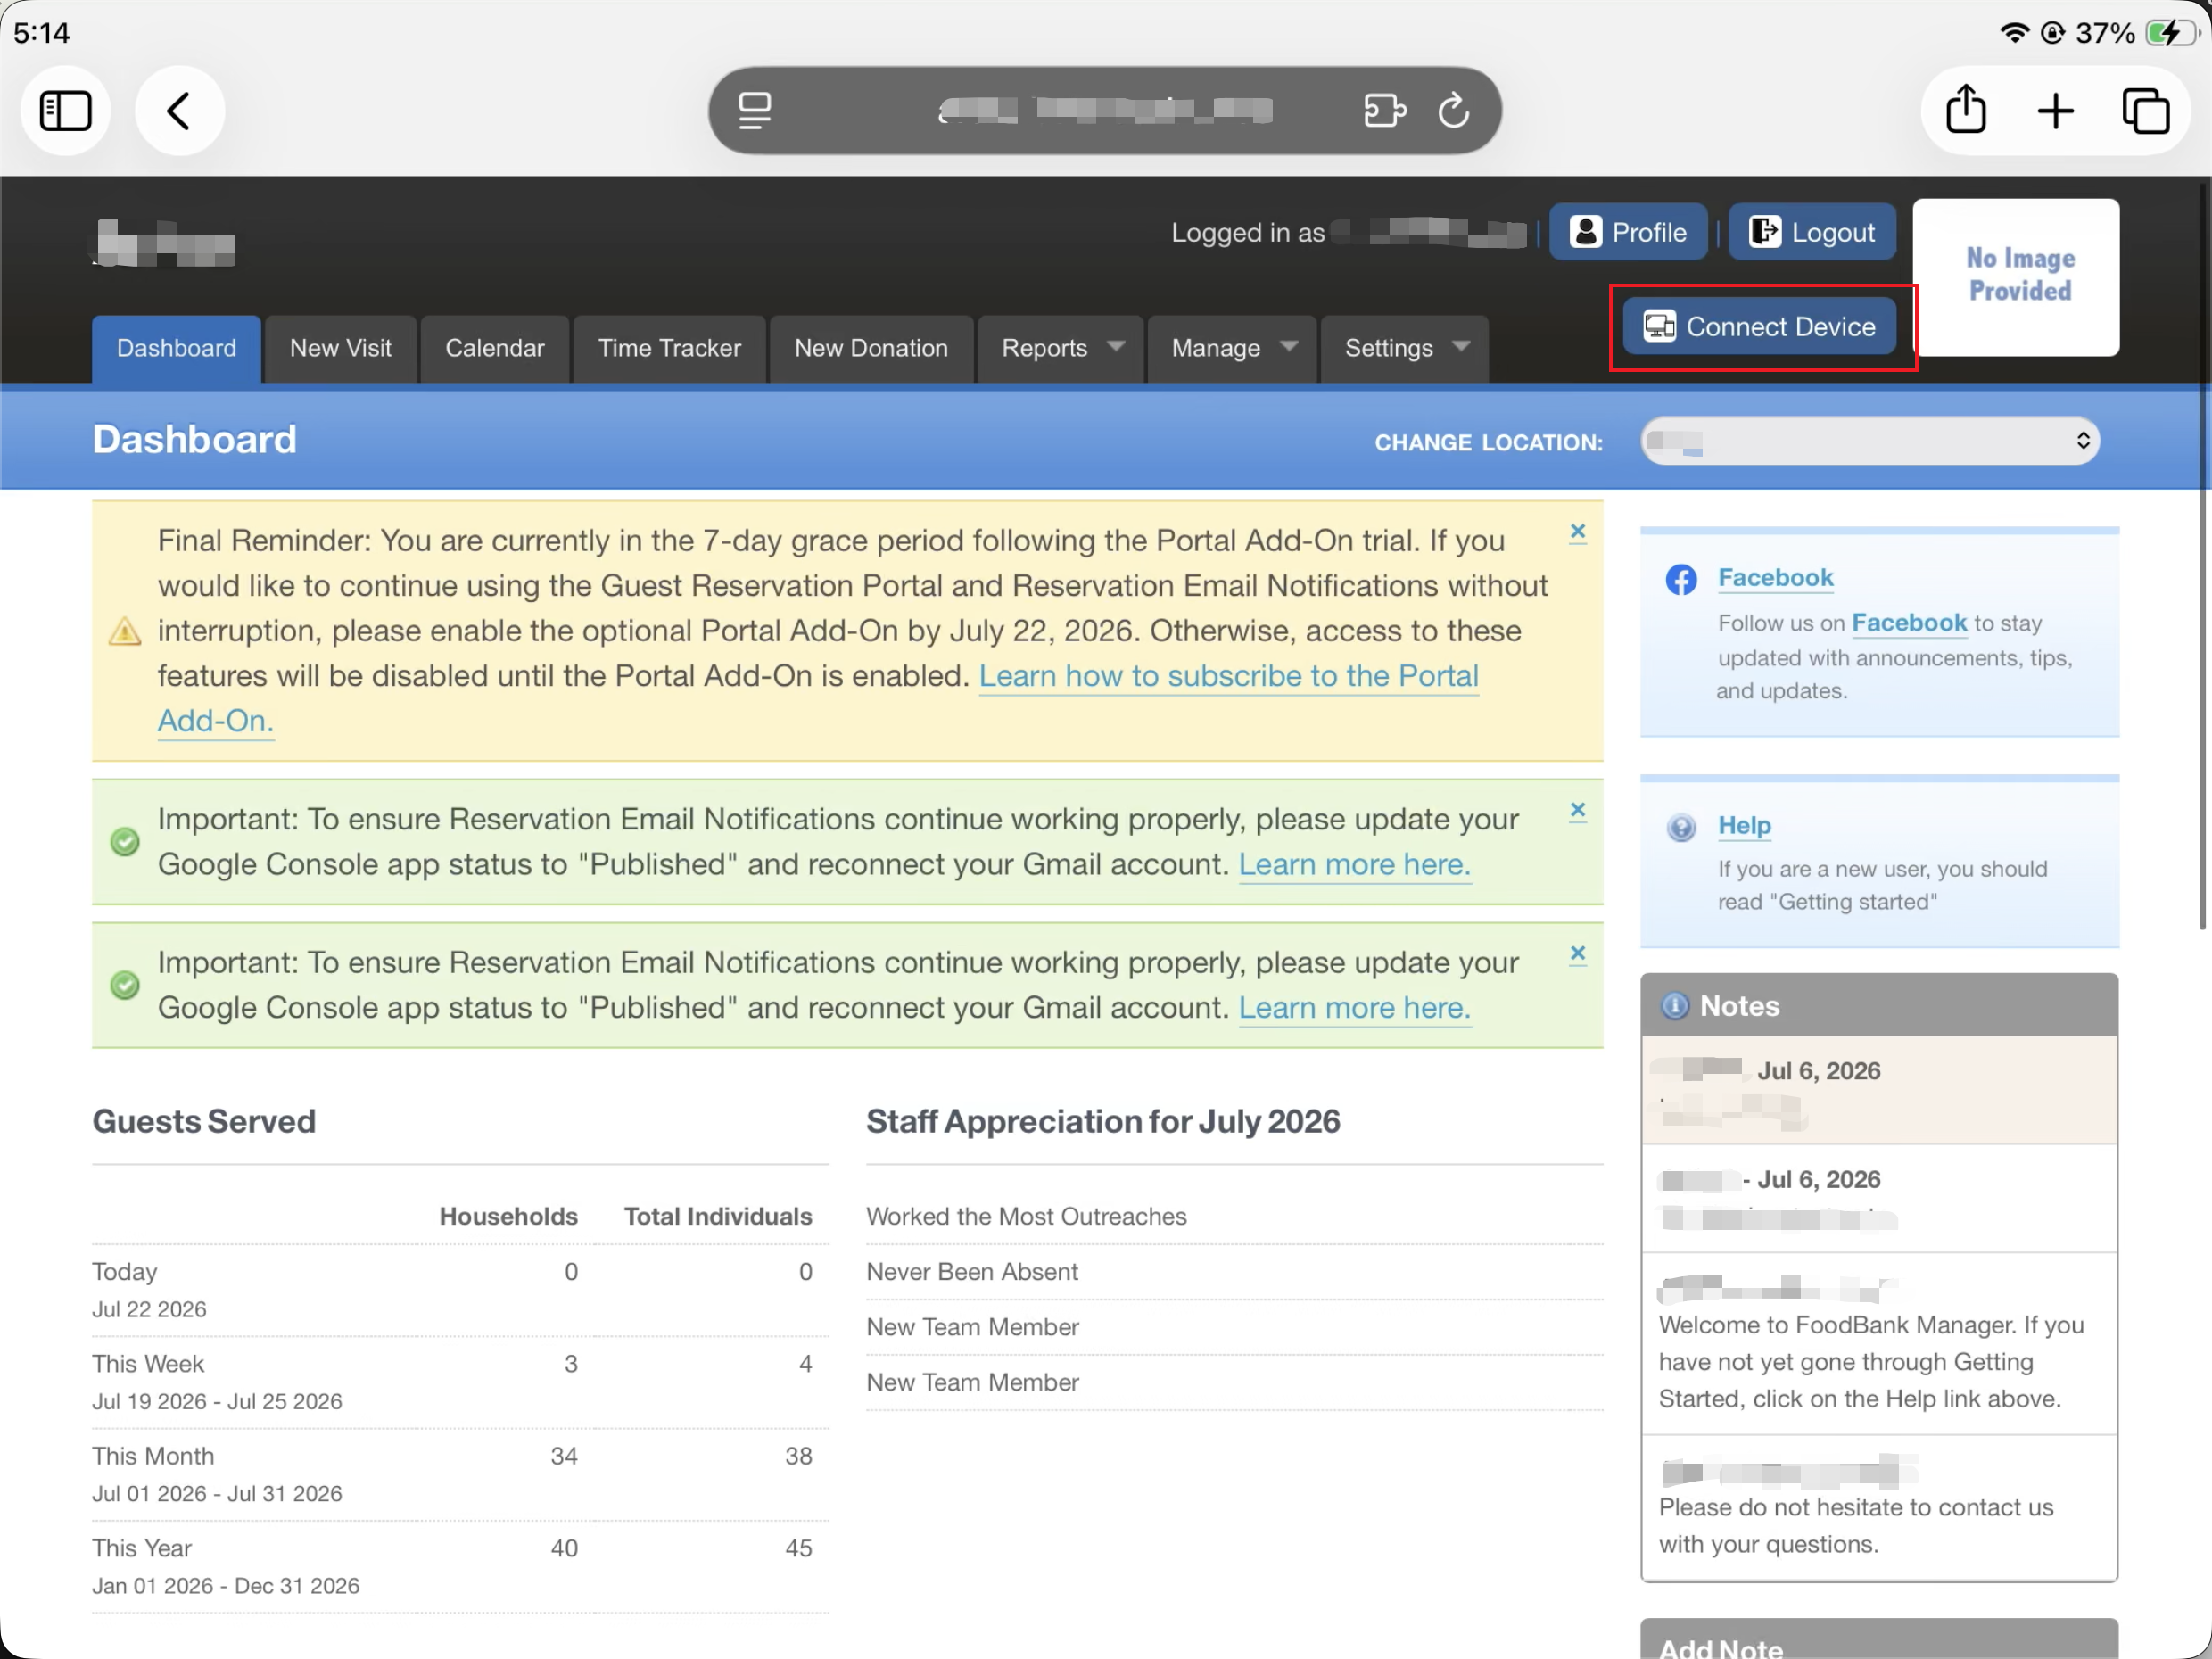
Click Connect Device in the top-right corner, next to your profile picture.
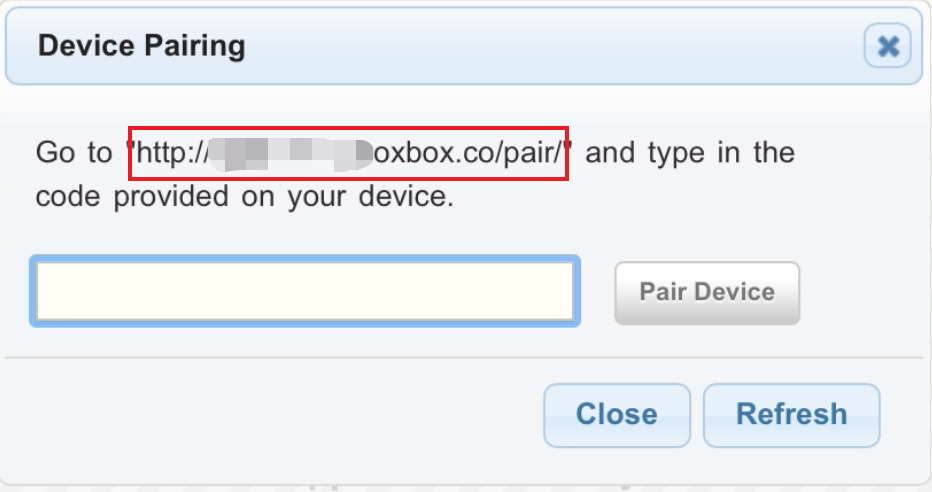
Copy the web address shown in the pairing pop-up window.
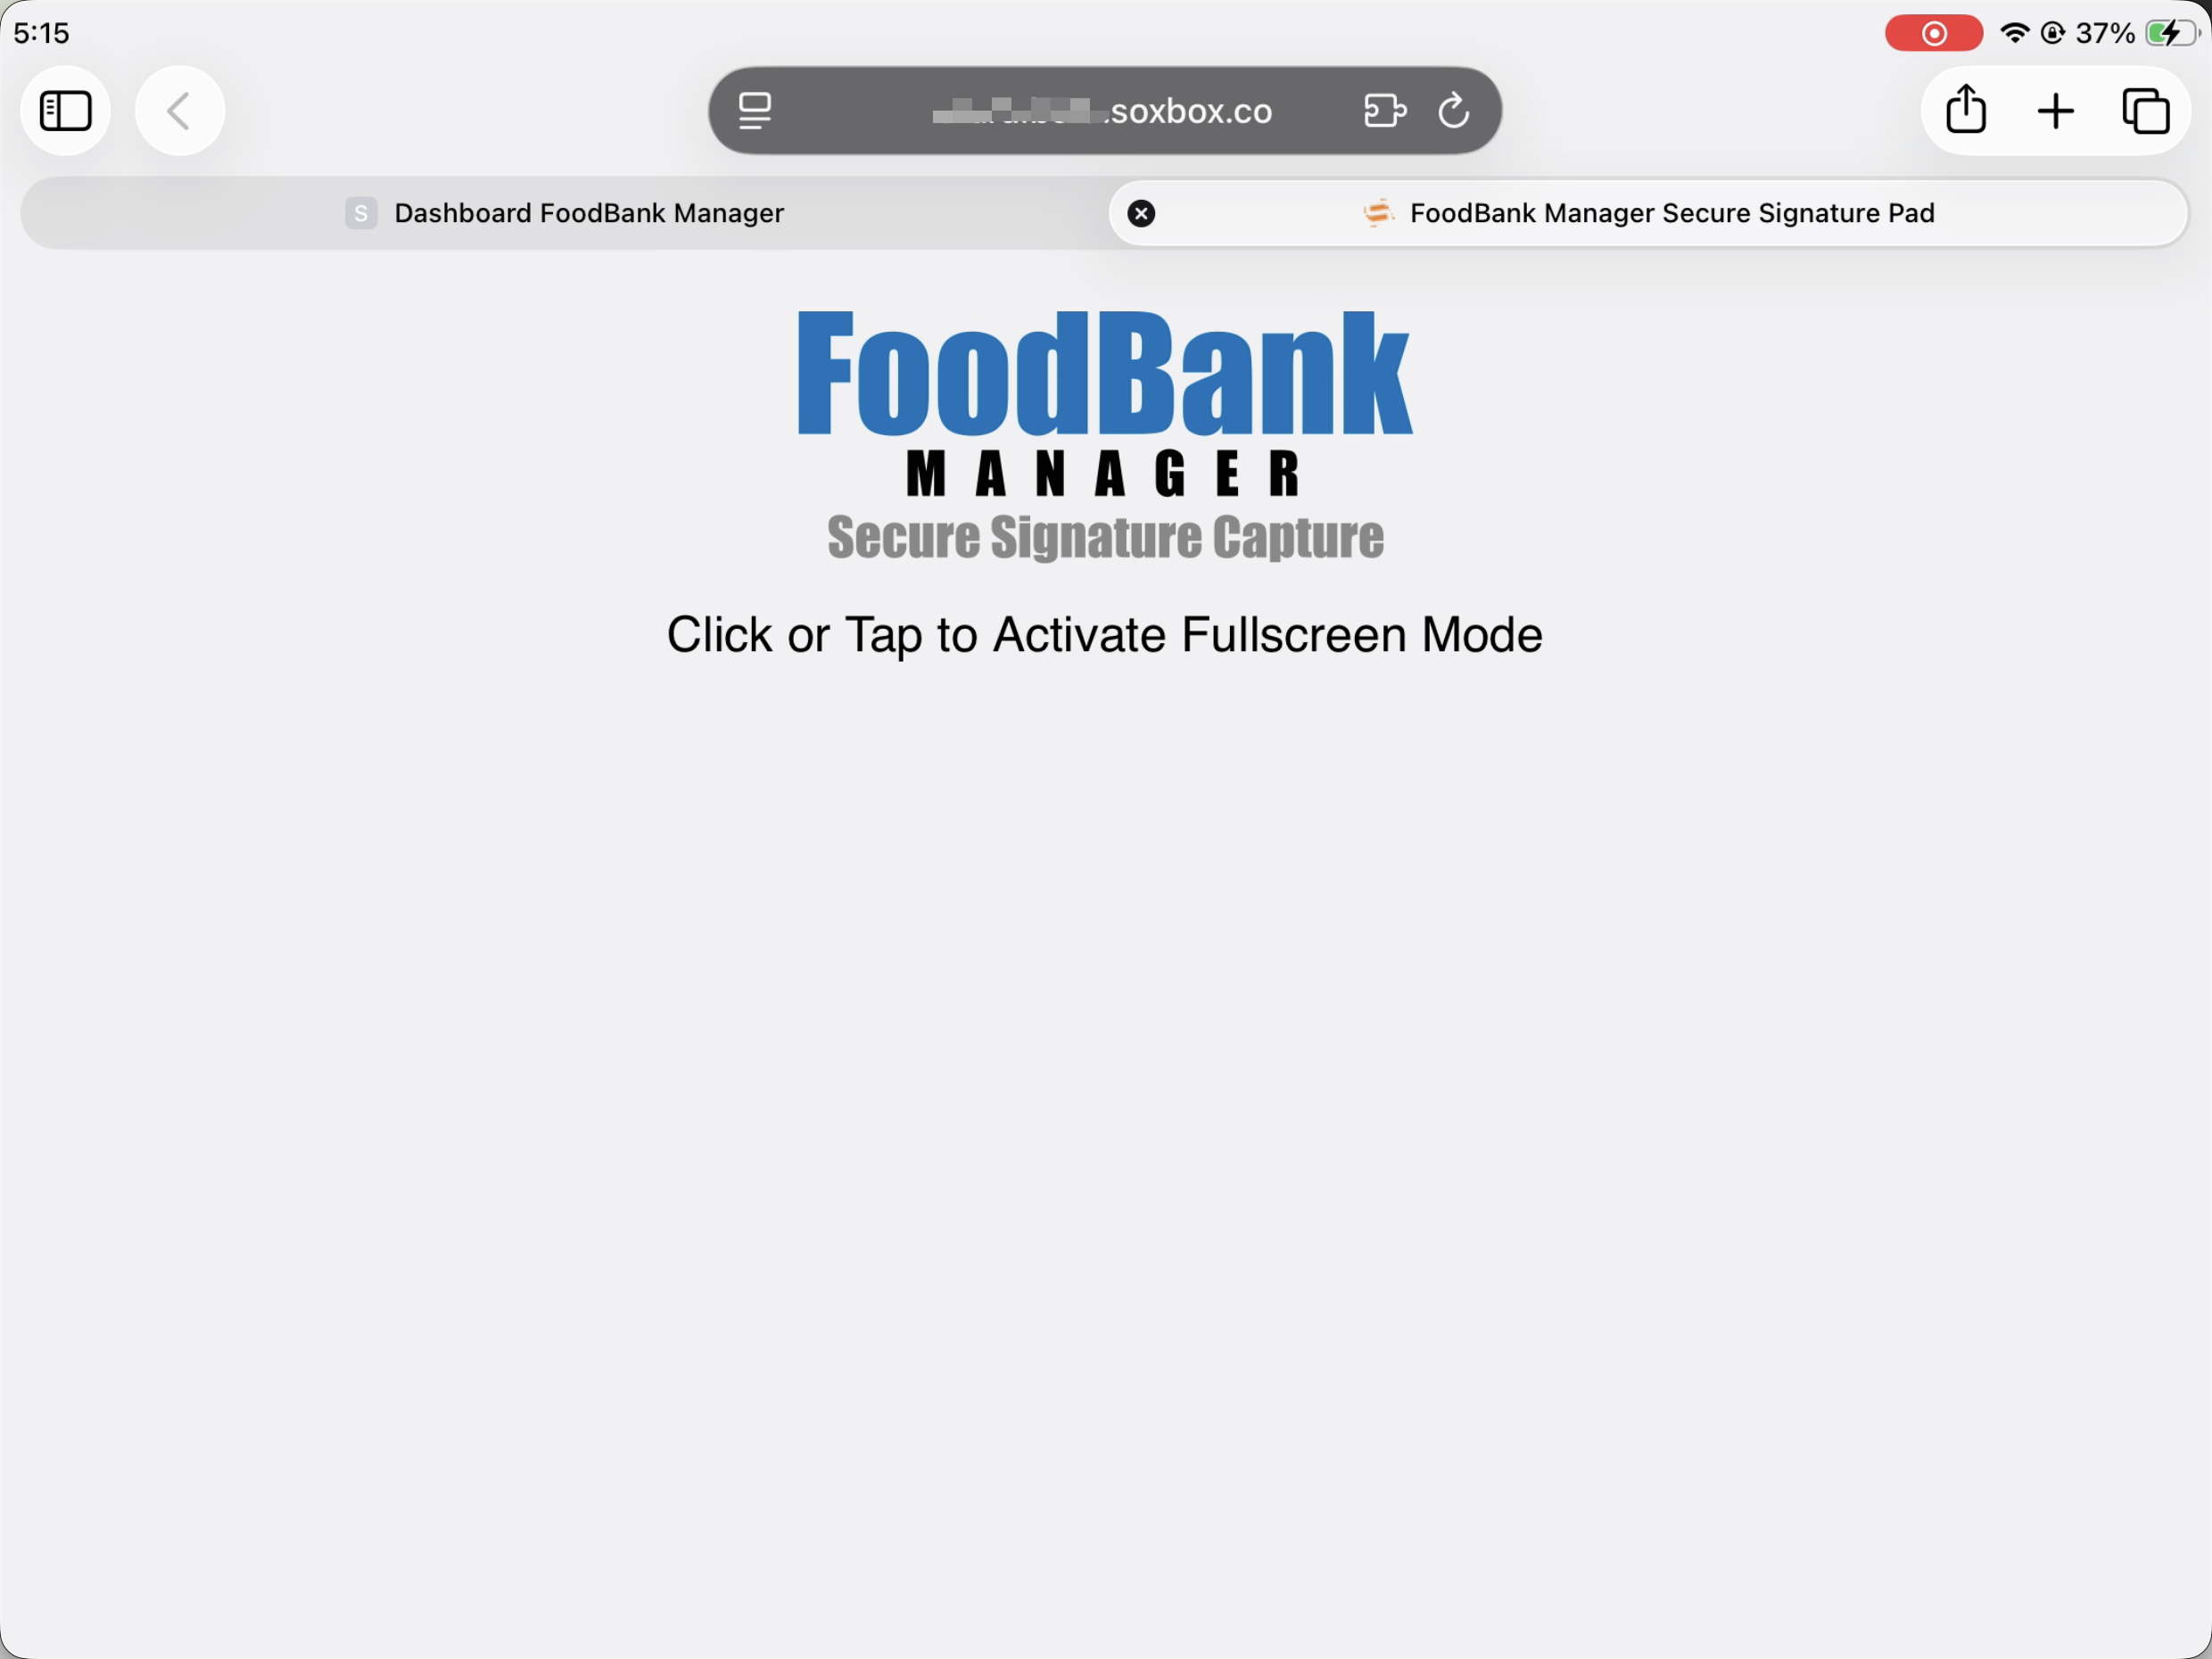
Open a new tab, paste the web address, and navigate to it. This should take you to the Secure Signature Capture screen.
Add the Secure Signature Capture shortcut to your tablet's Home Screen: Tap the Share button > View More > Add to Home Screen.
For Safari and Chrome, the Share button is found in the upper-right corner. If you are using a Firefox browser, the Share button is located in the top-left corner.
For Safari and Chrome browser: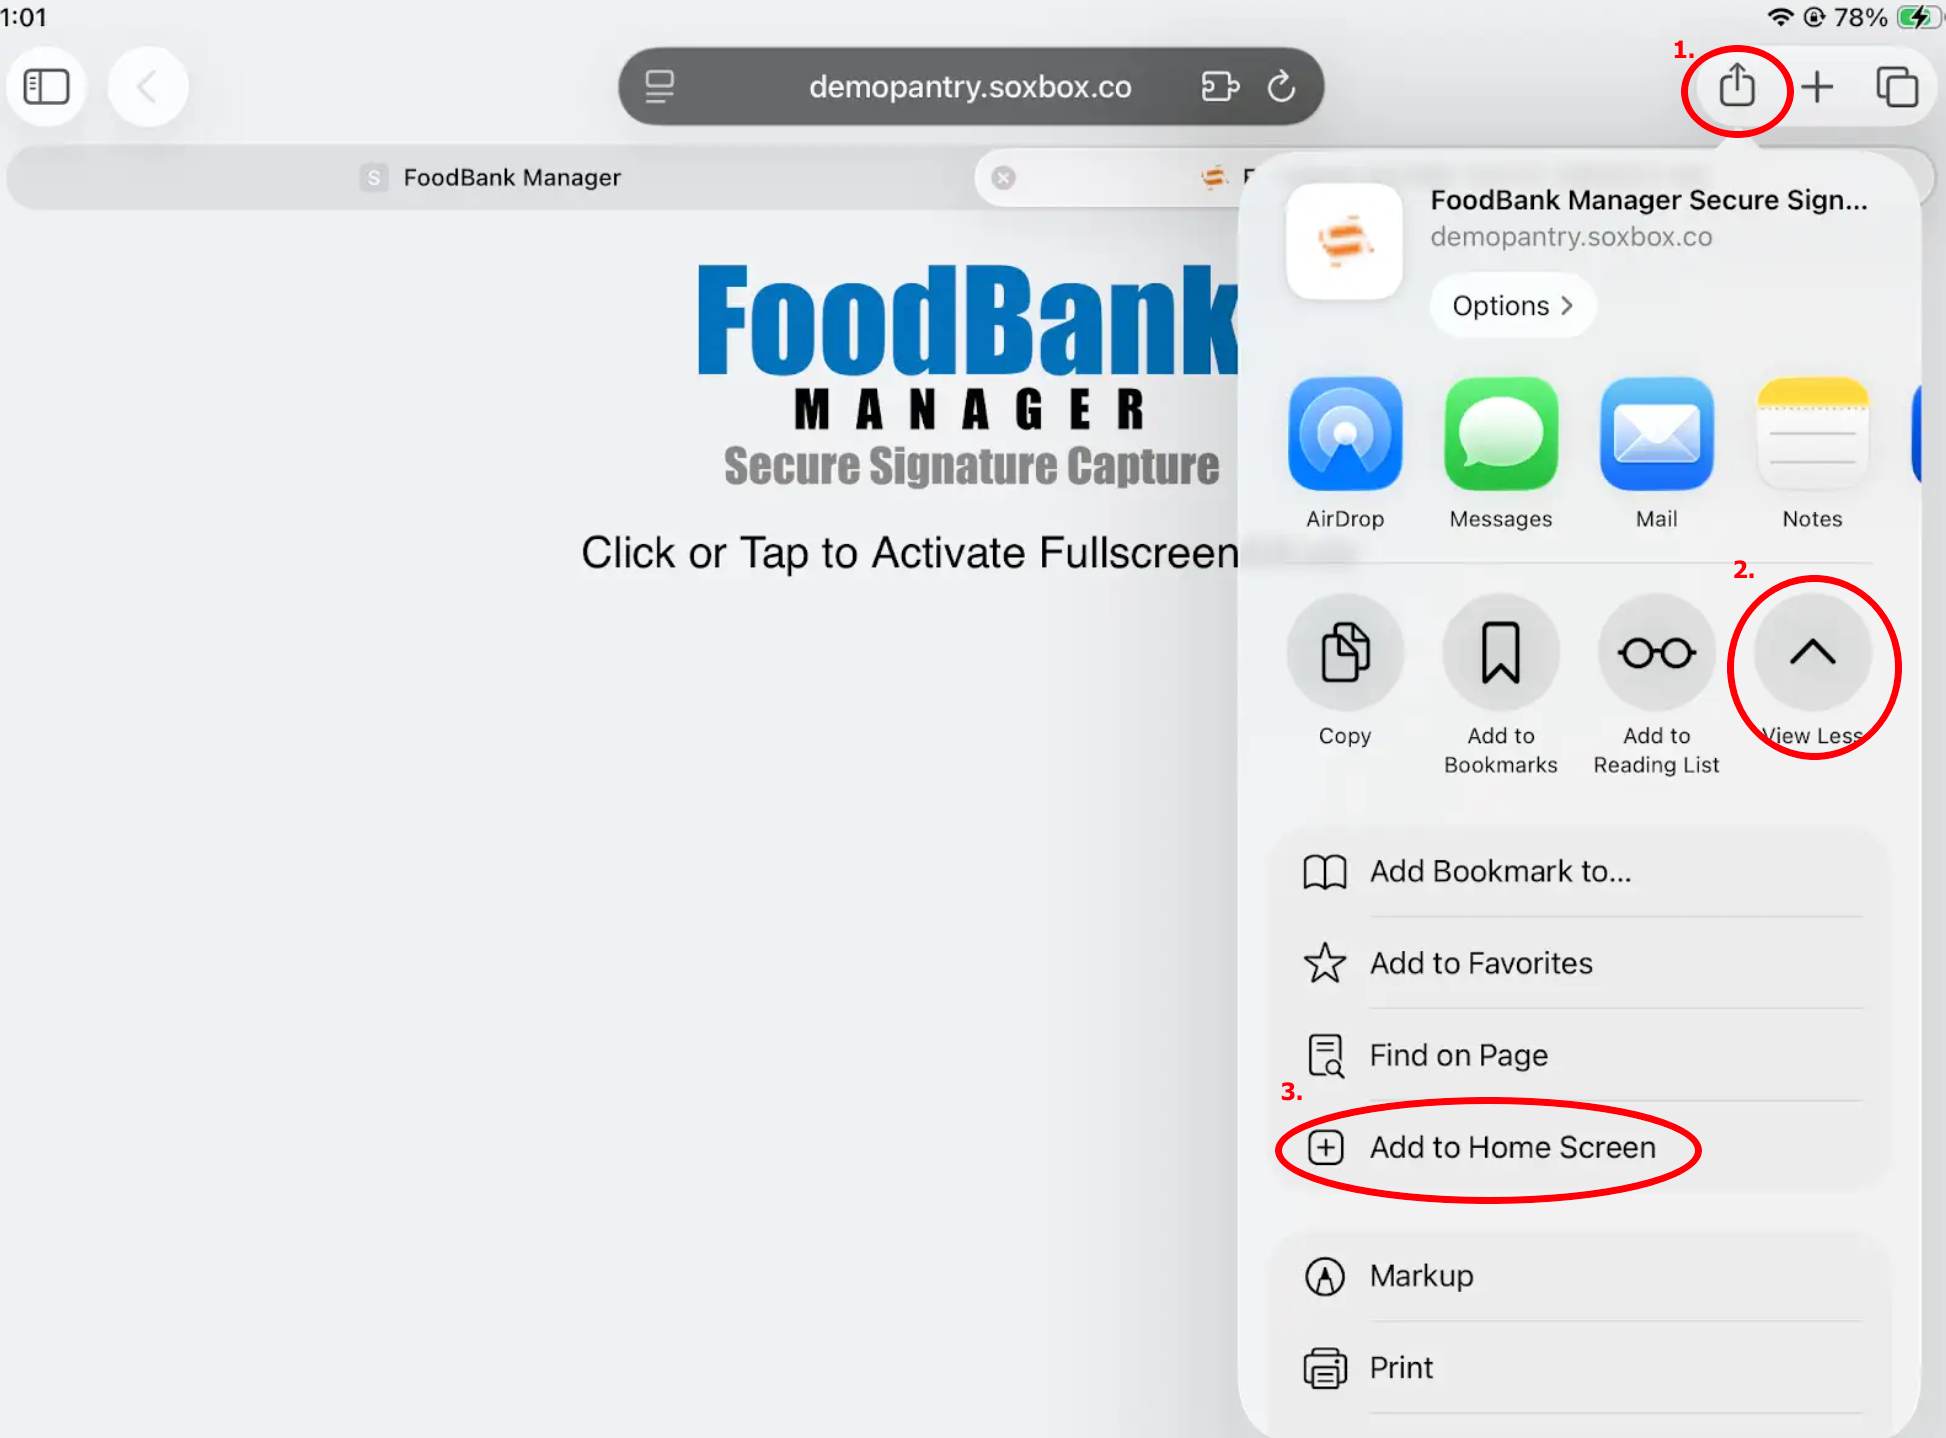
For Firefox browser: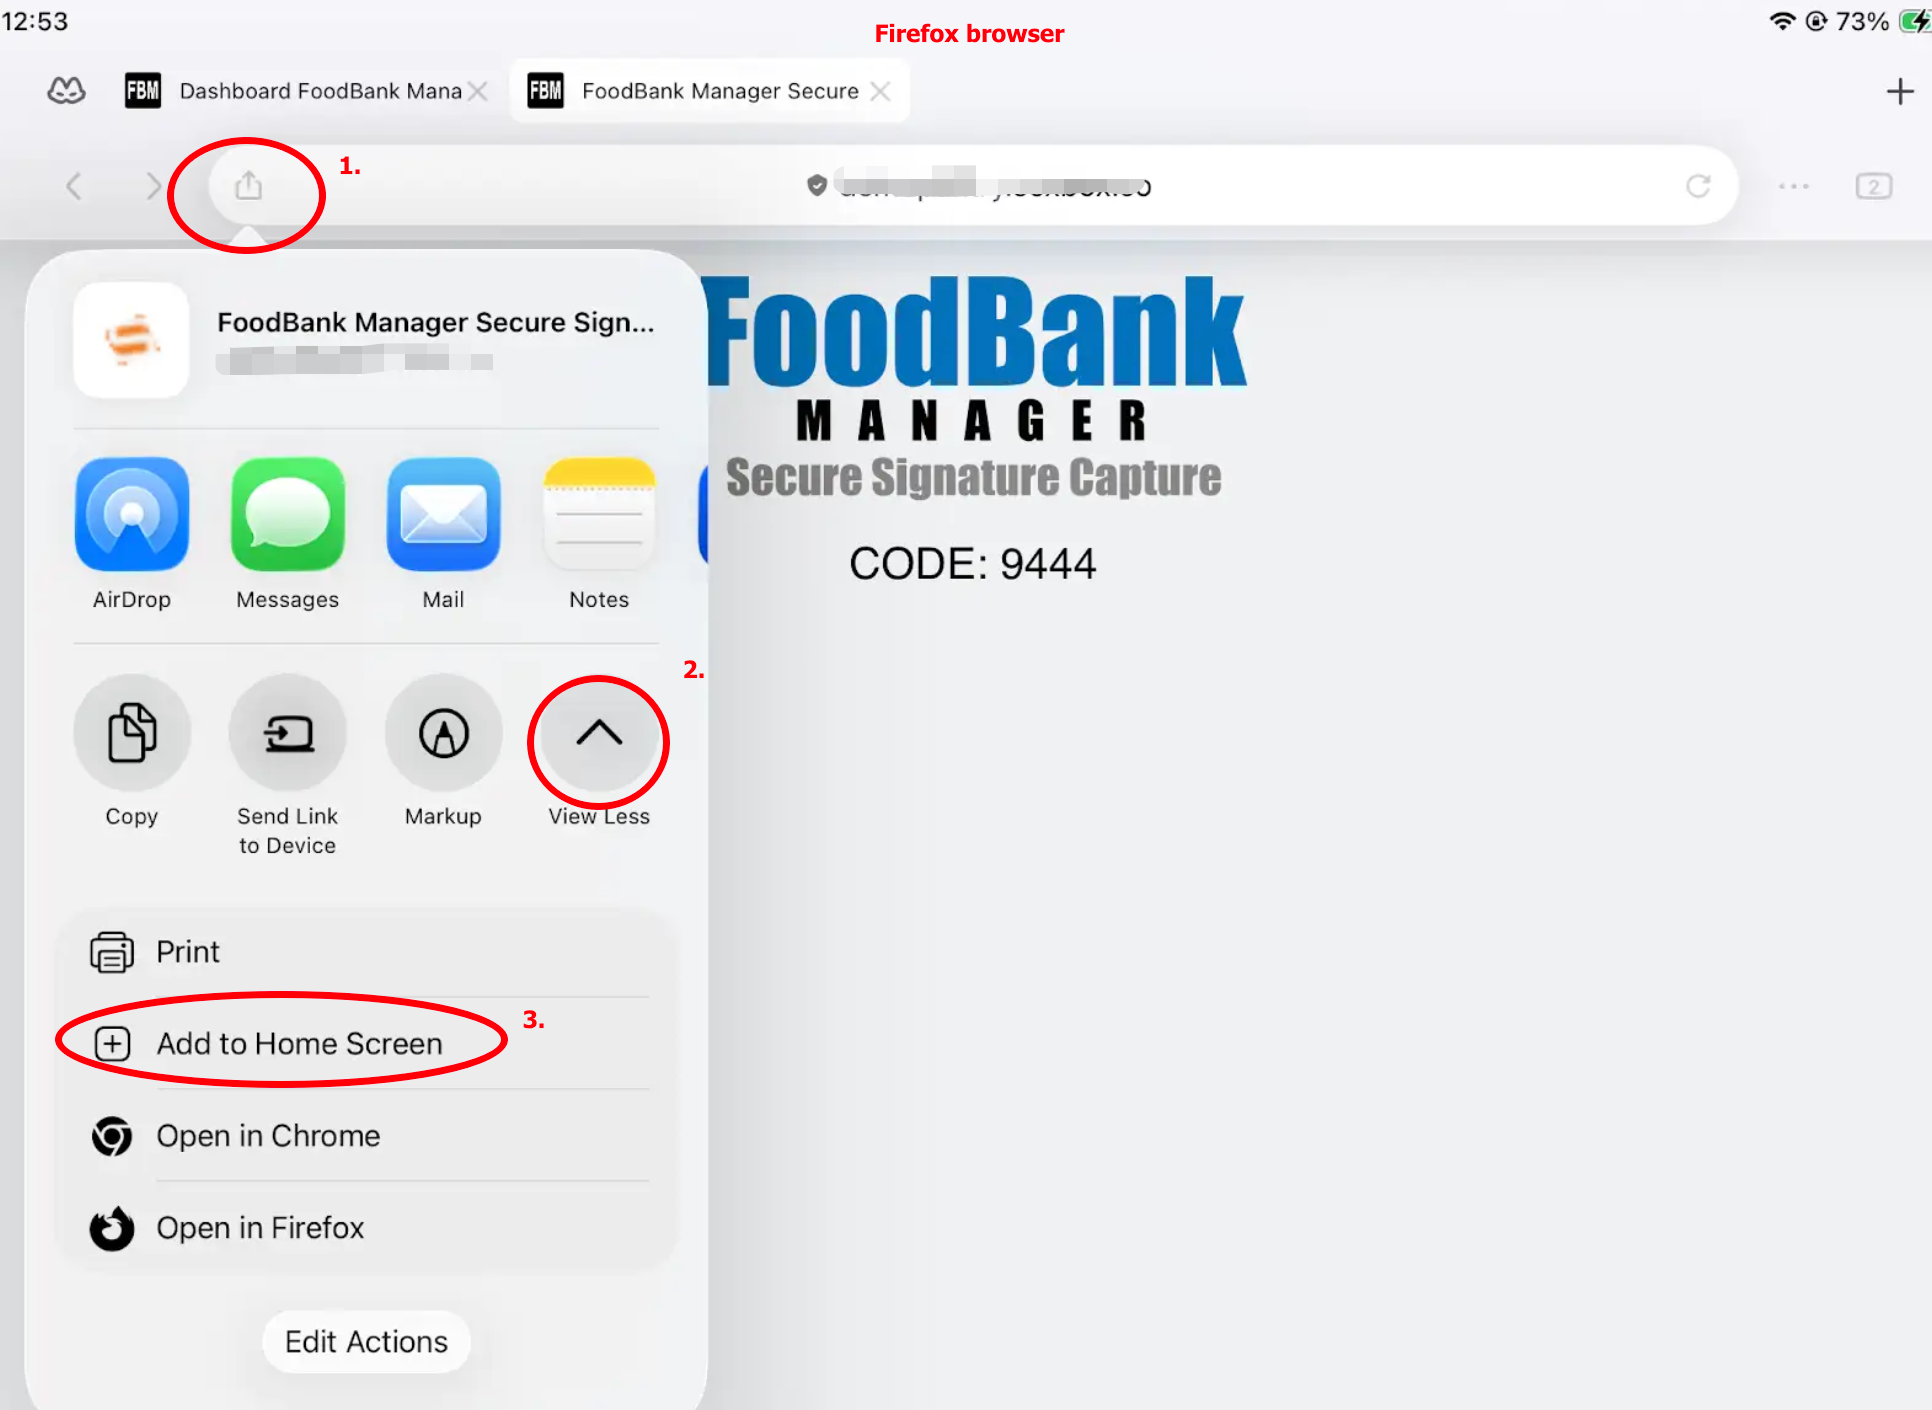
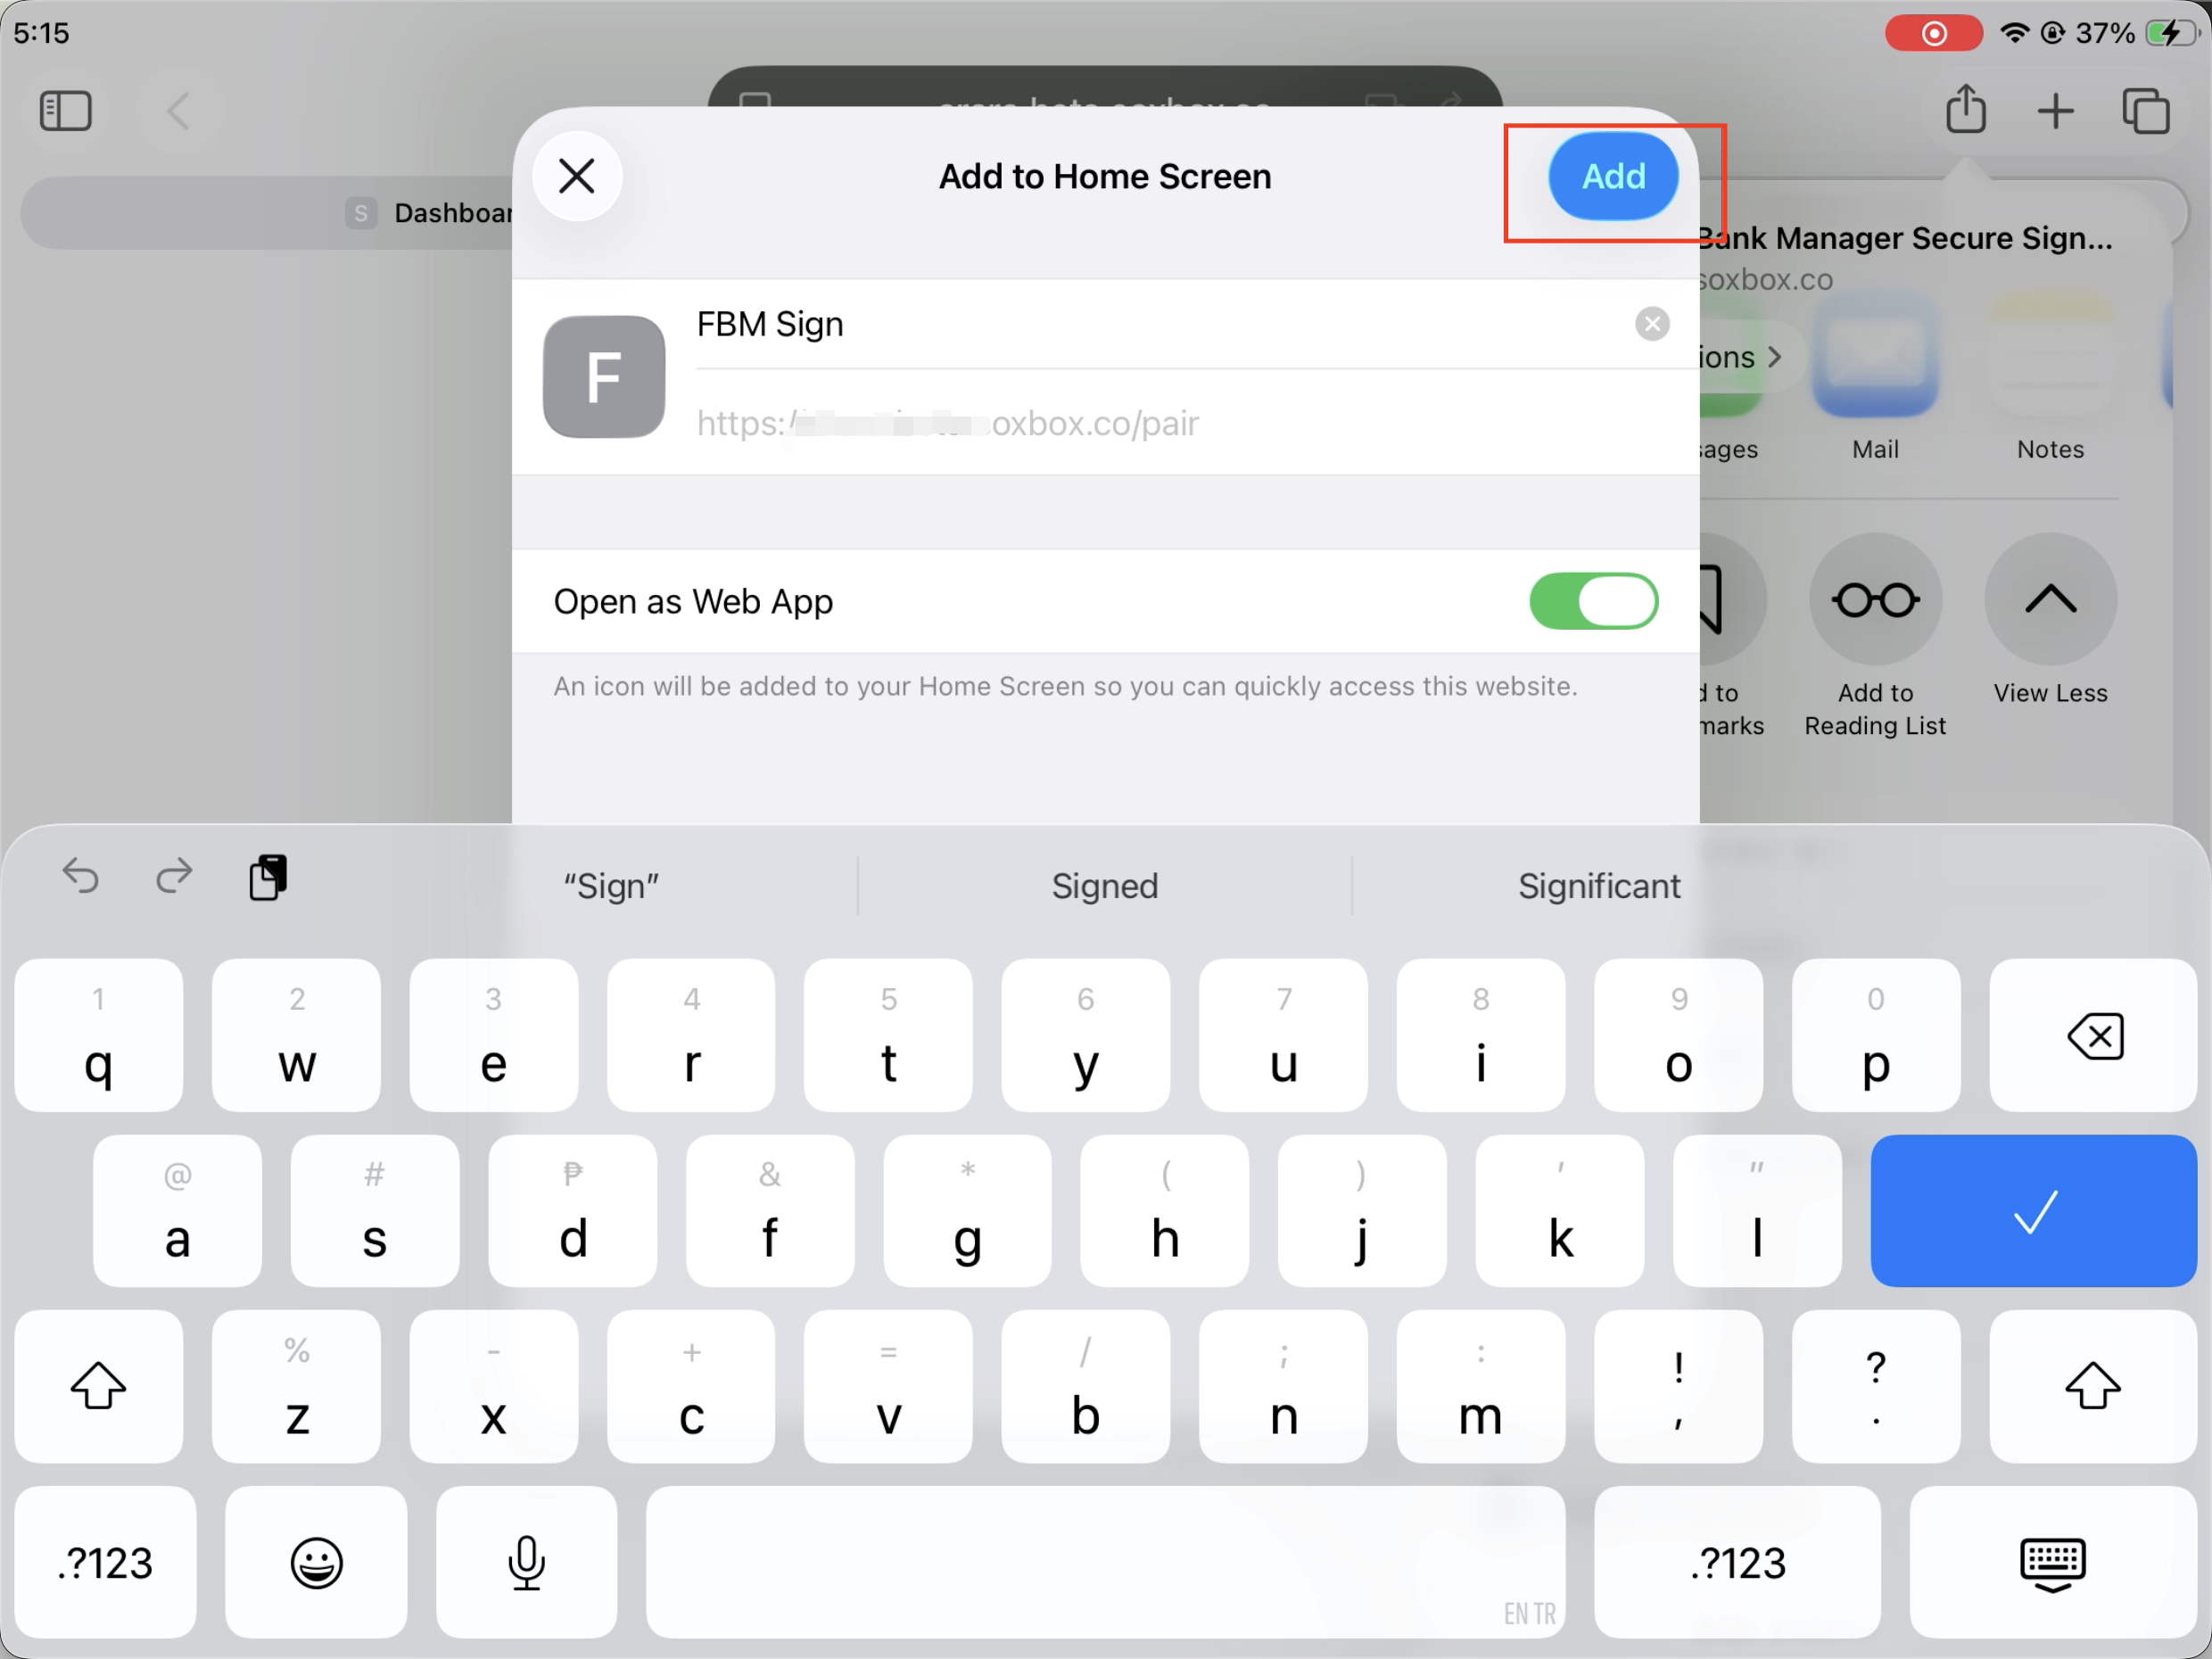
Customize the name if desired, then tap Add.
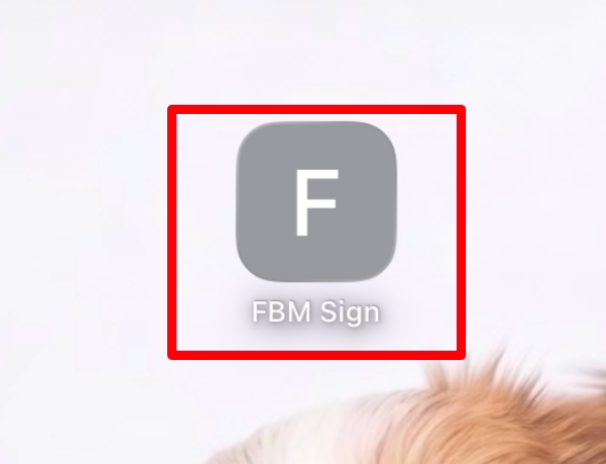
You will be taken back to your Home Screen, where you'll see a new app icon for Secure Signature Capture. (You do not need to open this app).
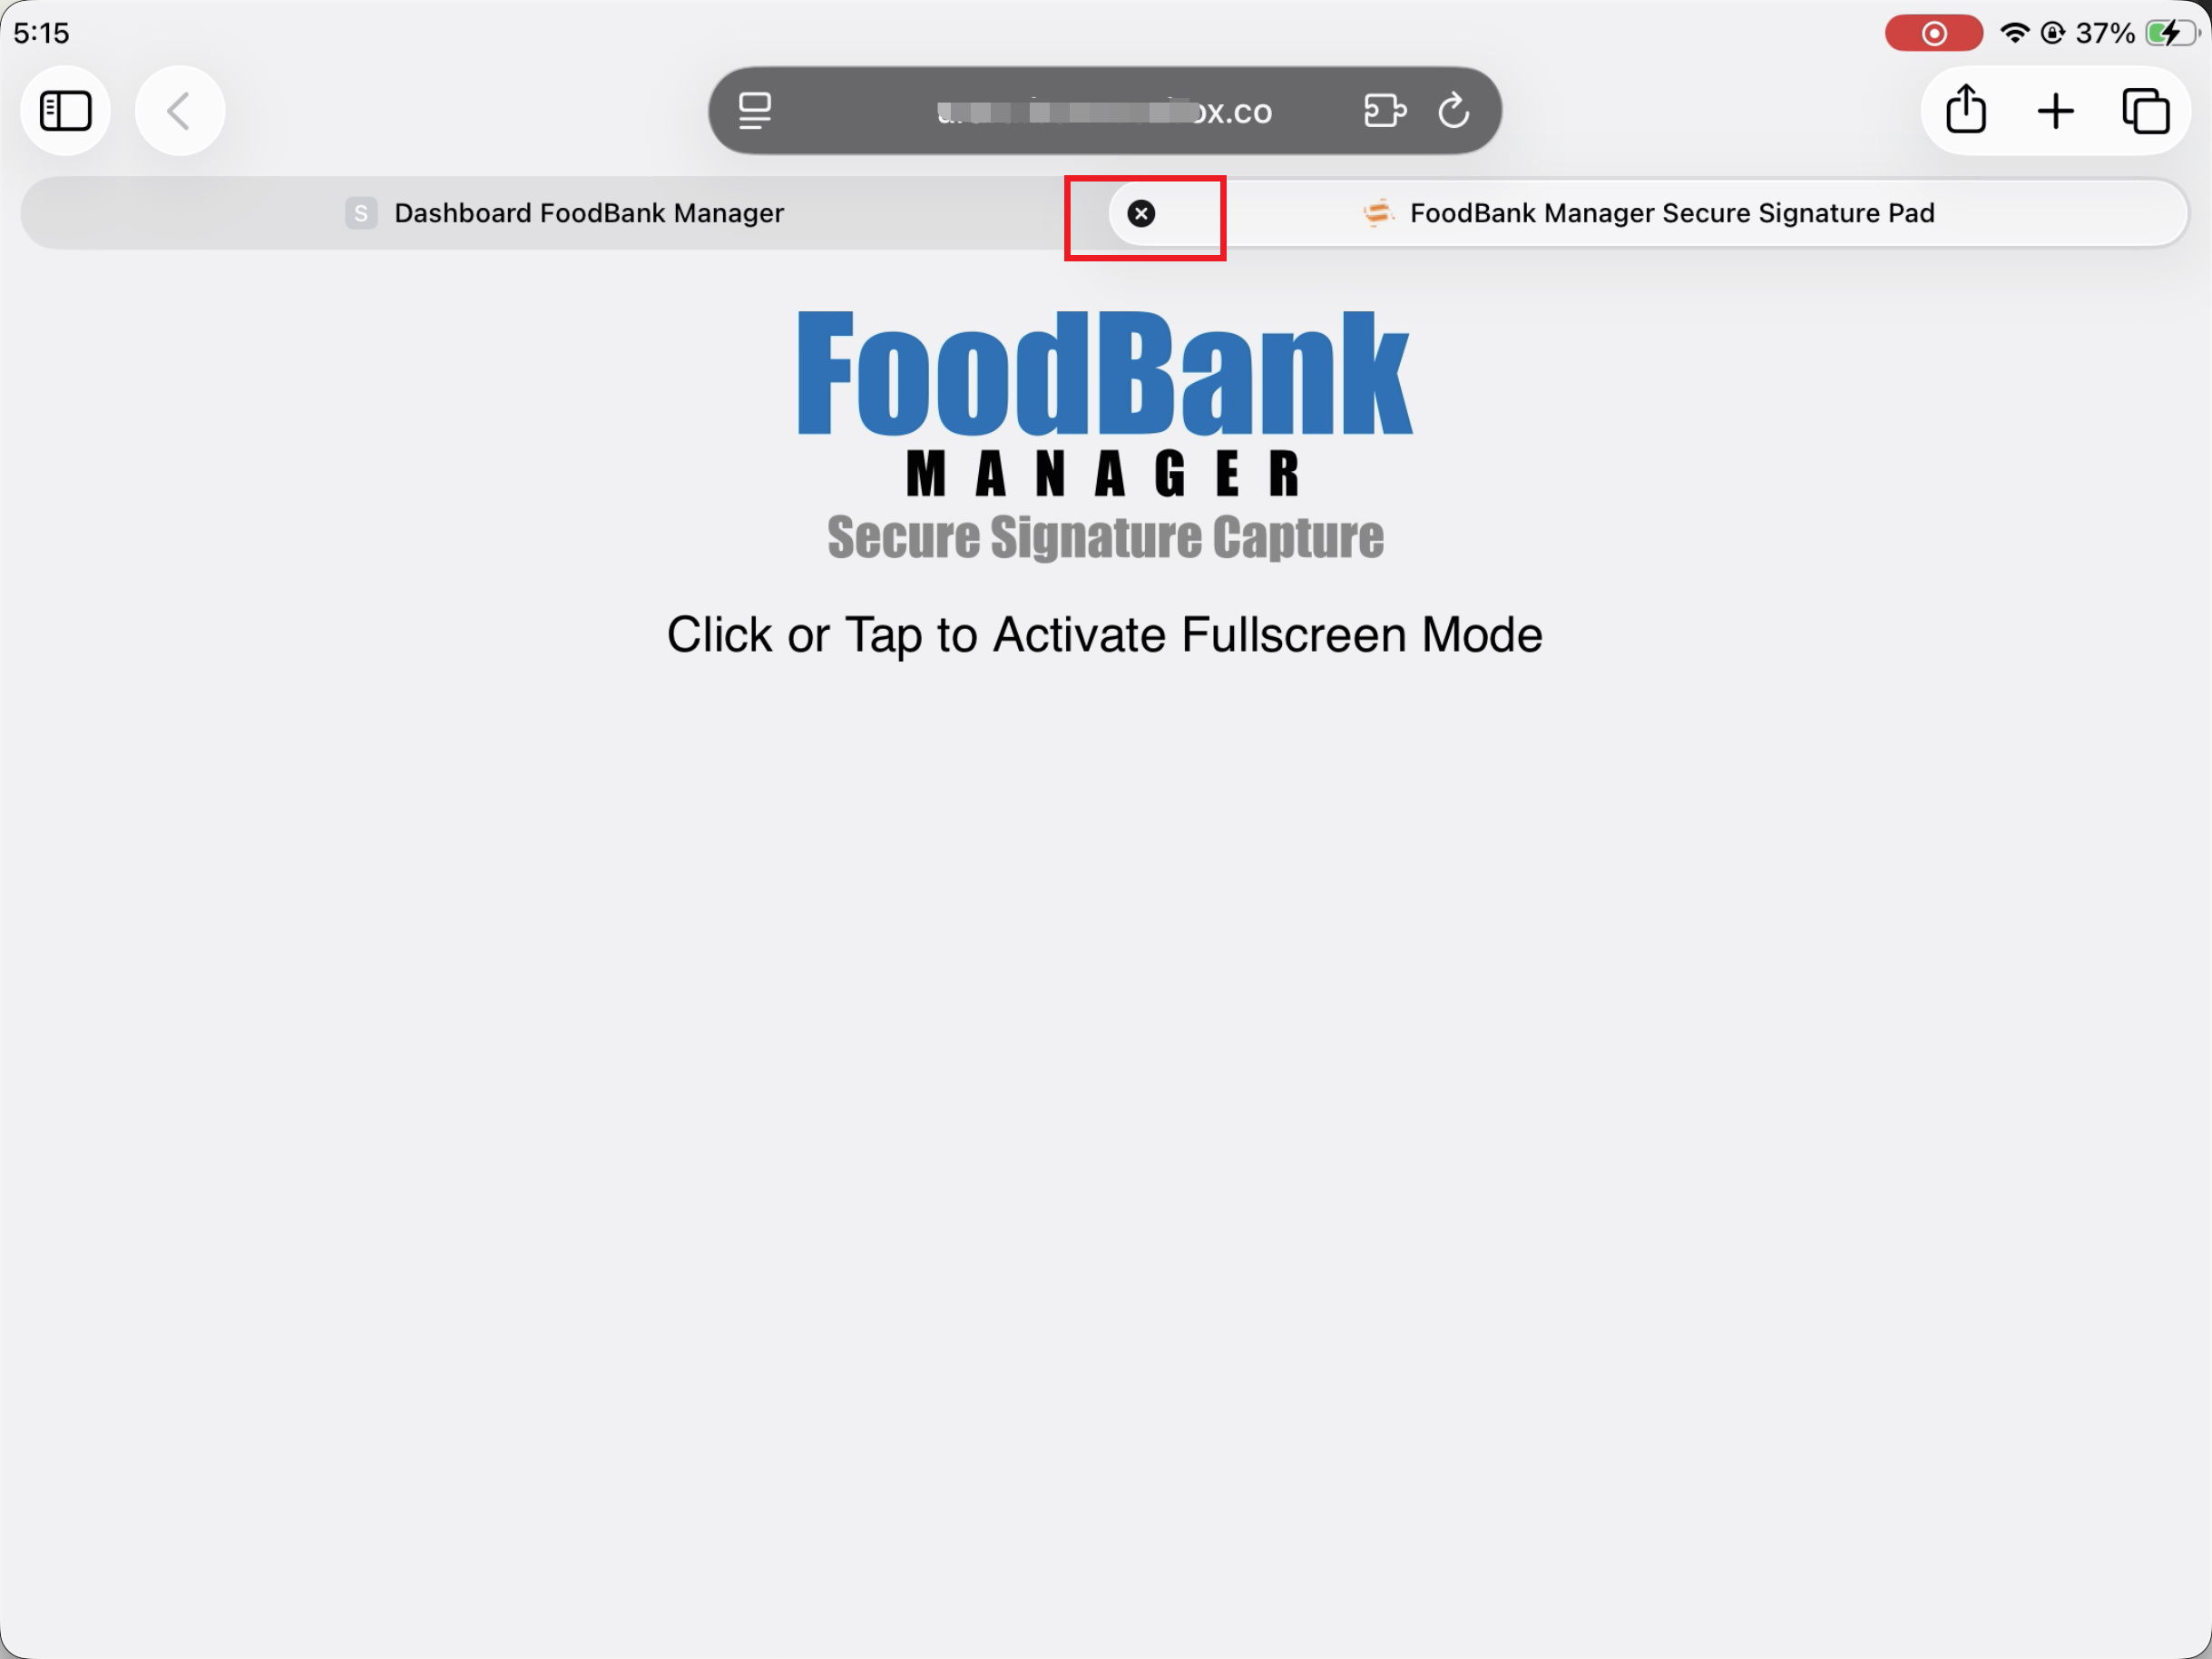
Return to your browser tab and close the Secure Signature Capture tab.
Go back to your FoodBank Manager dashboard and close the pairing pop-up window.
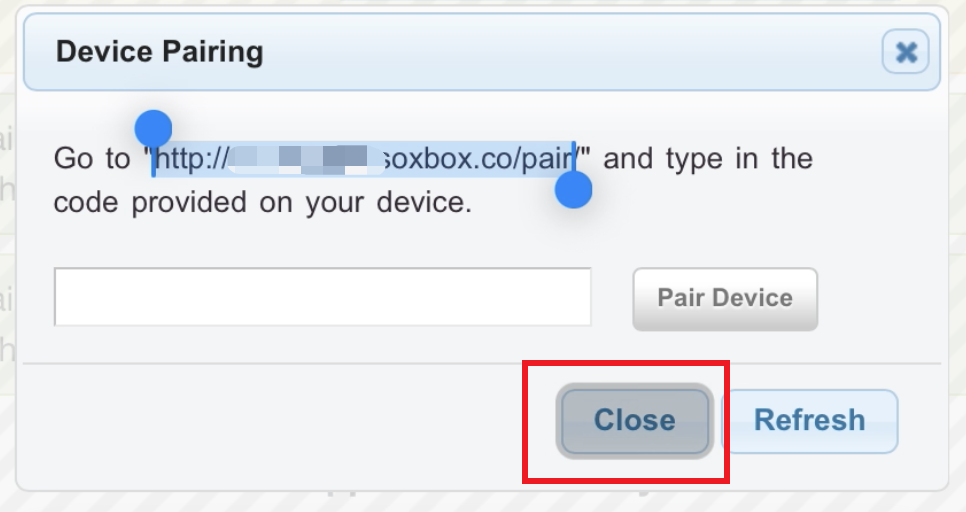
Note: You do not need to manually enter a pairing code. Once the Secure Signature Capture app has been saved to your Home Screen, FoodBank Manager will automatically connect to it whenever a signature is requested during guest check-ins.
Paired Wireless Signature Device
Video Tutorial: Click the link to watch a step-by-step guide in action: How to Set Up an All-in-One Tablet for Signature Capture
How it works: A secondary tablet or smartphone is paired wirelessly to a primary desktop or laptop computer using FoodBank Manager's built-in pairing tool. The primary computer runs the main check-in screen, while the paired tablet acts as a dedicated signature pad for the guest.
How to Set it up:
On the primary computer
Log in to FoodBank Manager.
Click Connect Device in the upper-right corner next to your profile picture.
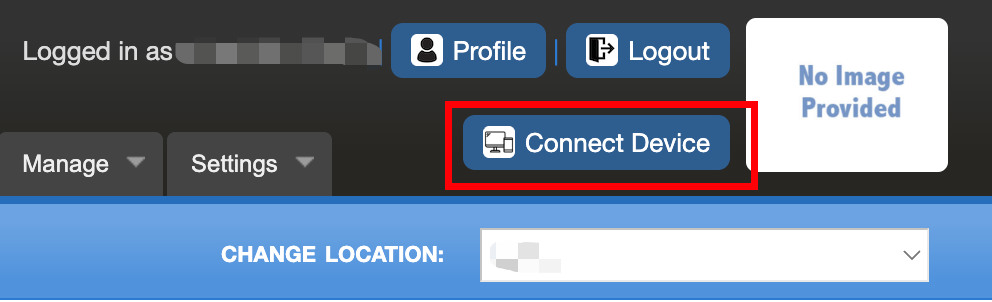
Copy or note the web address displayed in the pairing window.
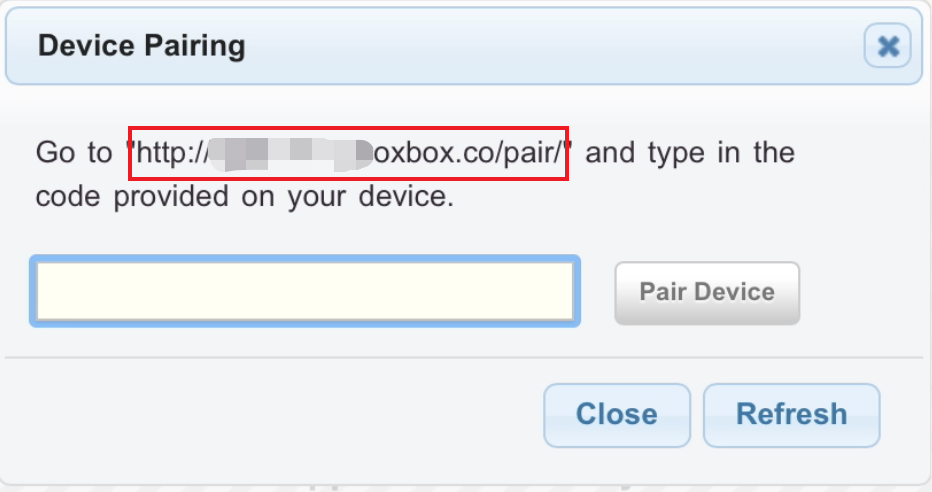
On the secondary touchscreen device
Open any preferred web browser (Safari, Chrome, Firefox).
Paste the web address, and navigate to it. This should take you to the Secure Signature Capture screen.
Add the Secure Signature Capture shortcut to your tablet's Home Screen: Tap the Share button > View More > Add to Home Screen.
For Safari and Chrome, the Share button is found in the upper-right corner. If you are using a Firefox browser, the Share button is located in the top-left corner.
For Safari and Chrome browser:
For Firefox browser:You will be taken back to your Home Screen, where you'll see a new app icon for Secure Signature Capture.
Click the icon to open the app and a pairing code will be displayed.
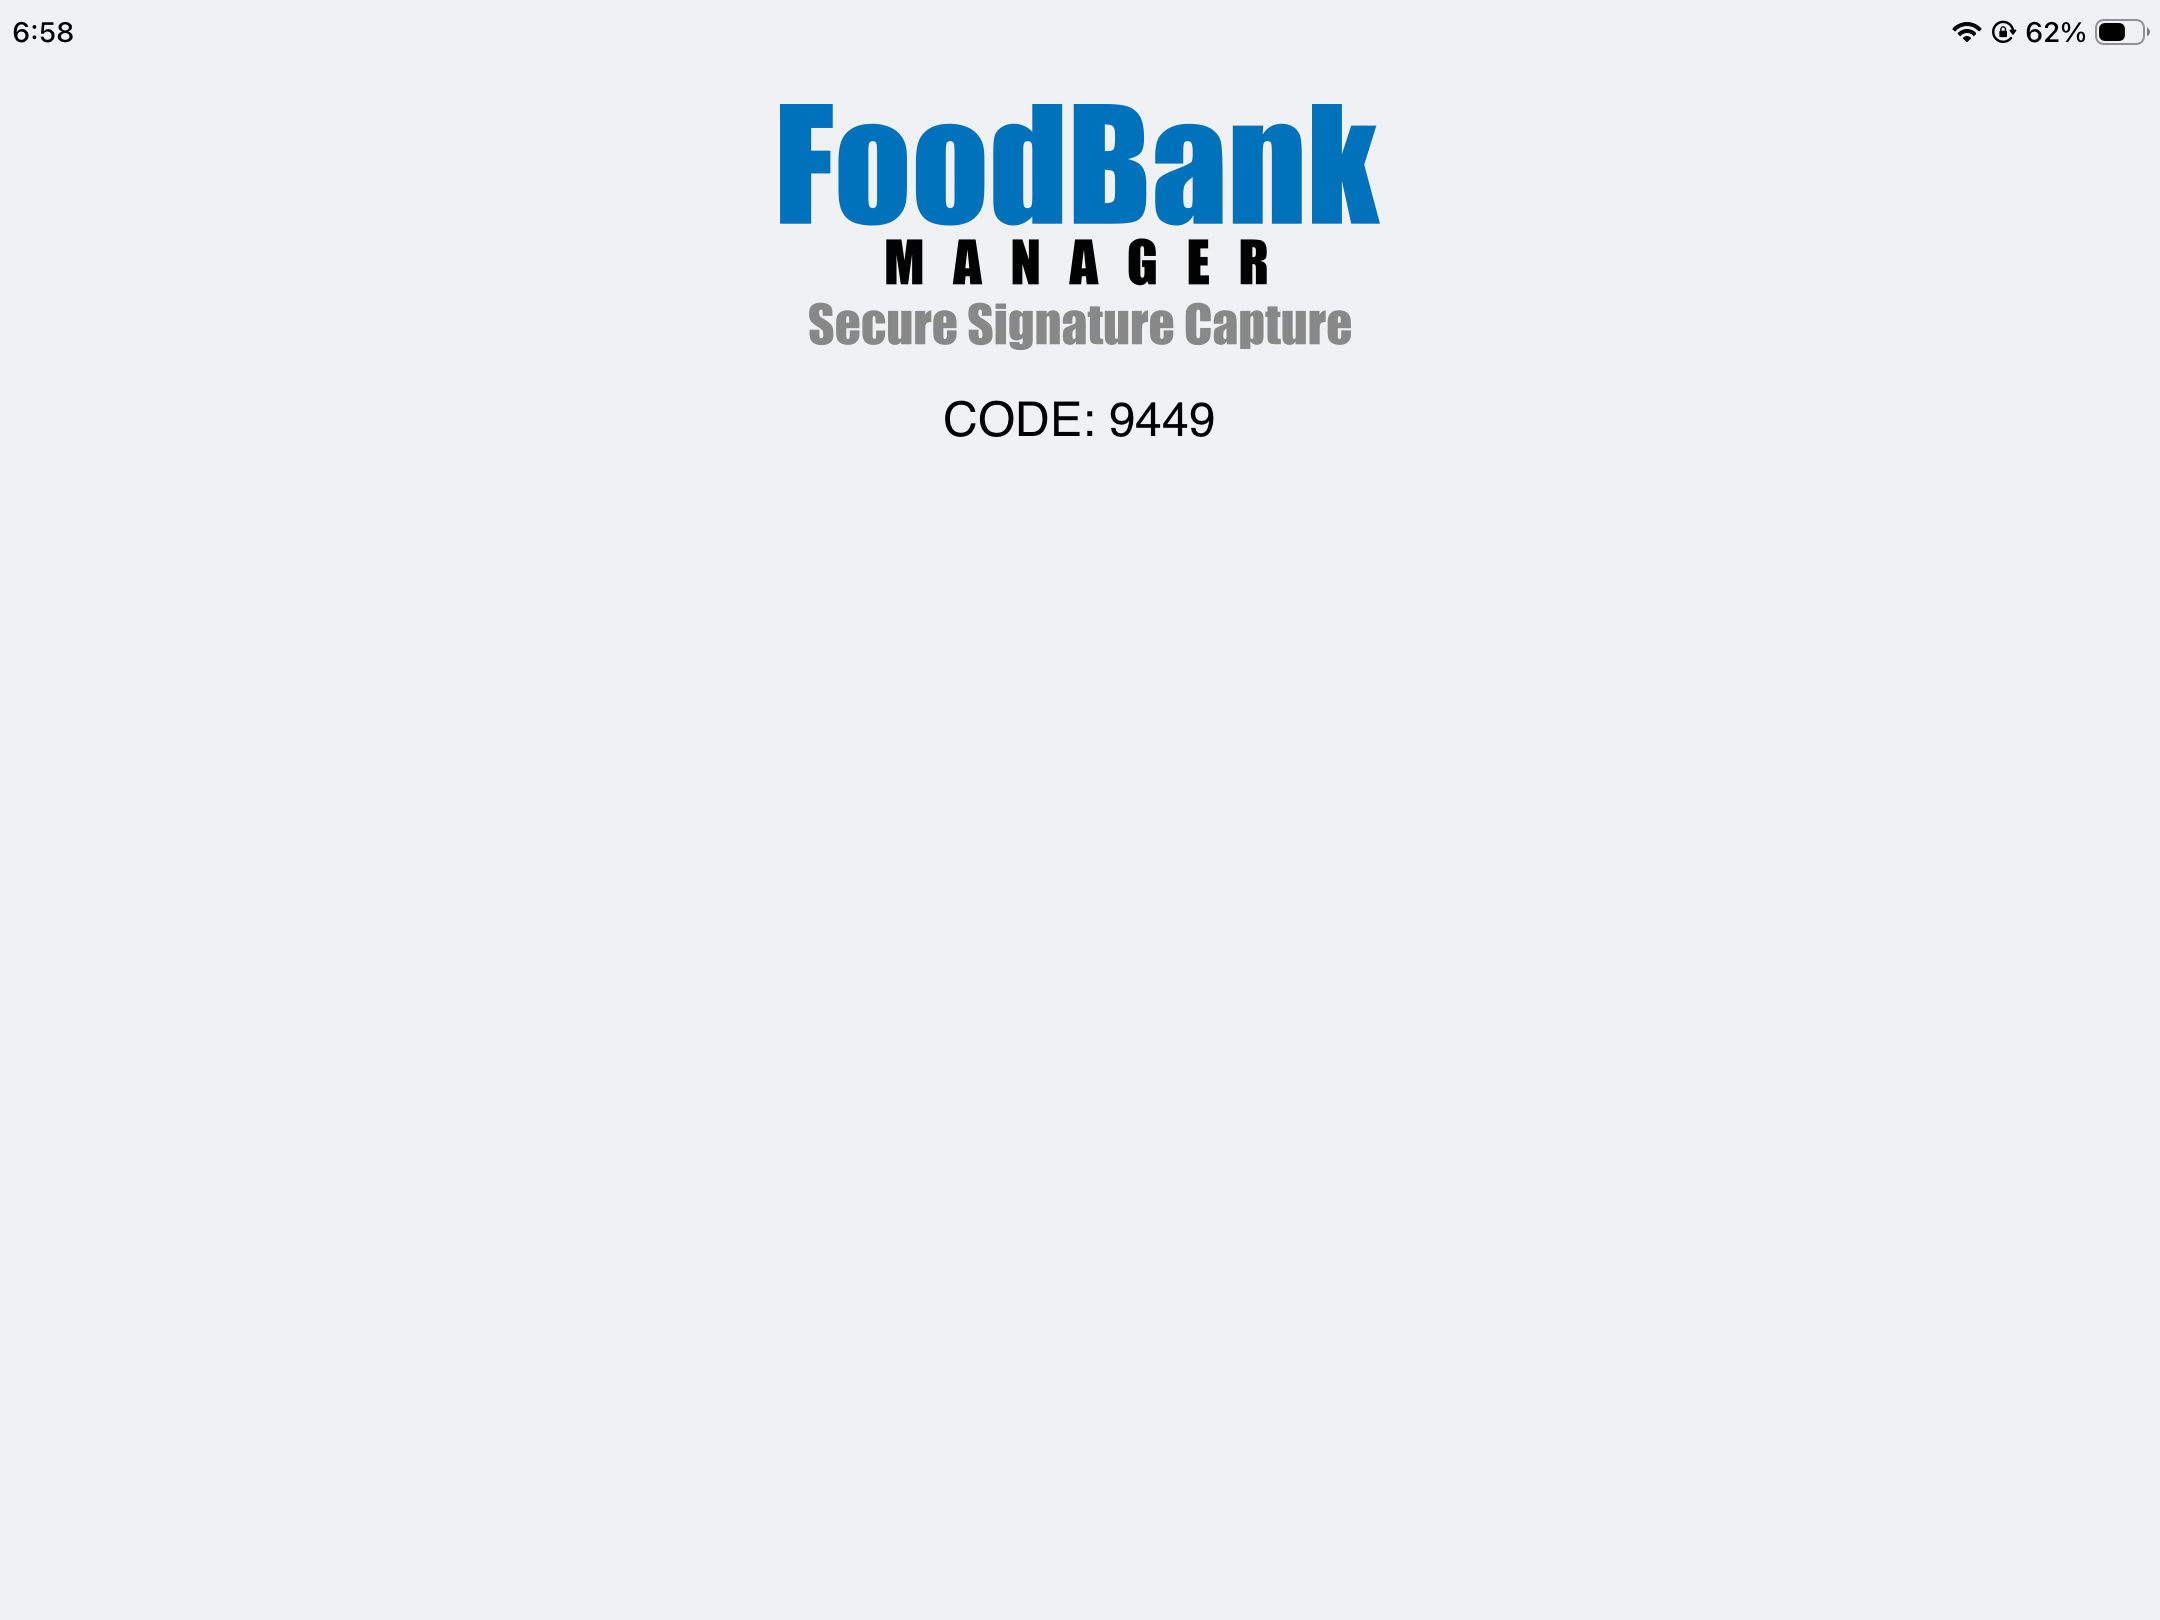
Complete pairing
Return to the pairing window on the primary computer.
Enter the pairing code displayed on the secondary device.
Click Pair Device to complete the setup.
Because FoodBank Manager is cloud-based, any tablet, or touchscreen computer with an internet browser can be used to capture signatures immediately—no driver installations required.Collecting Guests' Signatures
Prerequisite: Before collecting signatures, verify that your signature capture device or secure signature feature is properly configured.
To collect a signature:
On the Create New Visit page, click Request Signature.
Depending on your setup, the secure signature screen will display in one of three ways:
Standalone Desktop Setup: On the same desktop, the signature box opens in the separate browser window where the Secure Signature Capture is set up.
Paired Wireless Signature Device: The intake screen pauses on the computer, and the signature pad activates on the secondary client-facing tablet.
All-in-One Tablet Setup: The signature pad overlay opens directly on your tablet screen.
If enabled, the Terms and Conditions are displayed in the signature pad. The guest must accept them before continuing.
The guest provides their signature on the pad or screen (using a finger, stylus, or computer mouse), then clicks I Accept.
If Signature Lock is enabled (applicable only in the All-in-One Tablet setup), the screen automatically locks after the guest submits their signature. Enter the configured passcode to unlock the screen and continue.
Review and save the signature.
Standalone Desktop & Paired Wireless setups: Review the captured signature on your primary screen, then click Accept to save it to the visit record.
All-in-One Tablet setup: No additional confirmation is needed—once the guest submits their signature, it is automatically saved to the visit record.
Once the signature is successfully captured, you can proceed with completing the visit as normal.
Frequently Asked Questions (FAQ)
Do I need a secondary device or specialized hardware to use signatures?
No. You can capture signatures directly on a single computer using a standard mouse. Secondary devices (like paired tablets) are purely optional and designed to provide a smoother, paperless client-facing experience.
What should I do if my secondary signature device stops responding?
Click Connect Device in the top-right corner to quickly re-pair your hardware.
What if the secure signature screen is not responding, and the status in the FBM is stuck on "Disconnect Device"?
Clear your browser's cache and cookies, then relaunch the browser and try pairing the device again. These same steps apply to all device setup and pairing issues.
How often should we update our Terms & Conditions?
We recommend reviewing your disclaimer periodically to ensure ongoing compliance with state, federal, and TEFAP/CSFP requirements.
Why isn't the signature field showing up during check-in?
Check your configuration based on the signature type you are using:
For Default Signature: Go to Settings > Settings > Create Visit tab and check the Signature field:
- Set it to Always Show, or
- If set to Only Show When Required, verify that Required is selected under Settings > Tracking Methods for that specific program.
For Custom Signature Fields: Go to Settings > Custom Fields > Visits:
- Locate your custom signature field.
- Make sure the correct Help Desired categories are selected for it to appear.
Was this article helpful?
That’s Great!
Thank you for your feedback
Sorry! We couldn't be helpful
Thank you for your feedback
Feedback sent
We appreciate your effort and will try to fix the article