How to Connect Your Gmail to FBM (Get Your Client ID & Secret)
This guide will walk you through connecting your Gmail account to FBM by setting up access in Google. Follow each step carefully to complete the setup.
TABLE OF CONTENTS
- Before You Begin
- Step 1: Create a Google Cloud Project
- Step 2: Enable the Gmail API
- Step 3: Configure the OAuth Consent Screen
- Step 4: Complete the "Project Configuration" Settings
- Step 5: Create the OAuth Client (Client ID & Secret)
- Step 6: Change the Publishing Status
- Step 7: Enter Details in FBM
- Important: Gmail Daily Sending Limits
Before You Begin:
To enable the Email Integration feature, the Portal feature must be activated. Without the Portal add-on, email notifications will not be available.
Please note that once the Portal add-on is purchased, you will need to configure your Pantry details in FBM to fully enable the Portal feature.
If you prefer not to allow guests to make reservations online, you can simply choose not to share your Portal URL.
Your team can continue managing reservations internally in FBM and still send email notifications to guests as needed.
For more information about this feature, please visit: Reservation Email Notification Feature
VIEWING IMAGES

Click any image in this article to view it in full size.
Step 1
Create a Google Cloud Project
- Open your web browser and go to: https://console.cloud.google.com/projectcreate
- You will be redirected to the Google login page.
- If you do not have a Google account, create one.
- If you already have a Google account, sign in using your Gmail address.
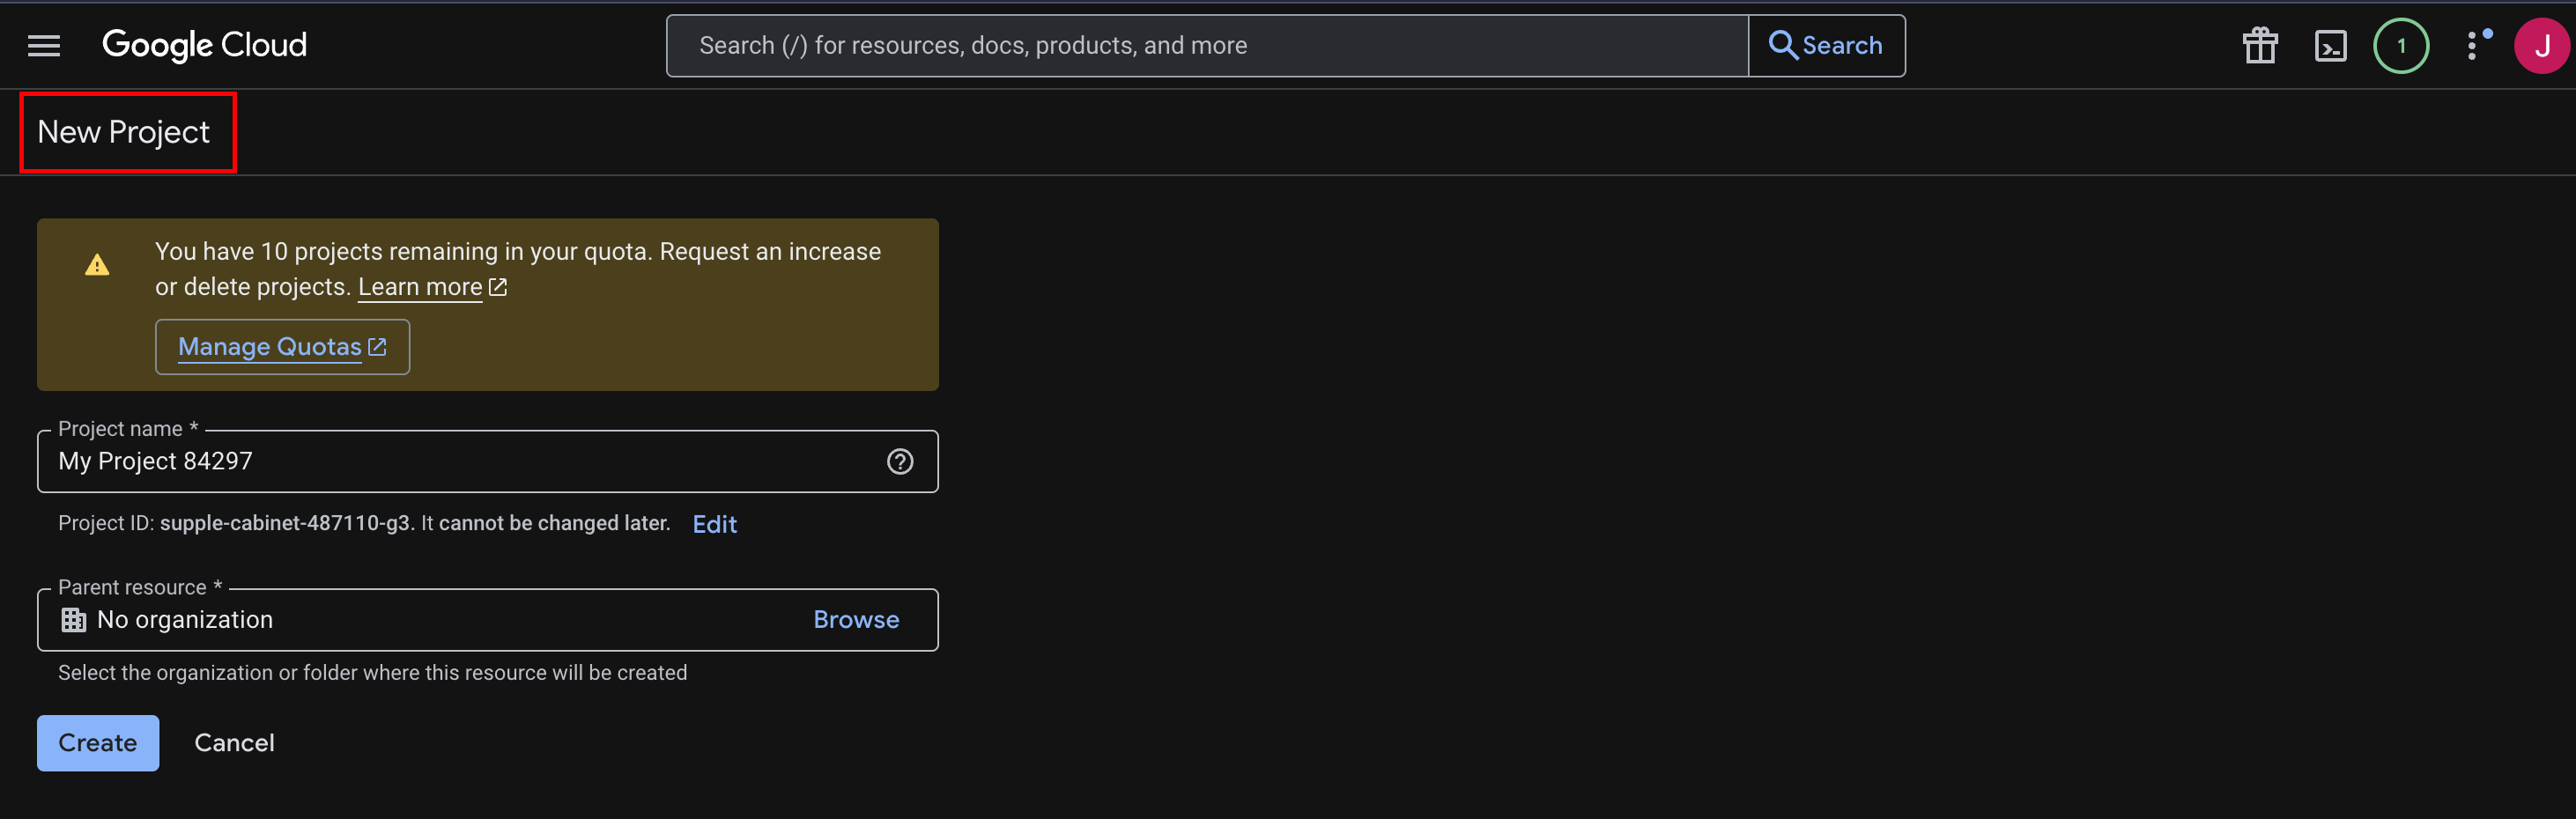
- After logging in, the New Project page will appear.
- Enter a Project Name.
- Click Create.
Step 2:
Enable the Gmail API
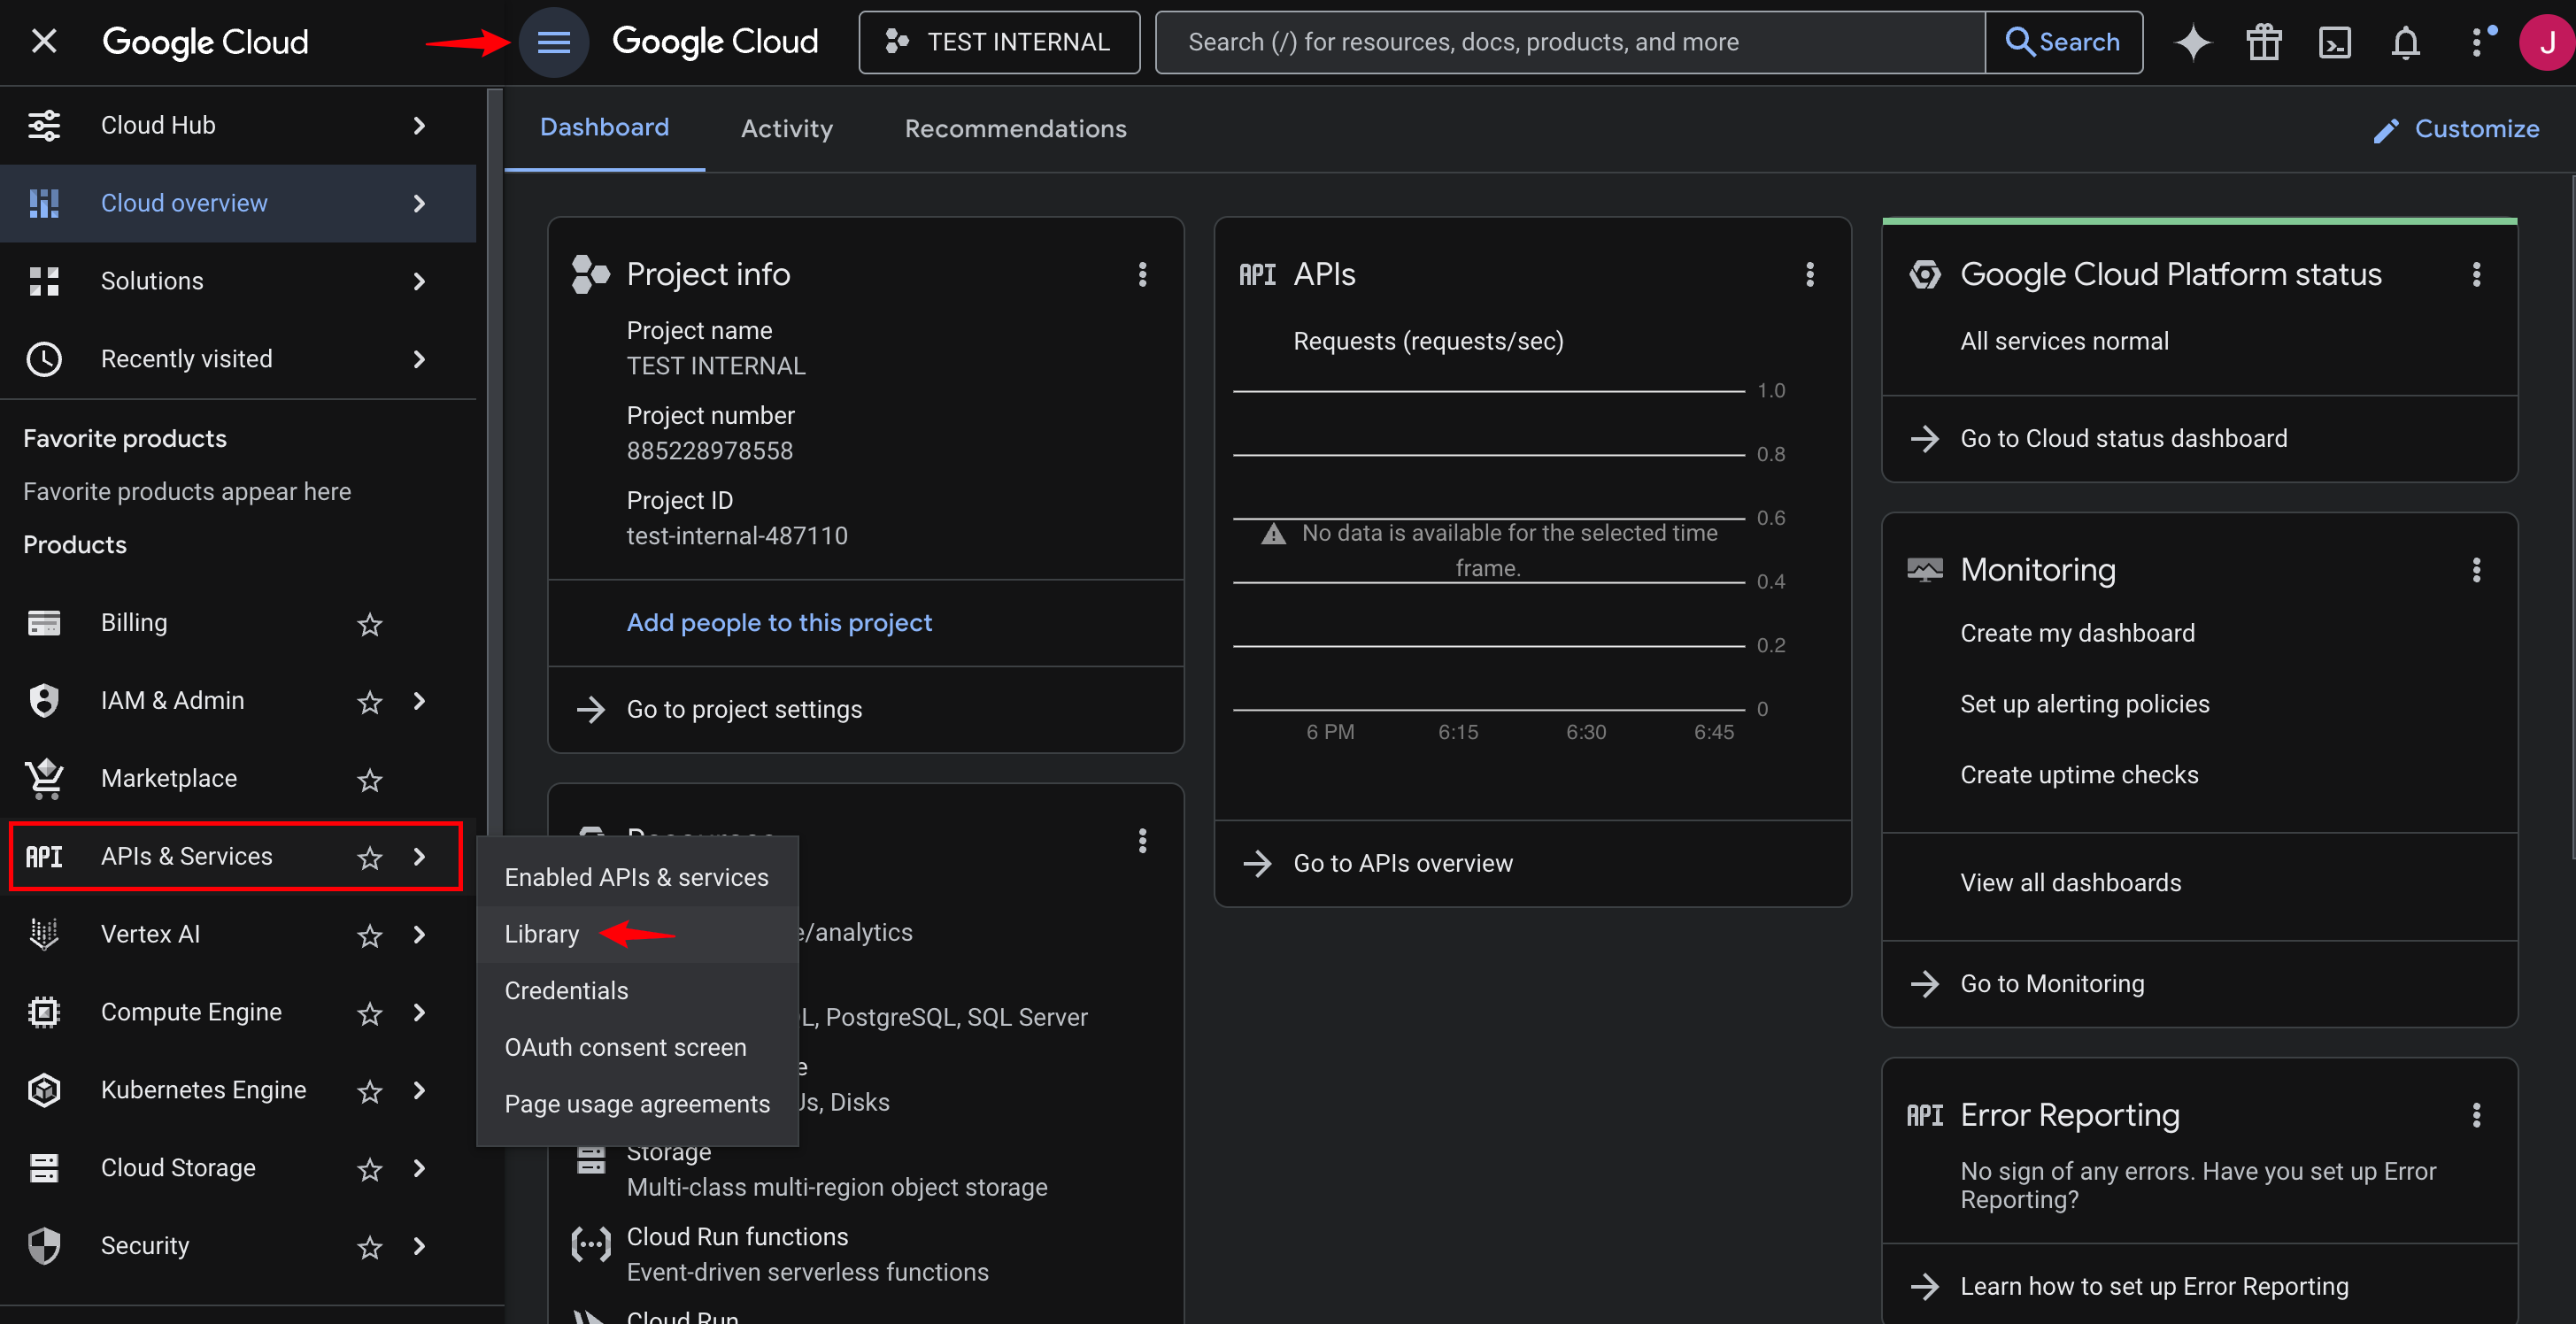
- Once the project is created, you will be taken to the Google Cloud Dashboard.
- Click the Navigation Menu (three horizontal lines) in the top-left corner.
- Scroll down and select APIs & Services.
- Click Library.
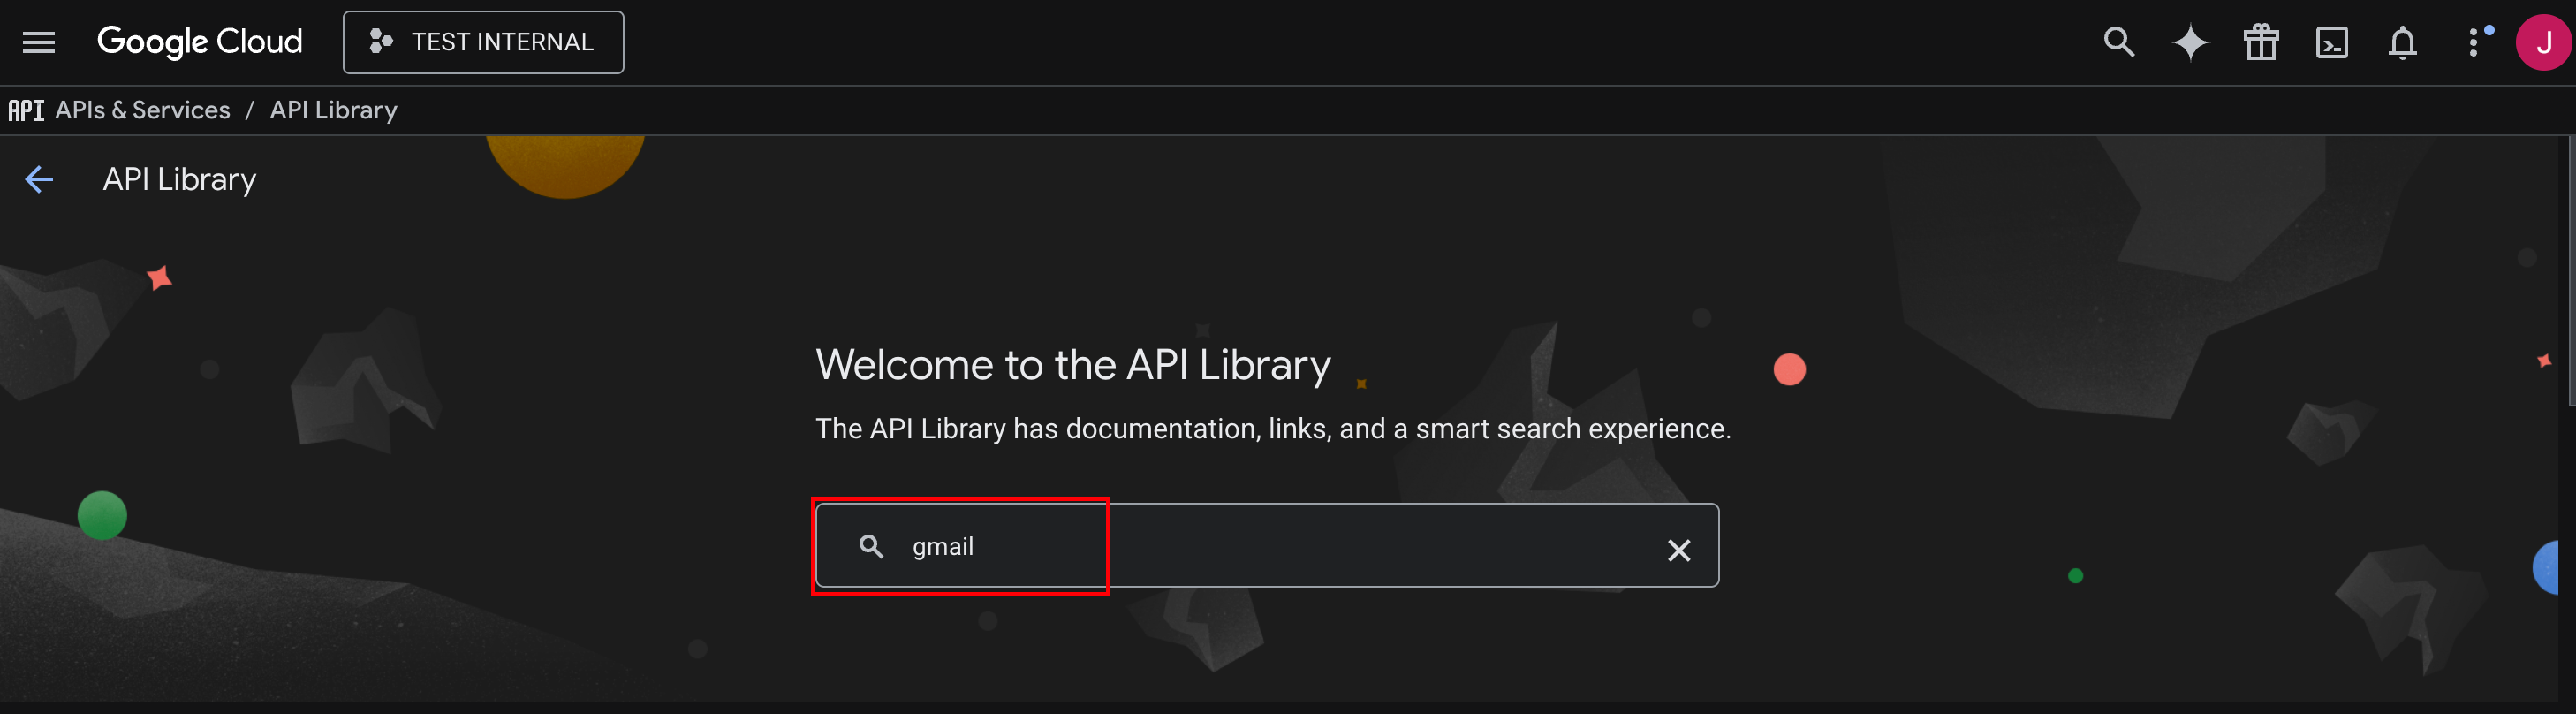
5. In the search bar, type Gmail and press enter to search.
6. From the search results, select Gmail API.
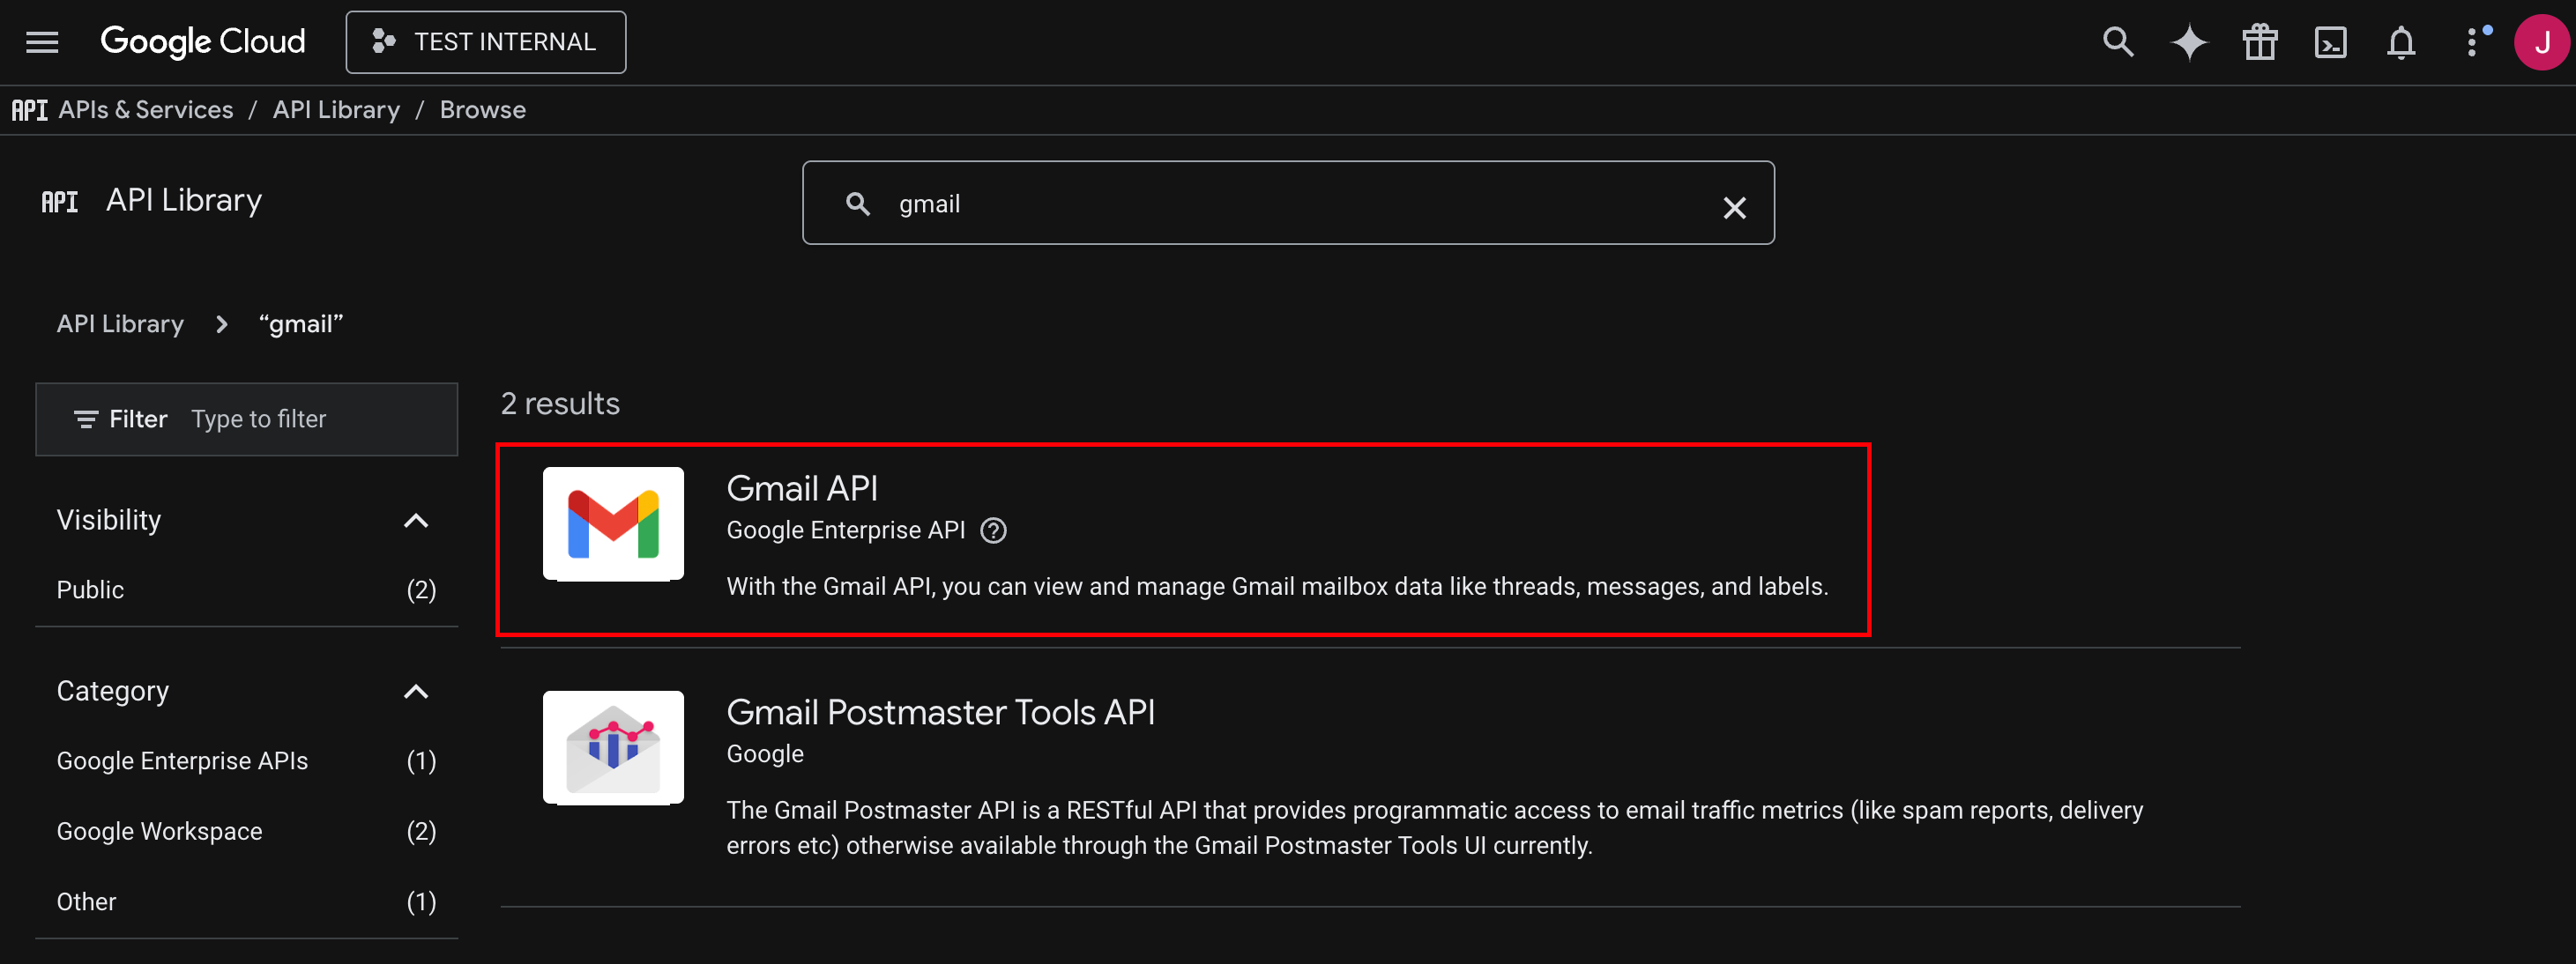
7. Click Enable to add the Gmail API to your project.
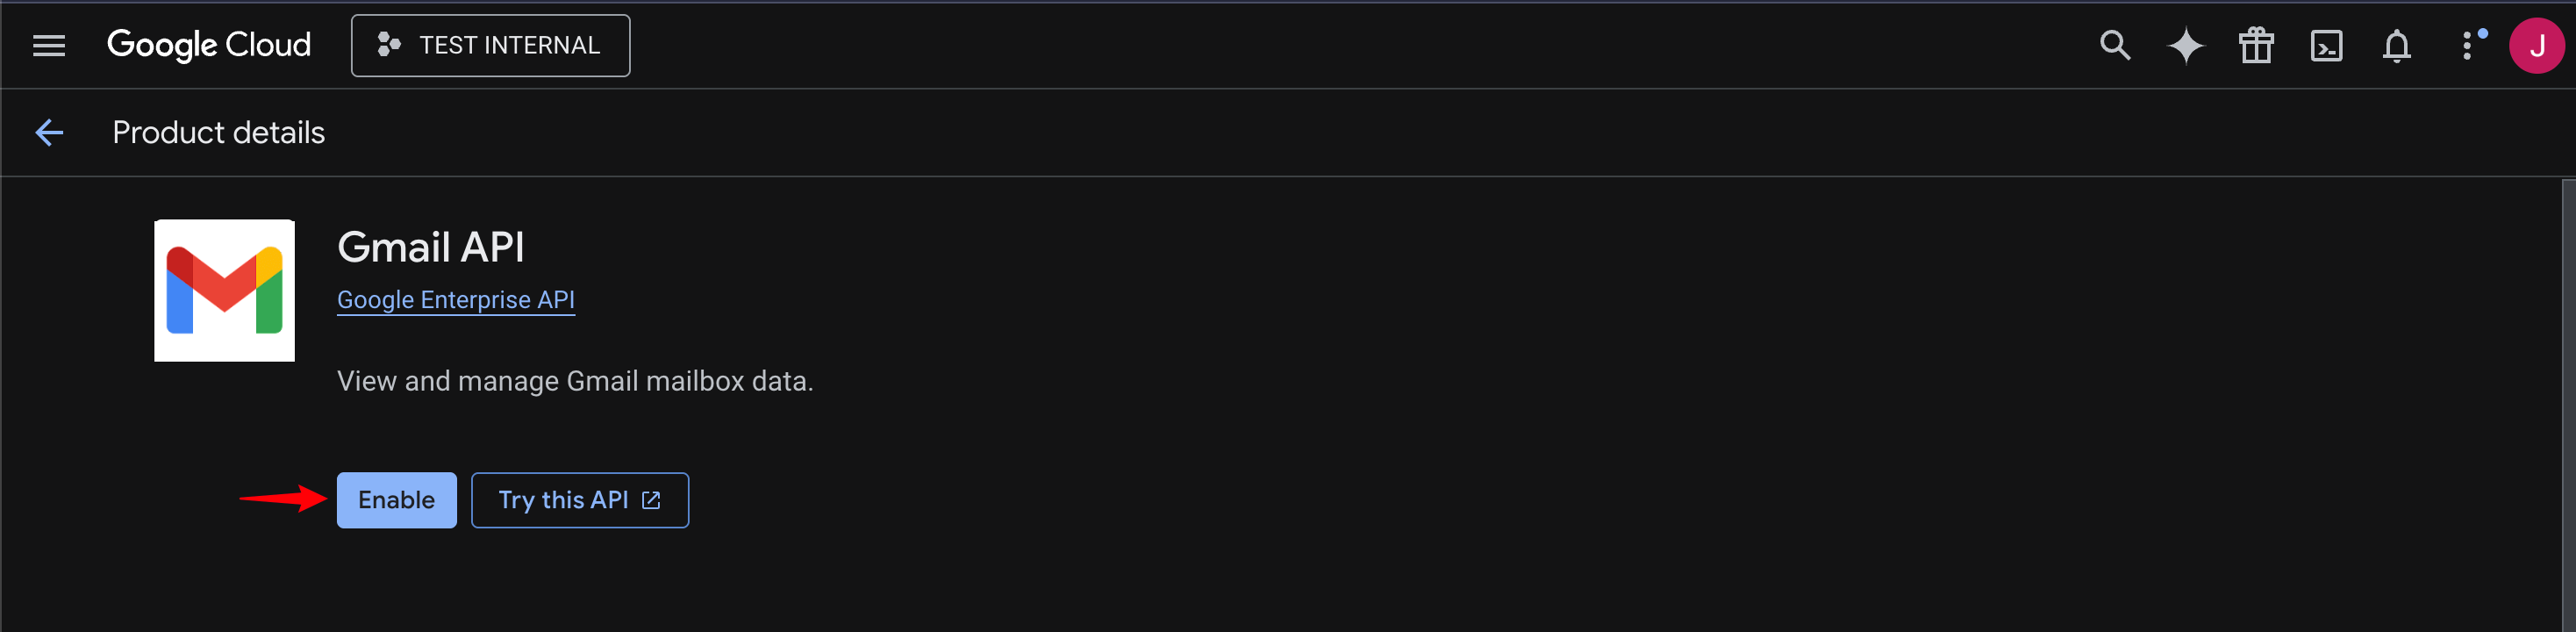
Once enabled, you will be redirected to the "API/Service Details" page where you can see Gmail API successfully enabled.

Step 3:
Configure the OAuth Consent Screen
- In the same page, navigate to the left-hand menu.
- Click on OAuth consent screen.
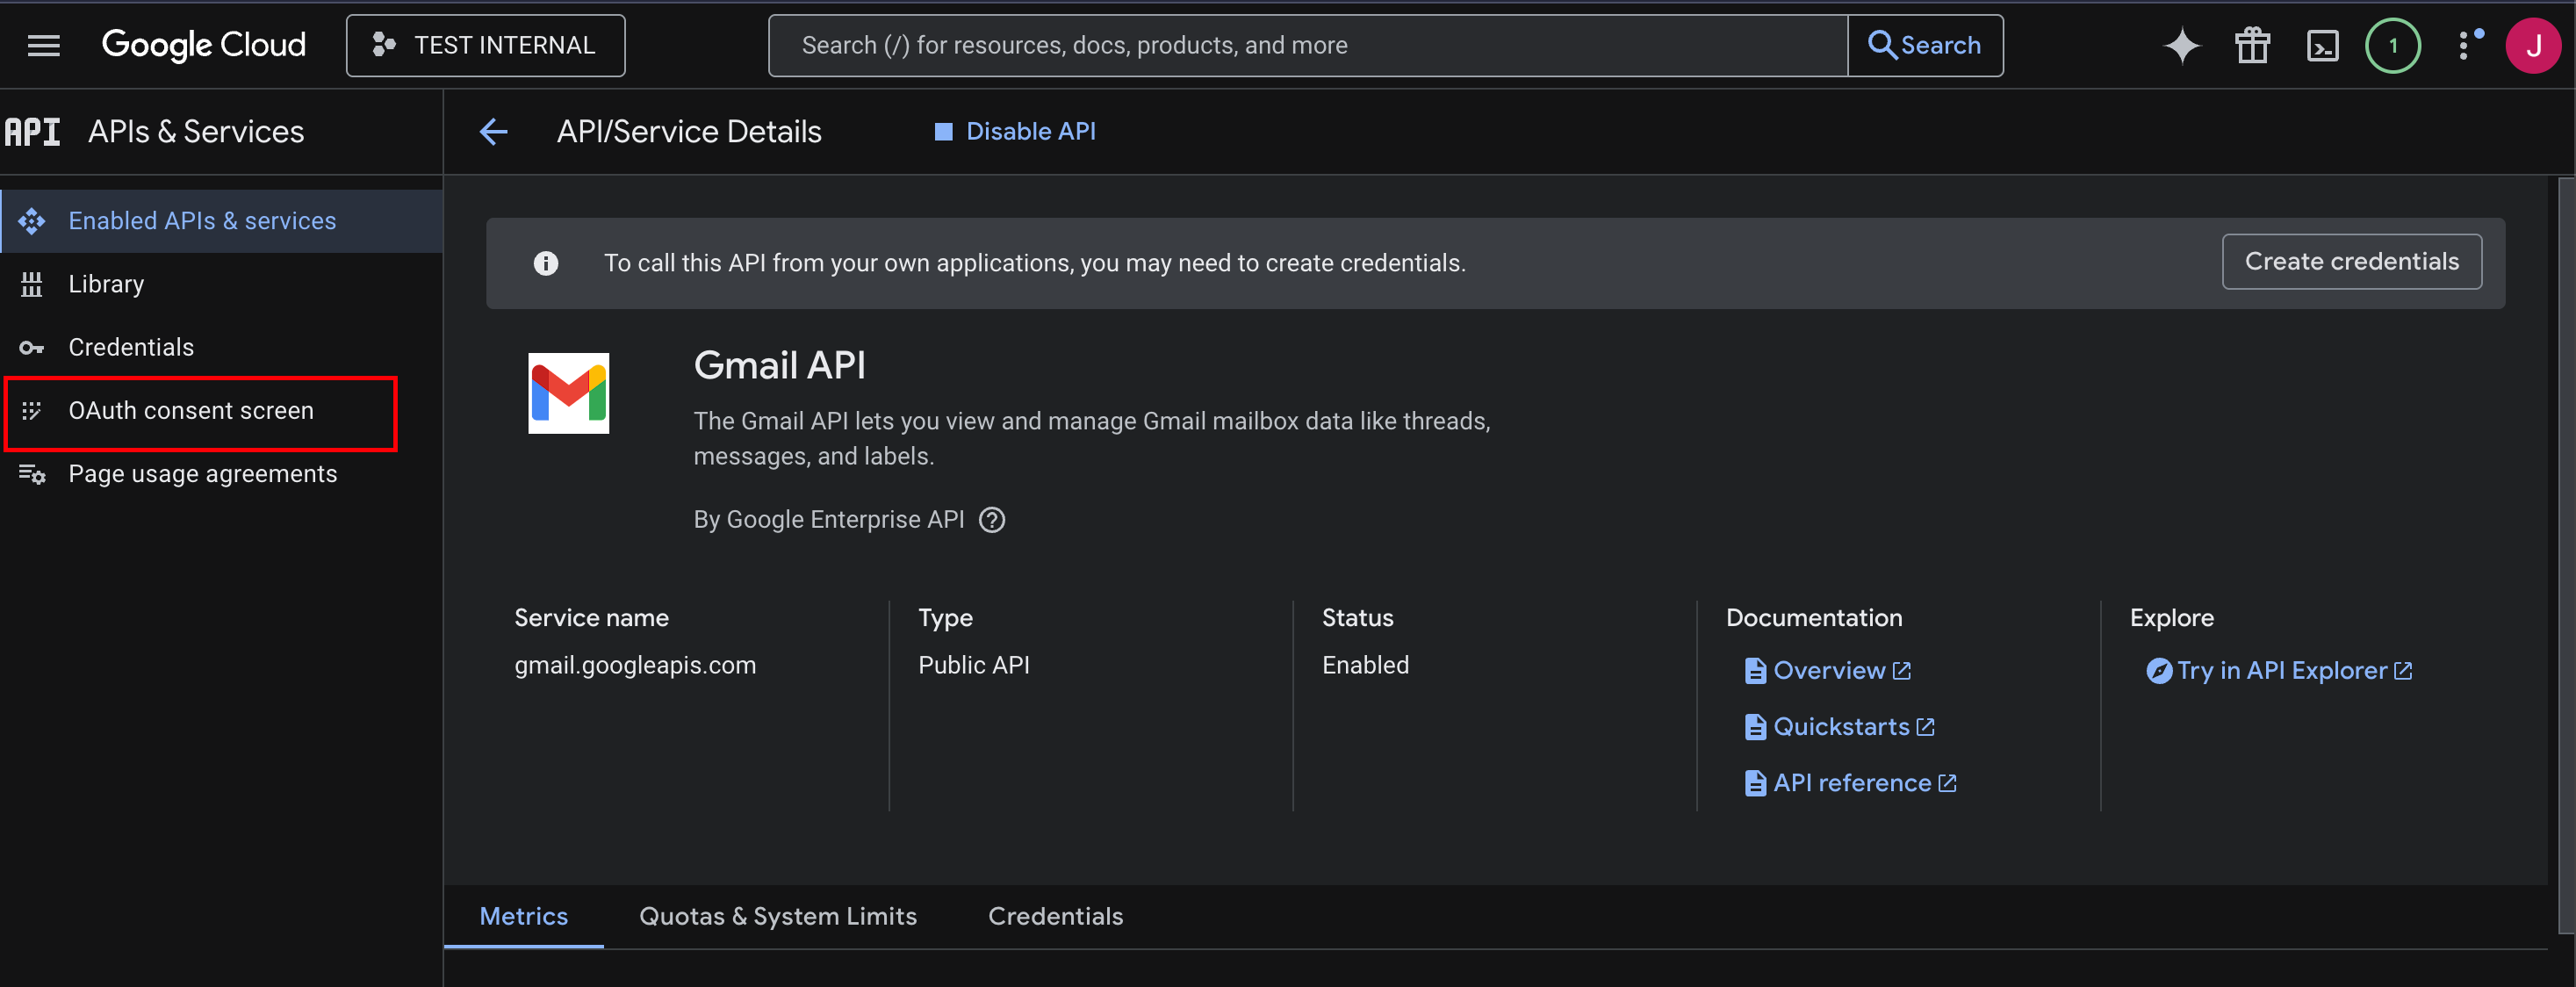
3. You will see a message indicating that the Auth Platform is not configured yet.
4. Click on Get Started.
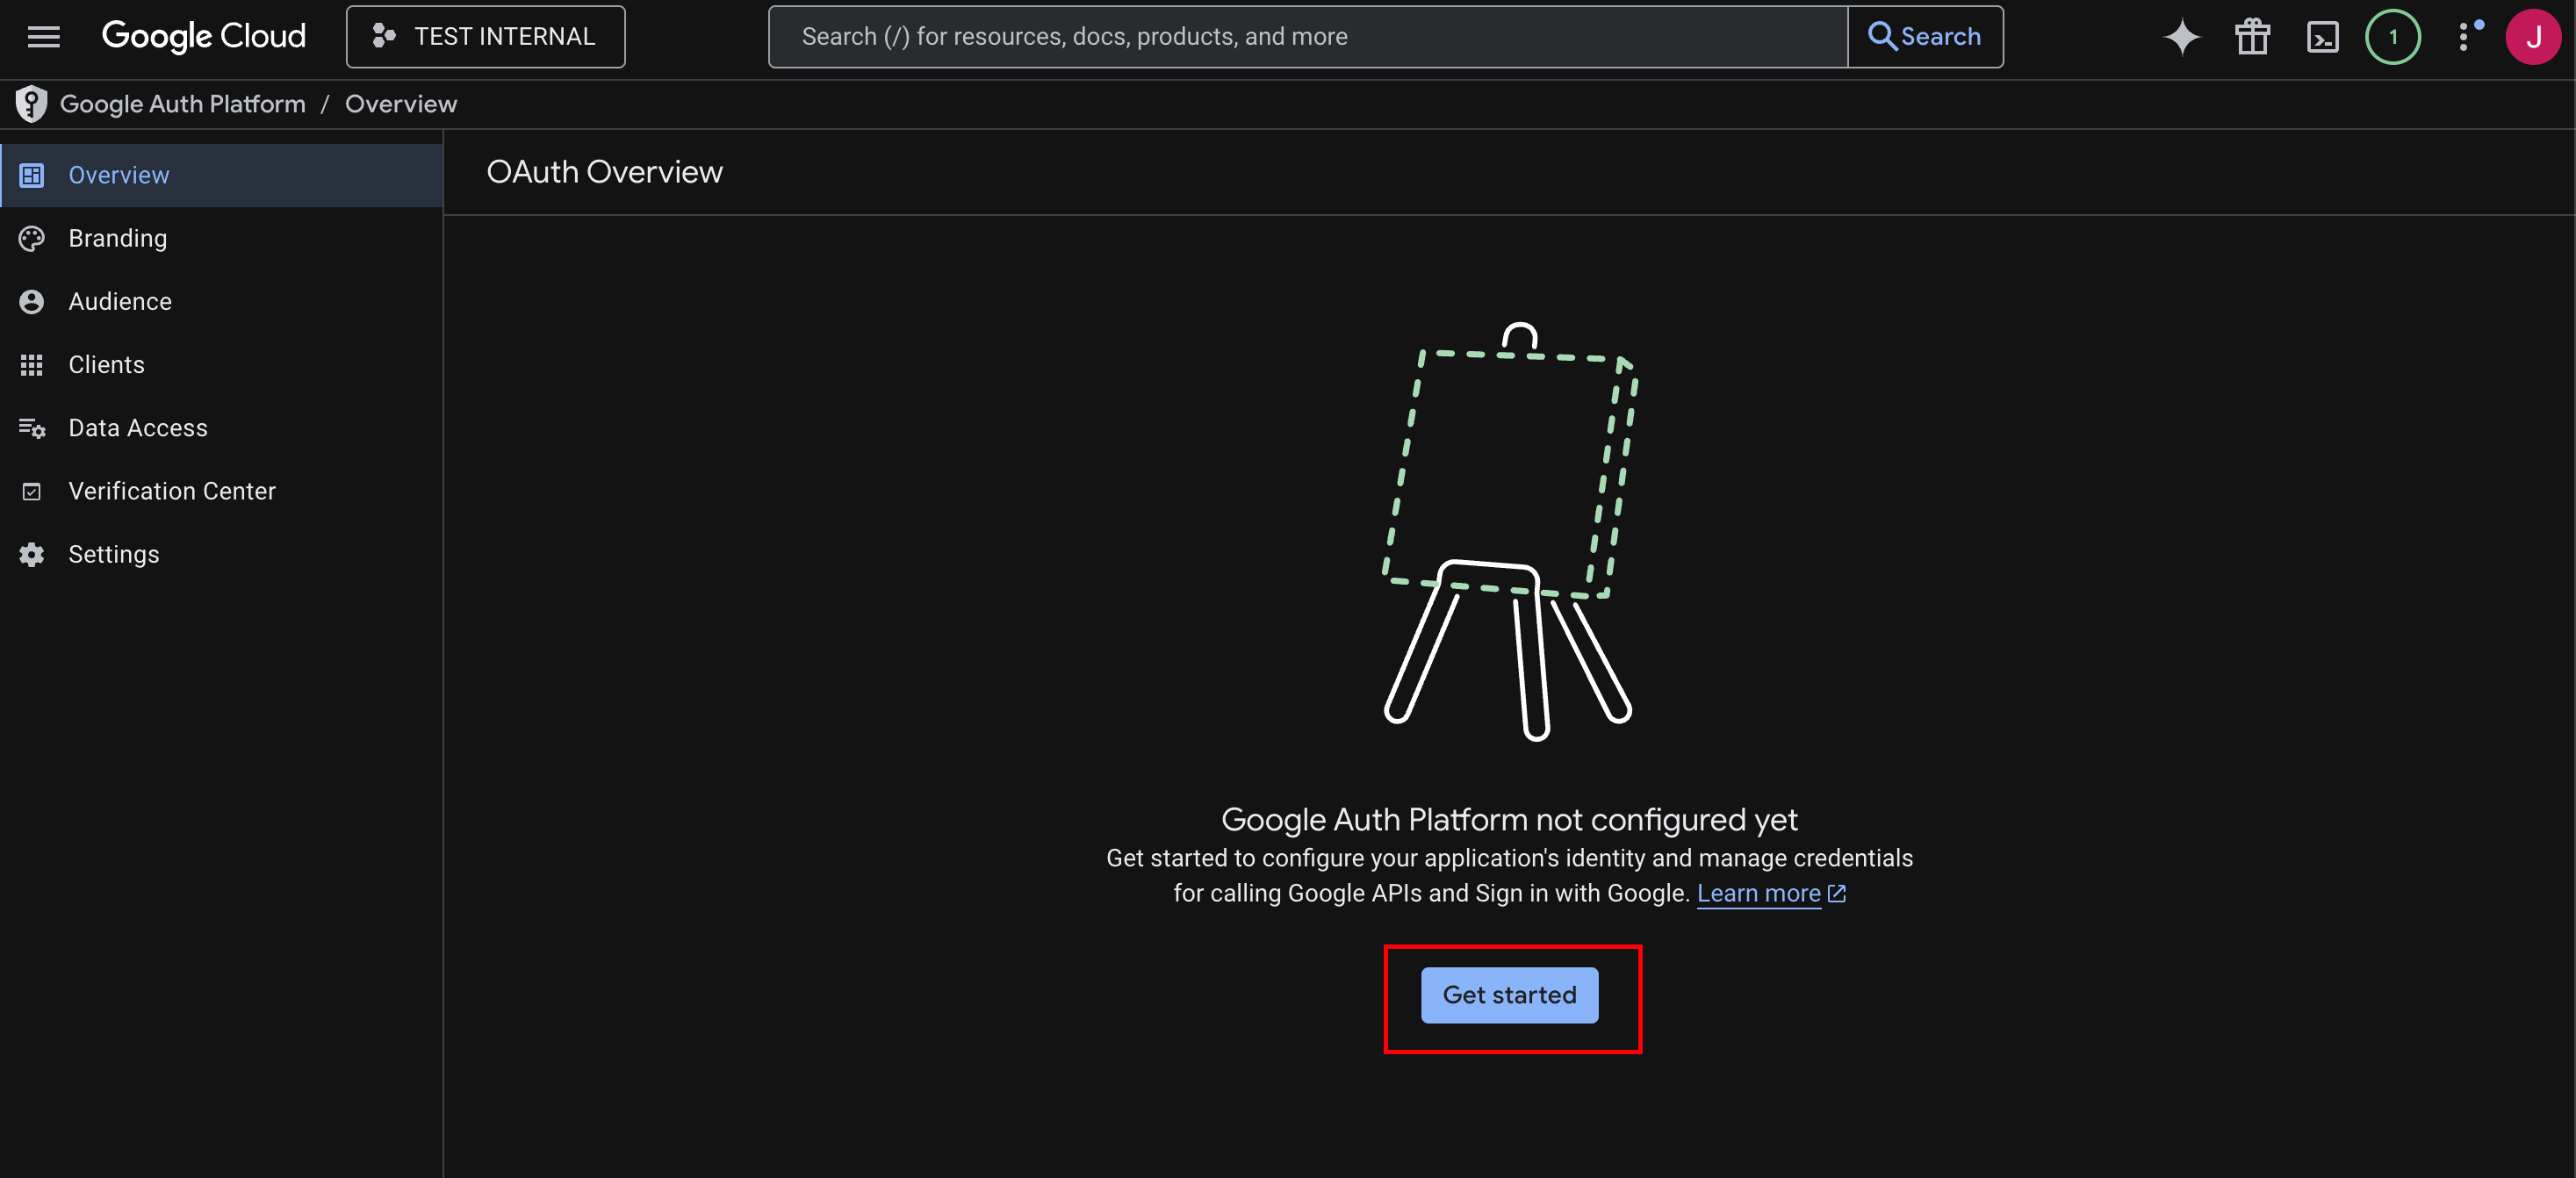
5. You will be redirected to the Project Configuration page where you can proceed to the next step.
Step 4:
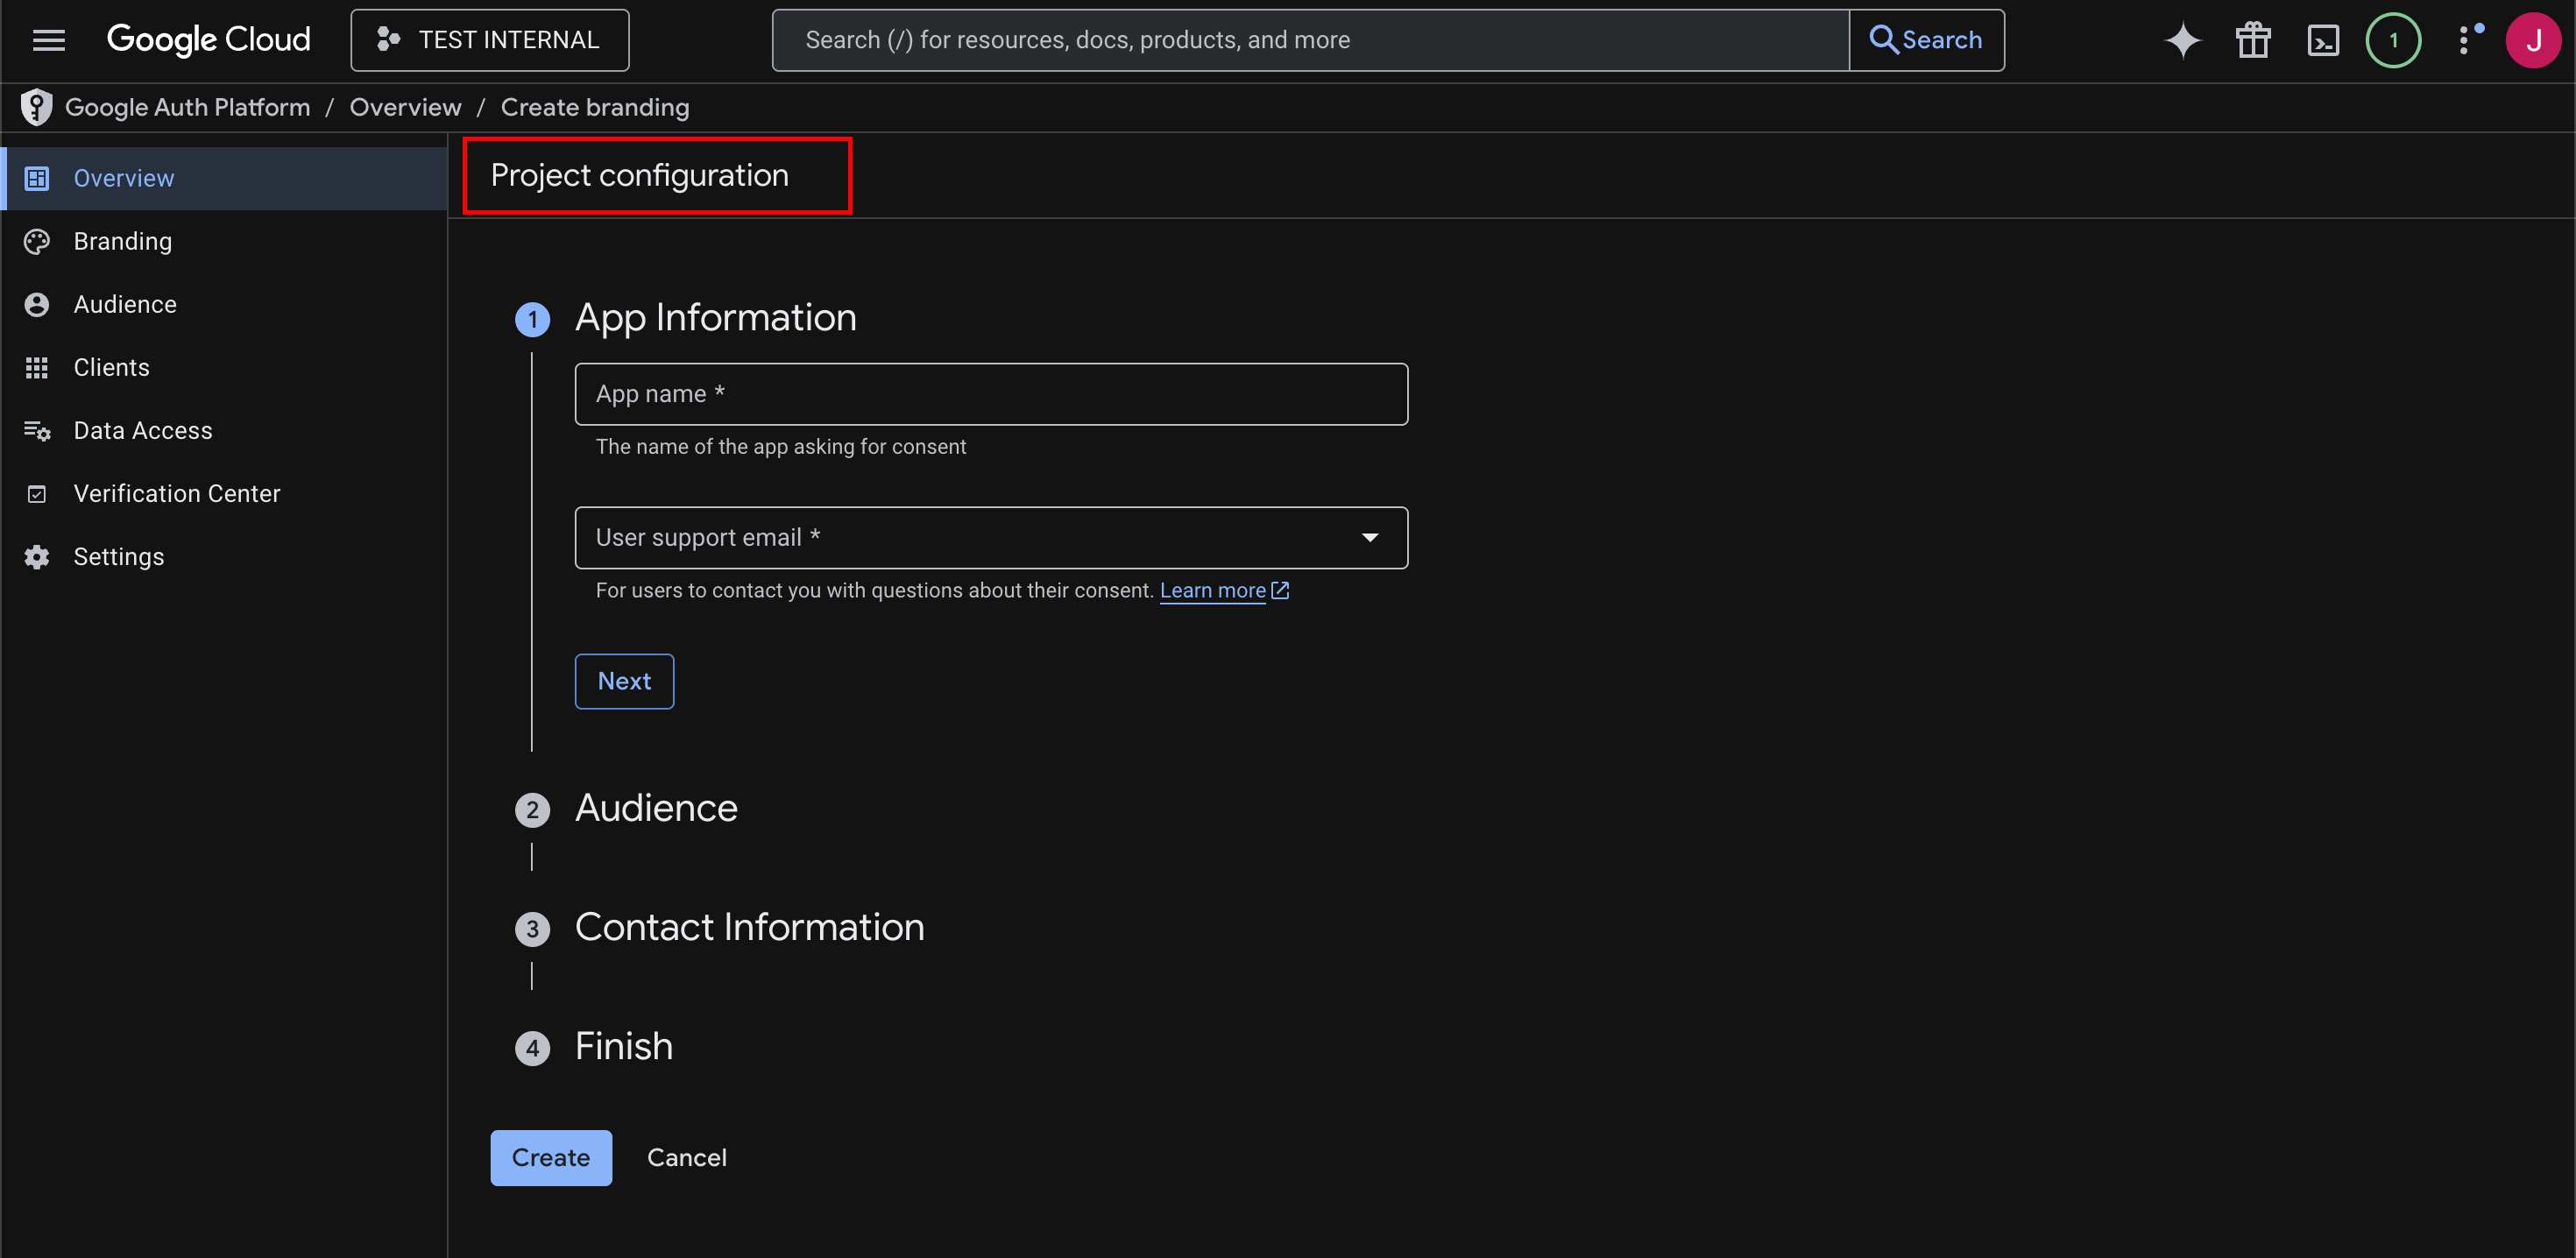
Complete the "Project Configuration" Settings
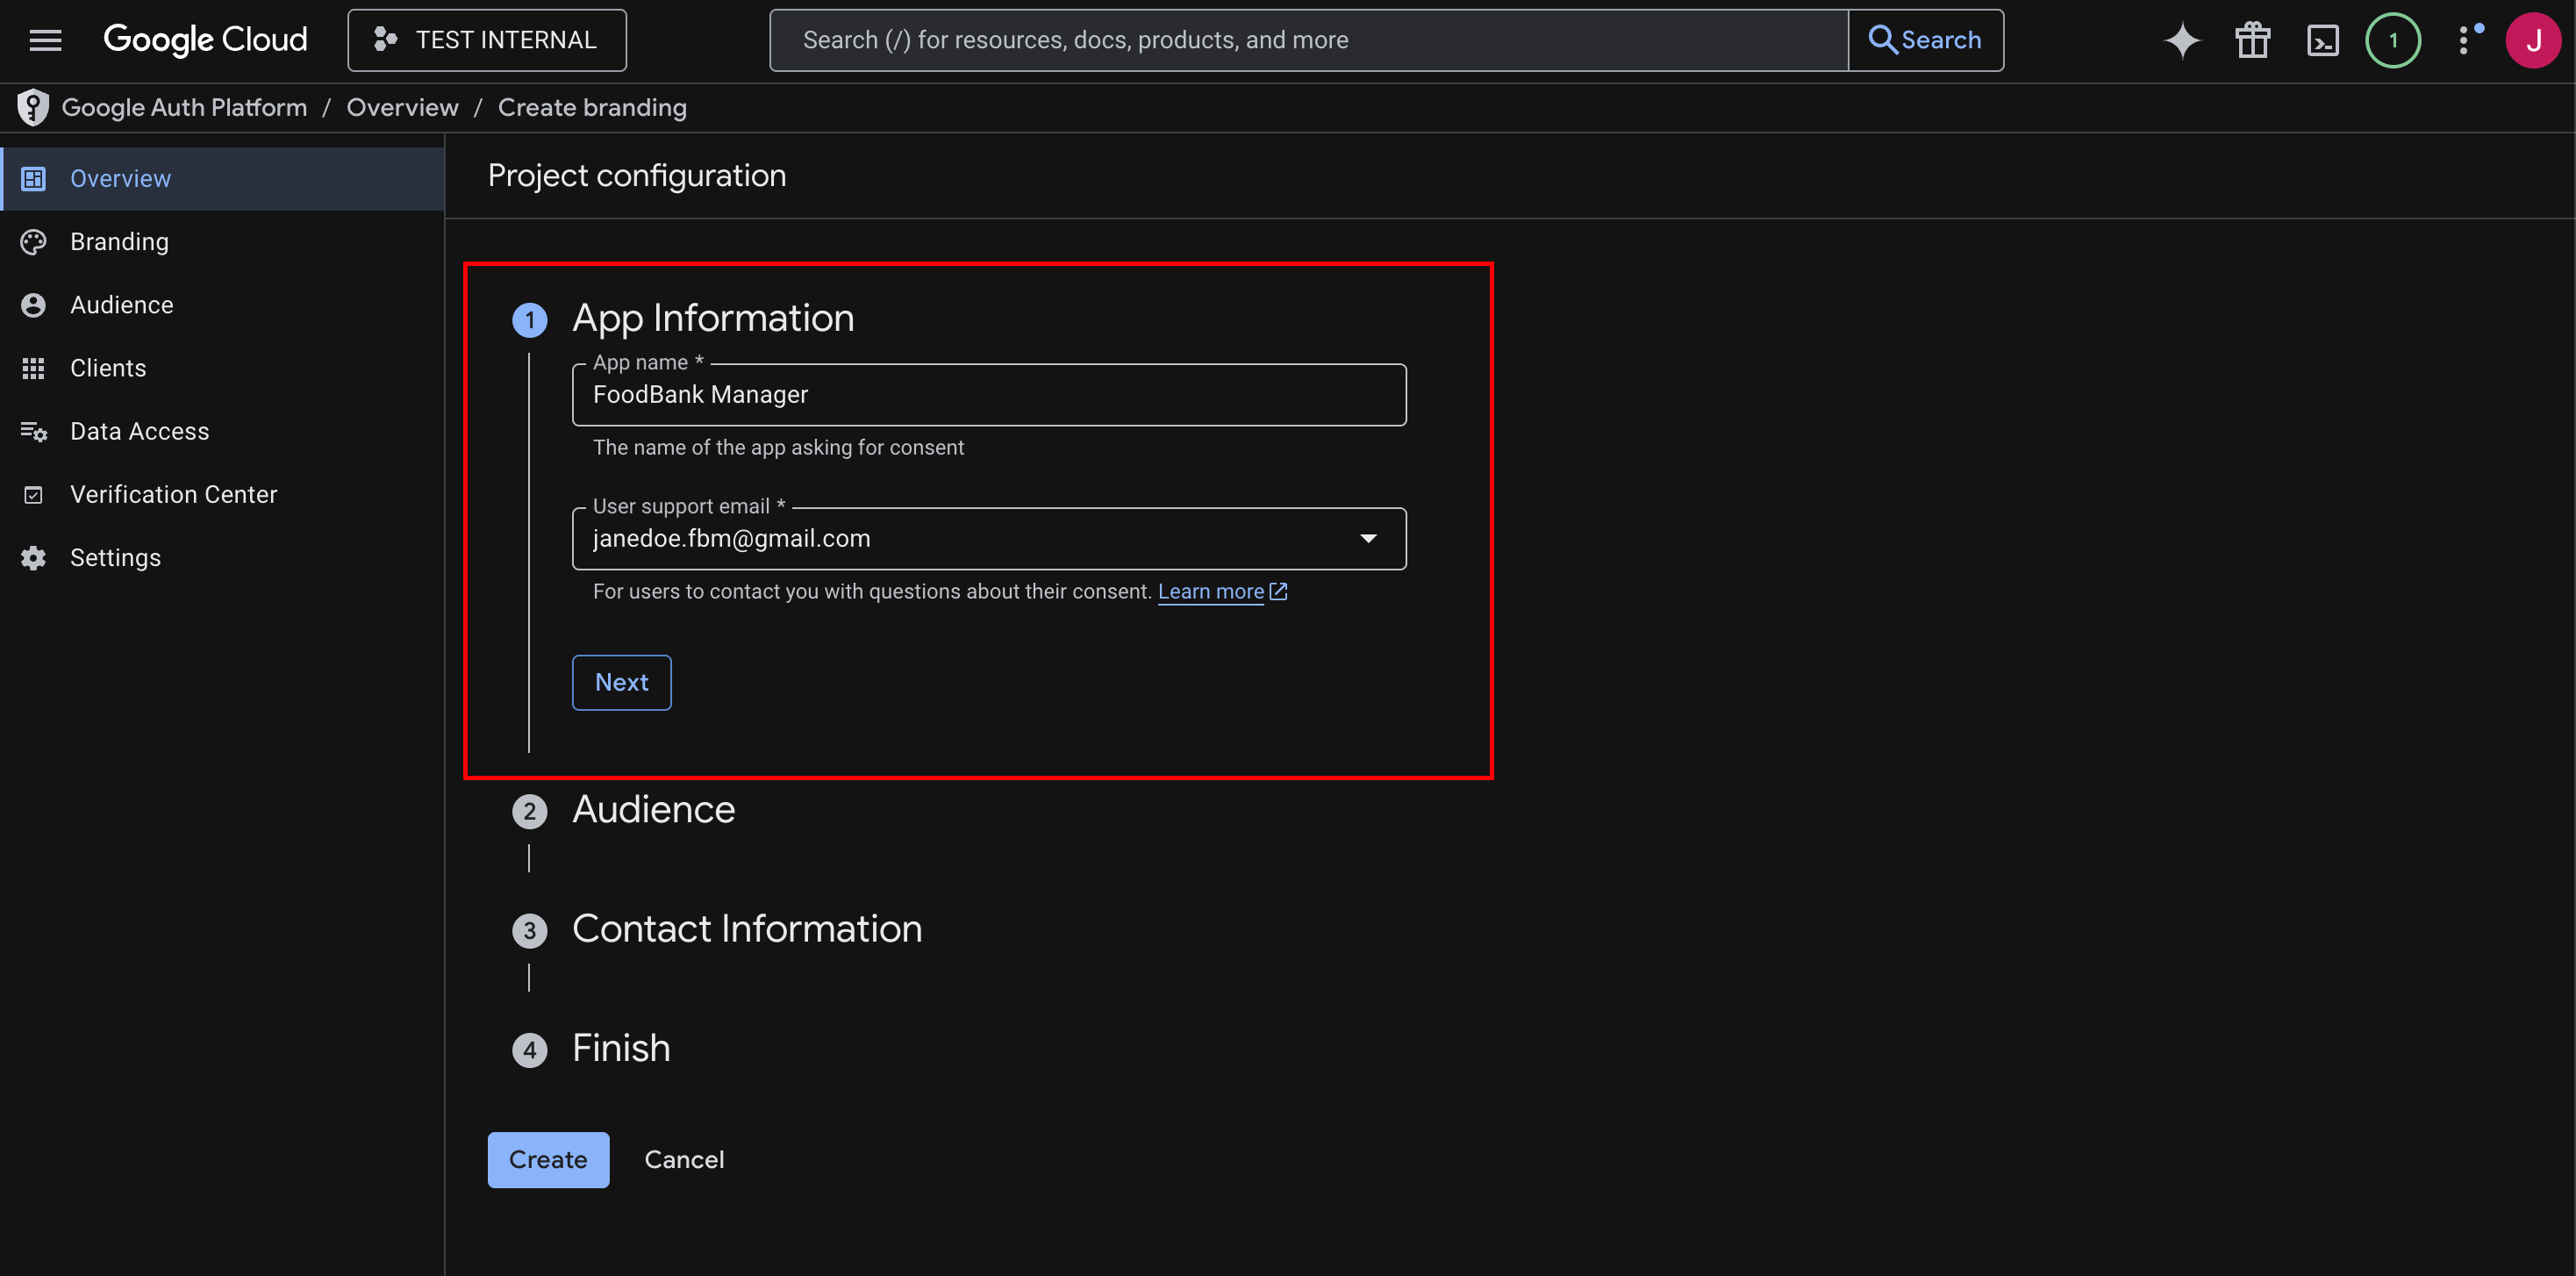
App Information
- Enter your preferred App Name for this project (e.g., FBM, foodbankmanager, etc.).
- Select a User Support Email in the dropdown menu.
- Click Next.
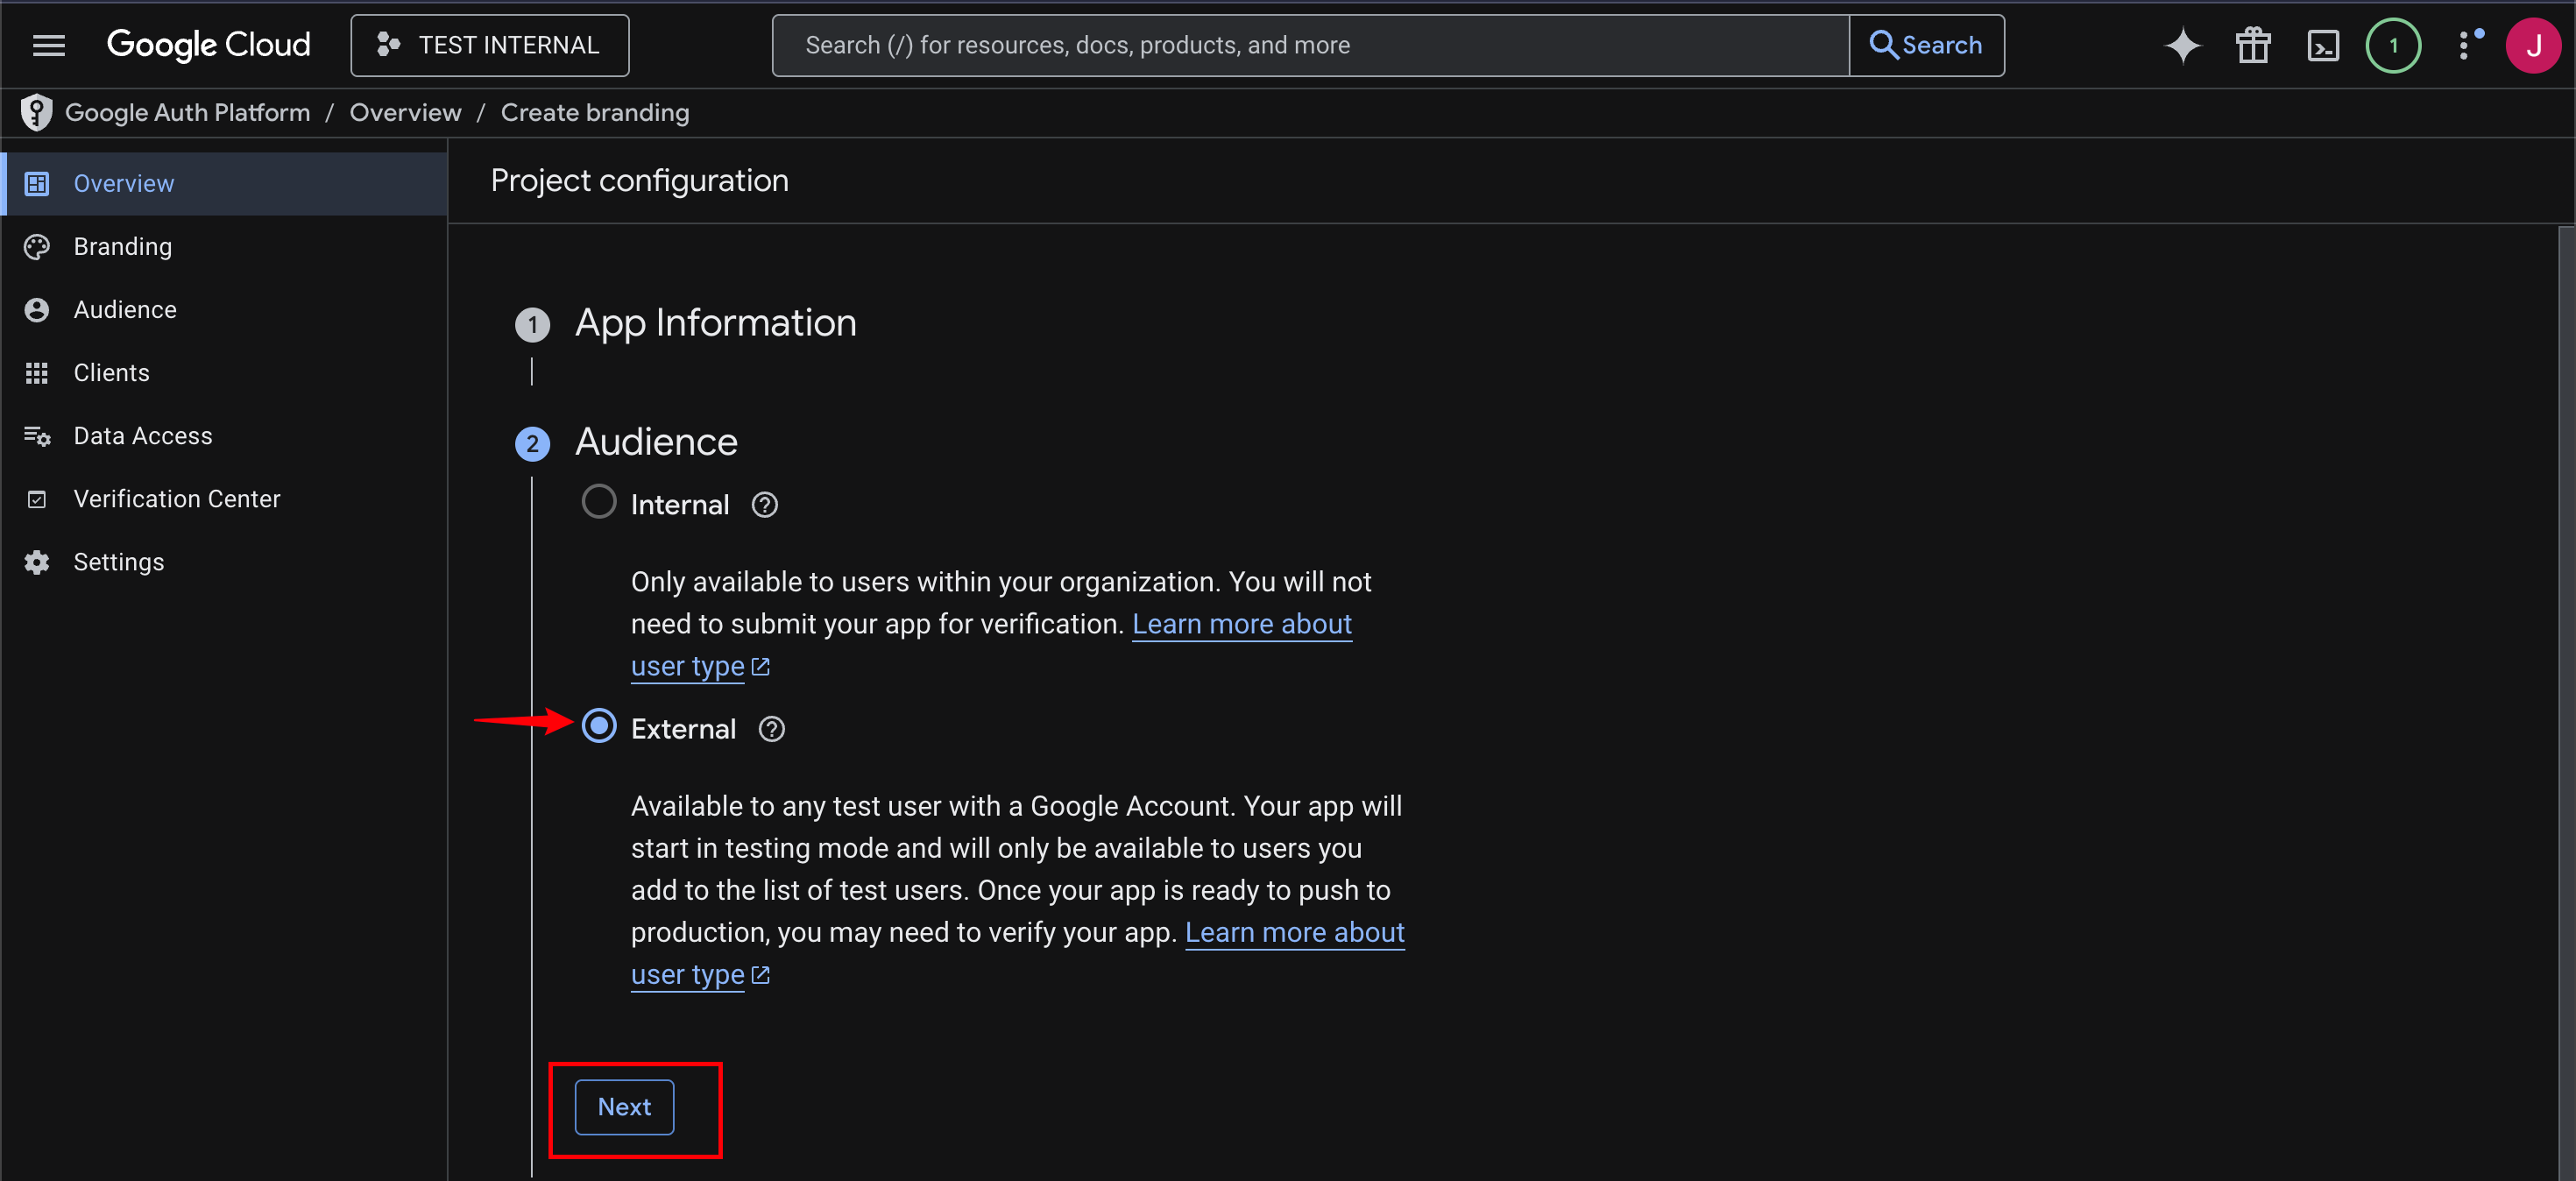
Audience Selection
You will now choose who can use the app. You will see two options:
Internal
- Choose this only if your organization uses a paid Google Workspace account (for example, a company email managed by your IT team).
- This option is usually not available if you are using a personal Gmail account.
- If you see this option disabled (greyed out), that is normal.
External
- Choose this if you are using a regular Gmail account (for example, youremail@gmail.com).
- This is the correct option for most users.
For this setup, select External. Then click Next to continue.
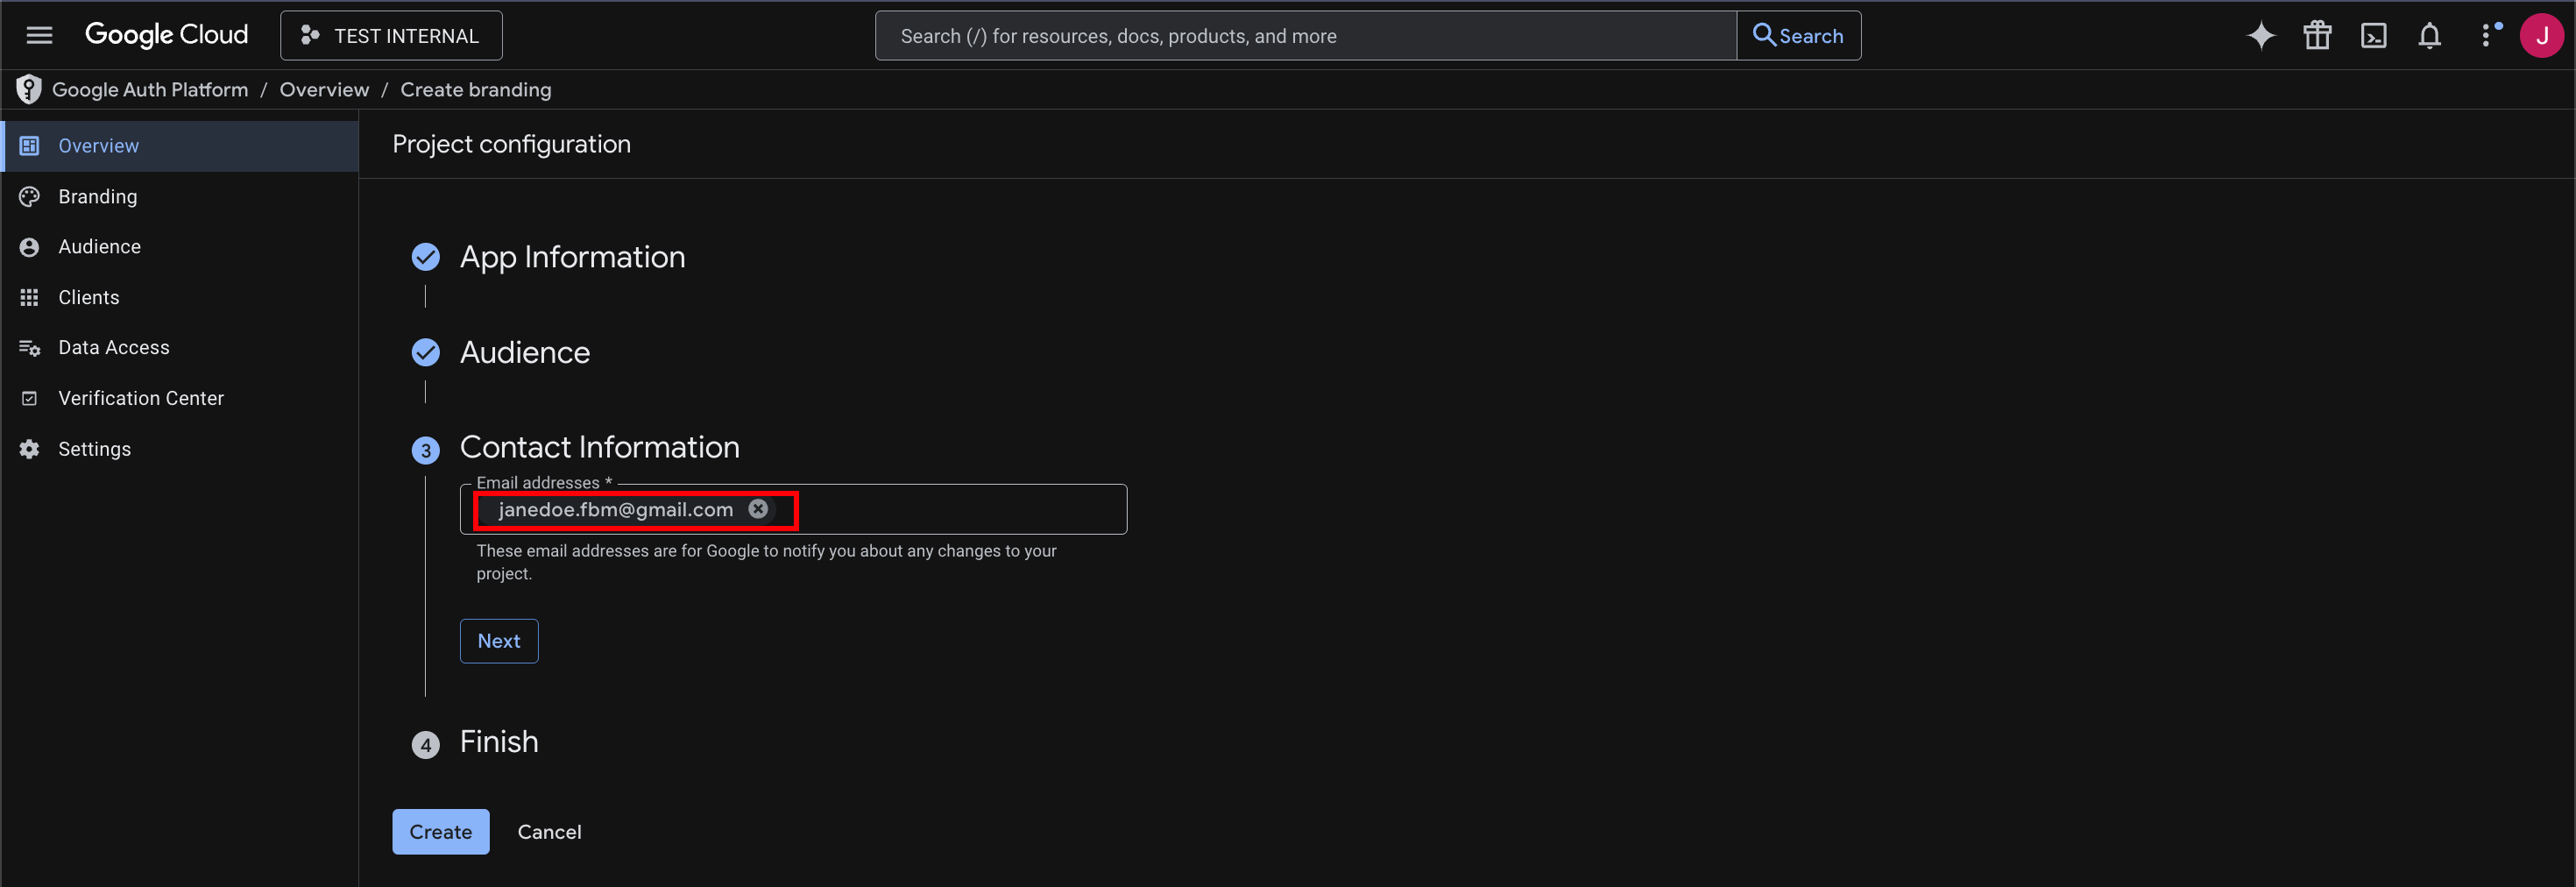
Contact Information
- Enter your Email Address and click Next.
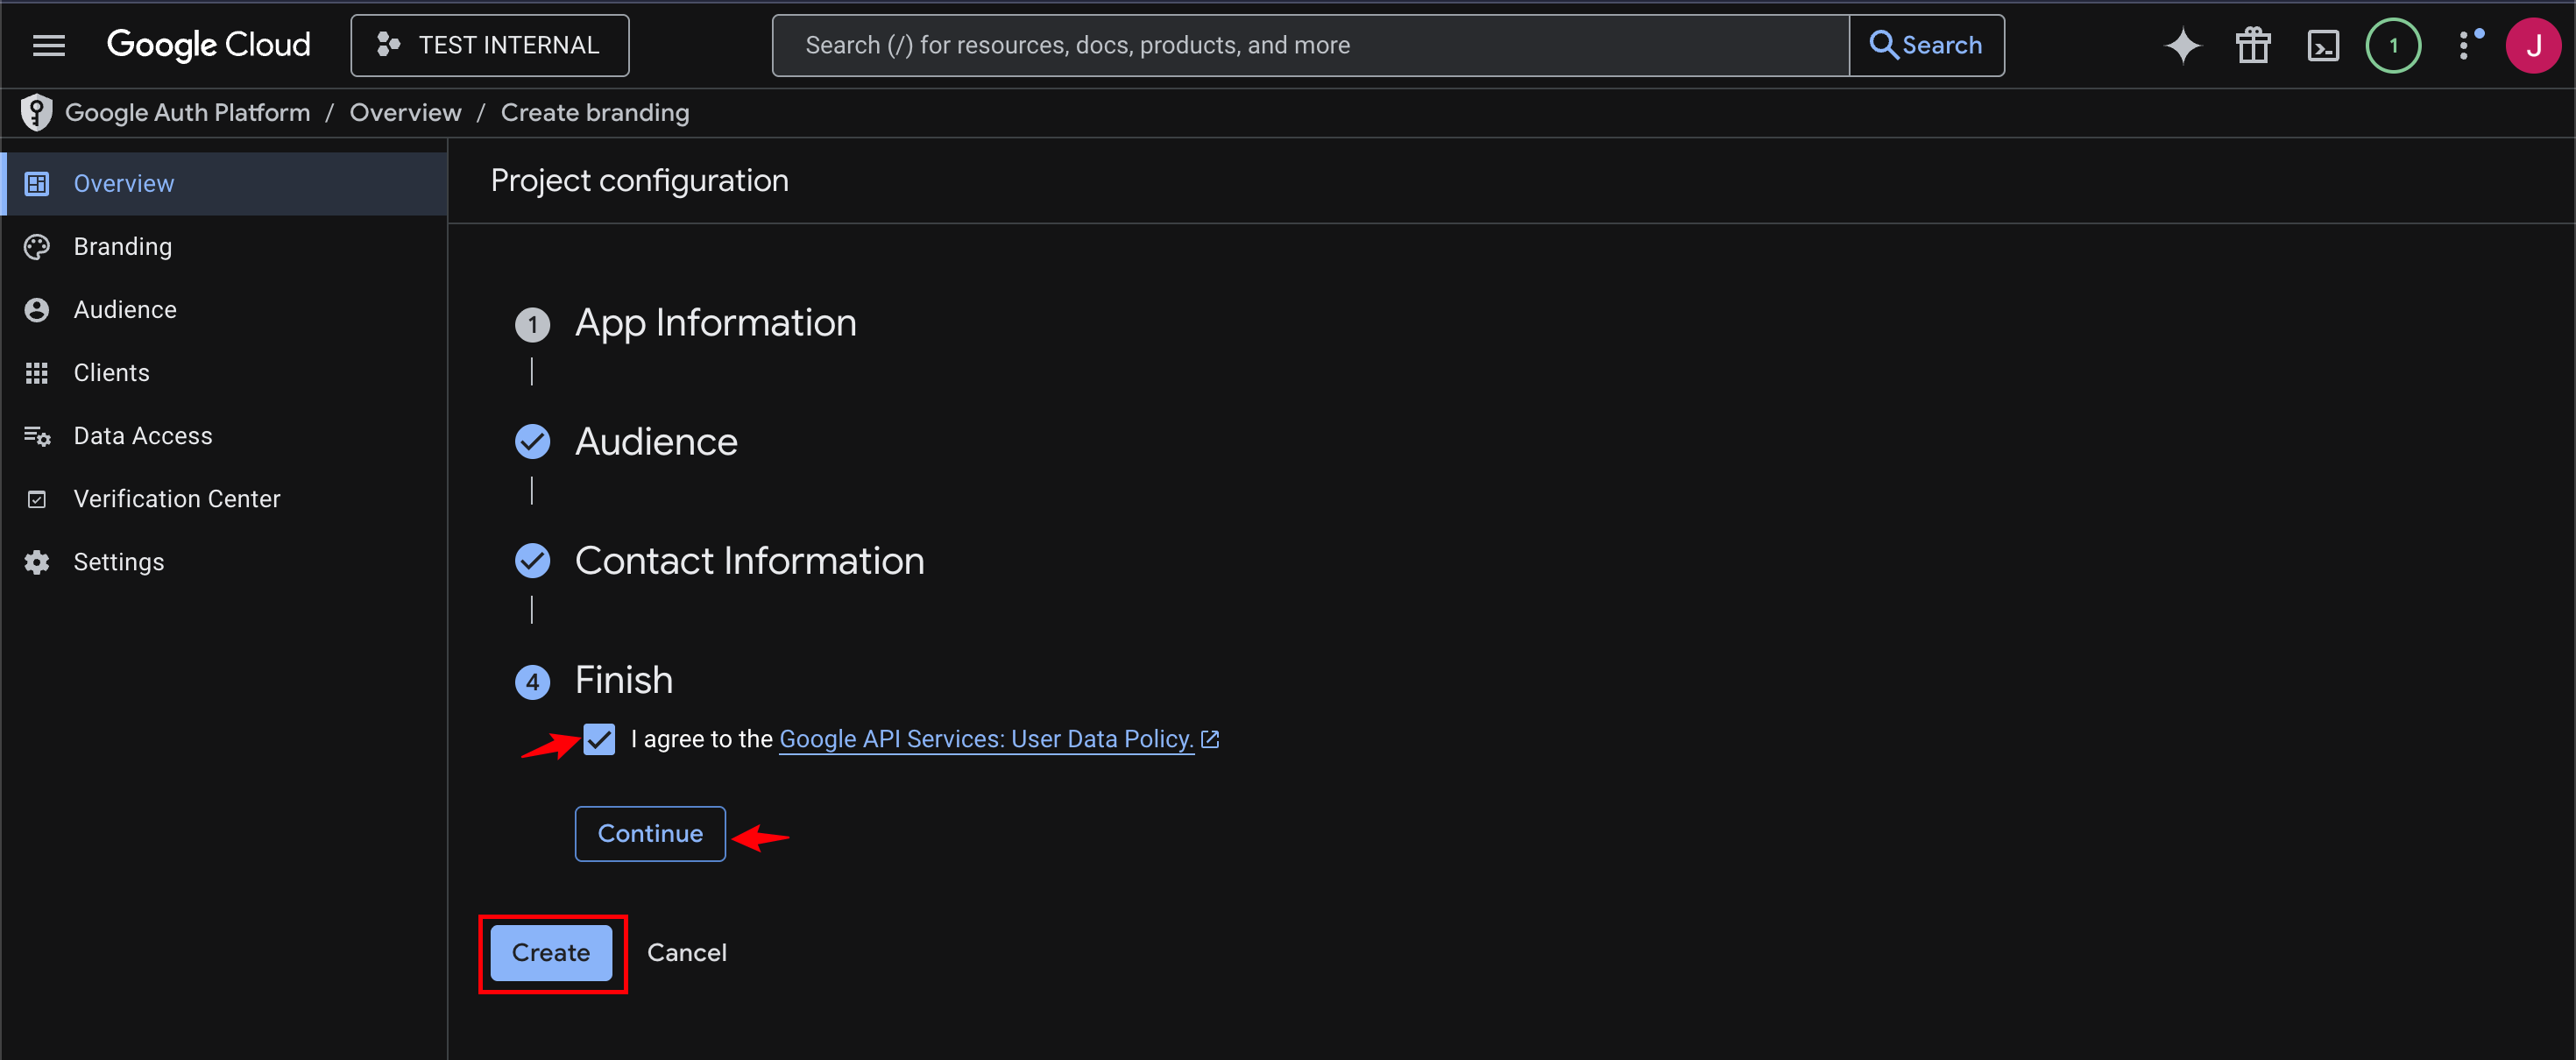
- Review the User Data Policy.
- Check the box to confirm that you agree to the policy.
- Click Continue and Create.
Once this process is completed, you will be redirected to the OAuth Overview page. From there, proceed to the next step.
After clicking Create, you will automatically be taken to the OAuth Overview page where you can continue for the next step.
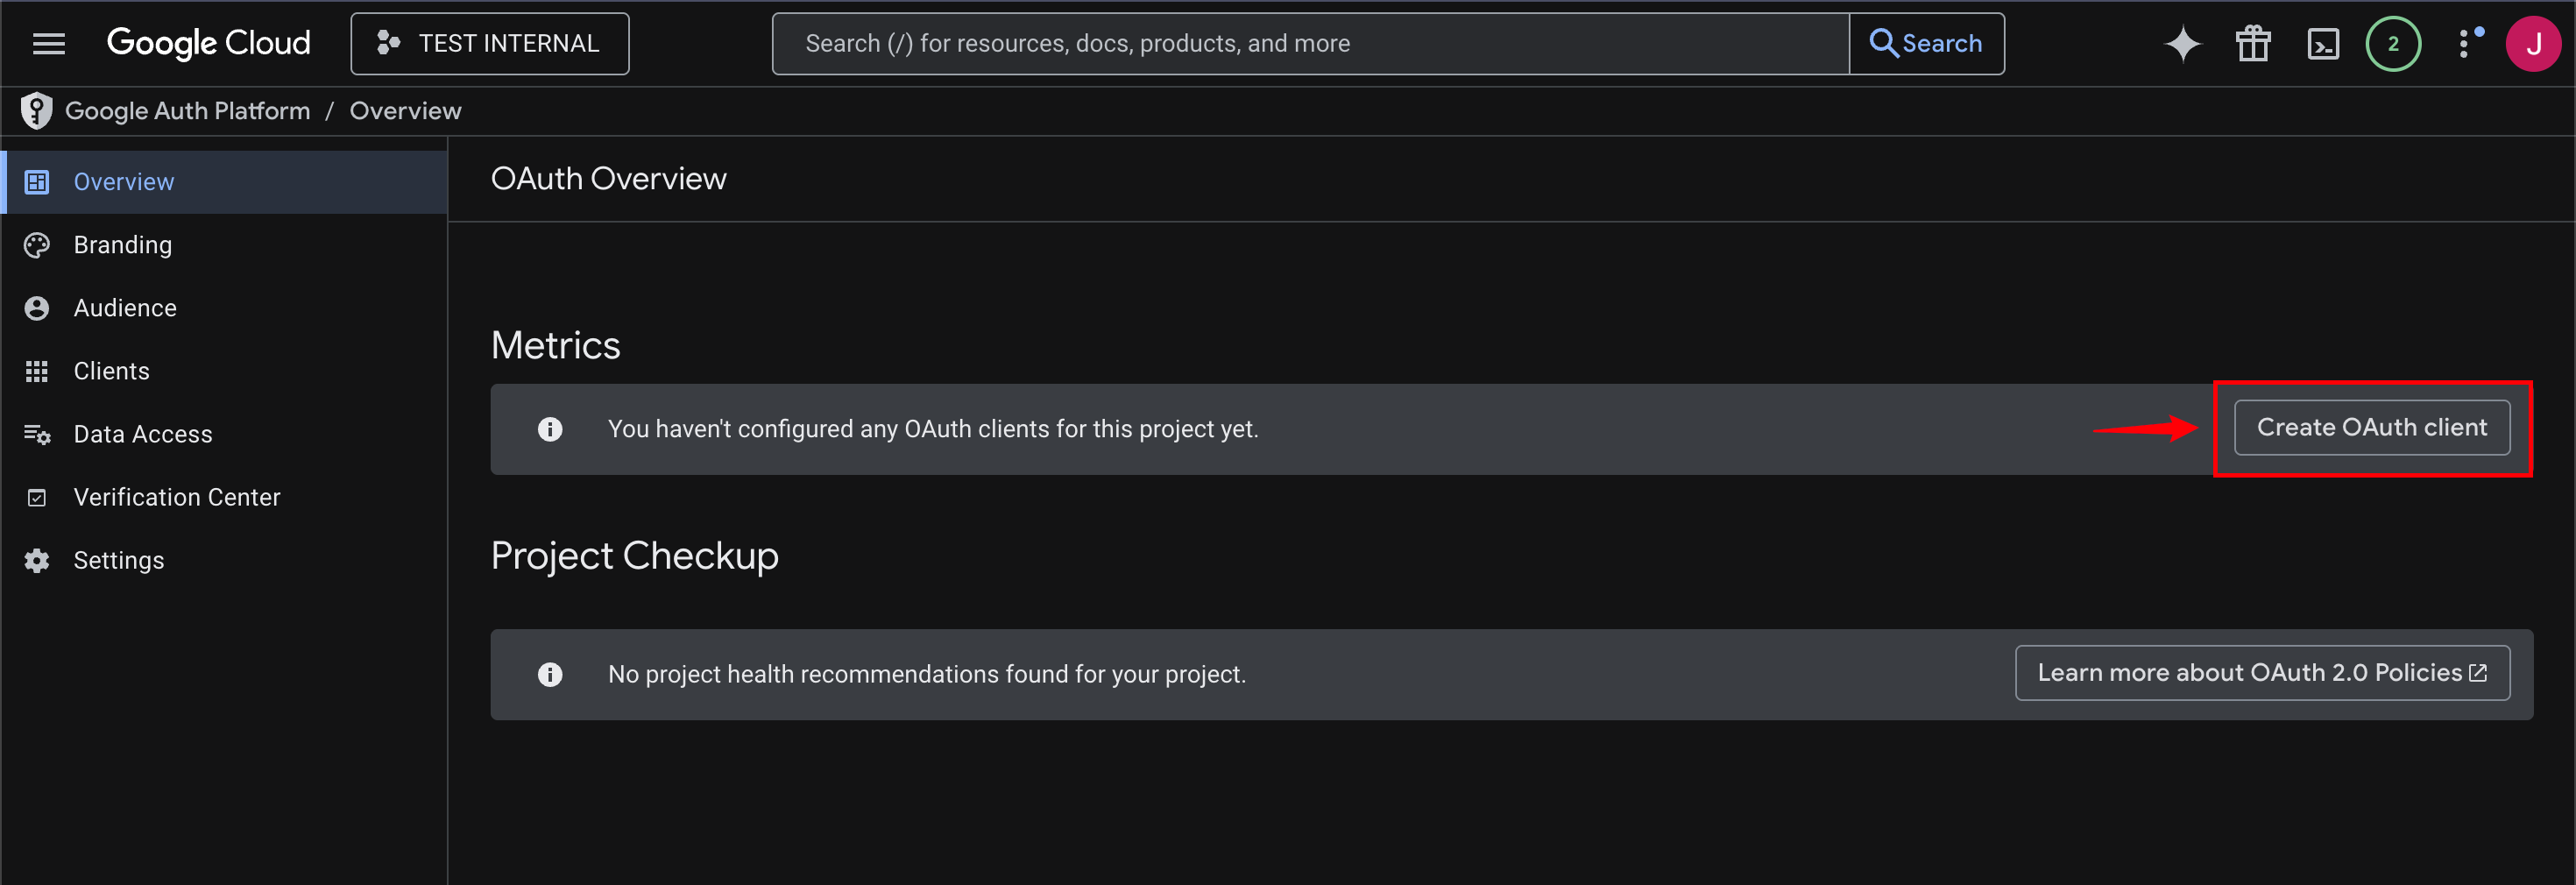
Step 5:
Create the OAuth Client (Client ID & Secret)
Under the Metrics section, click the Create OAuth client button.
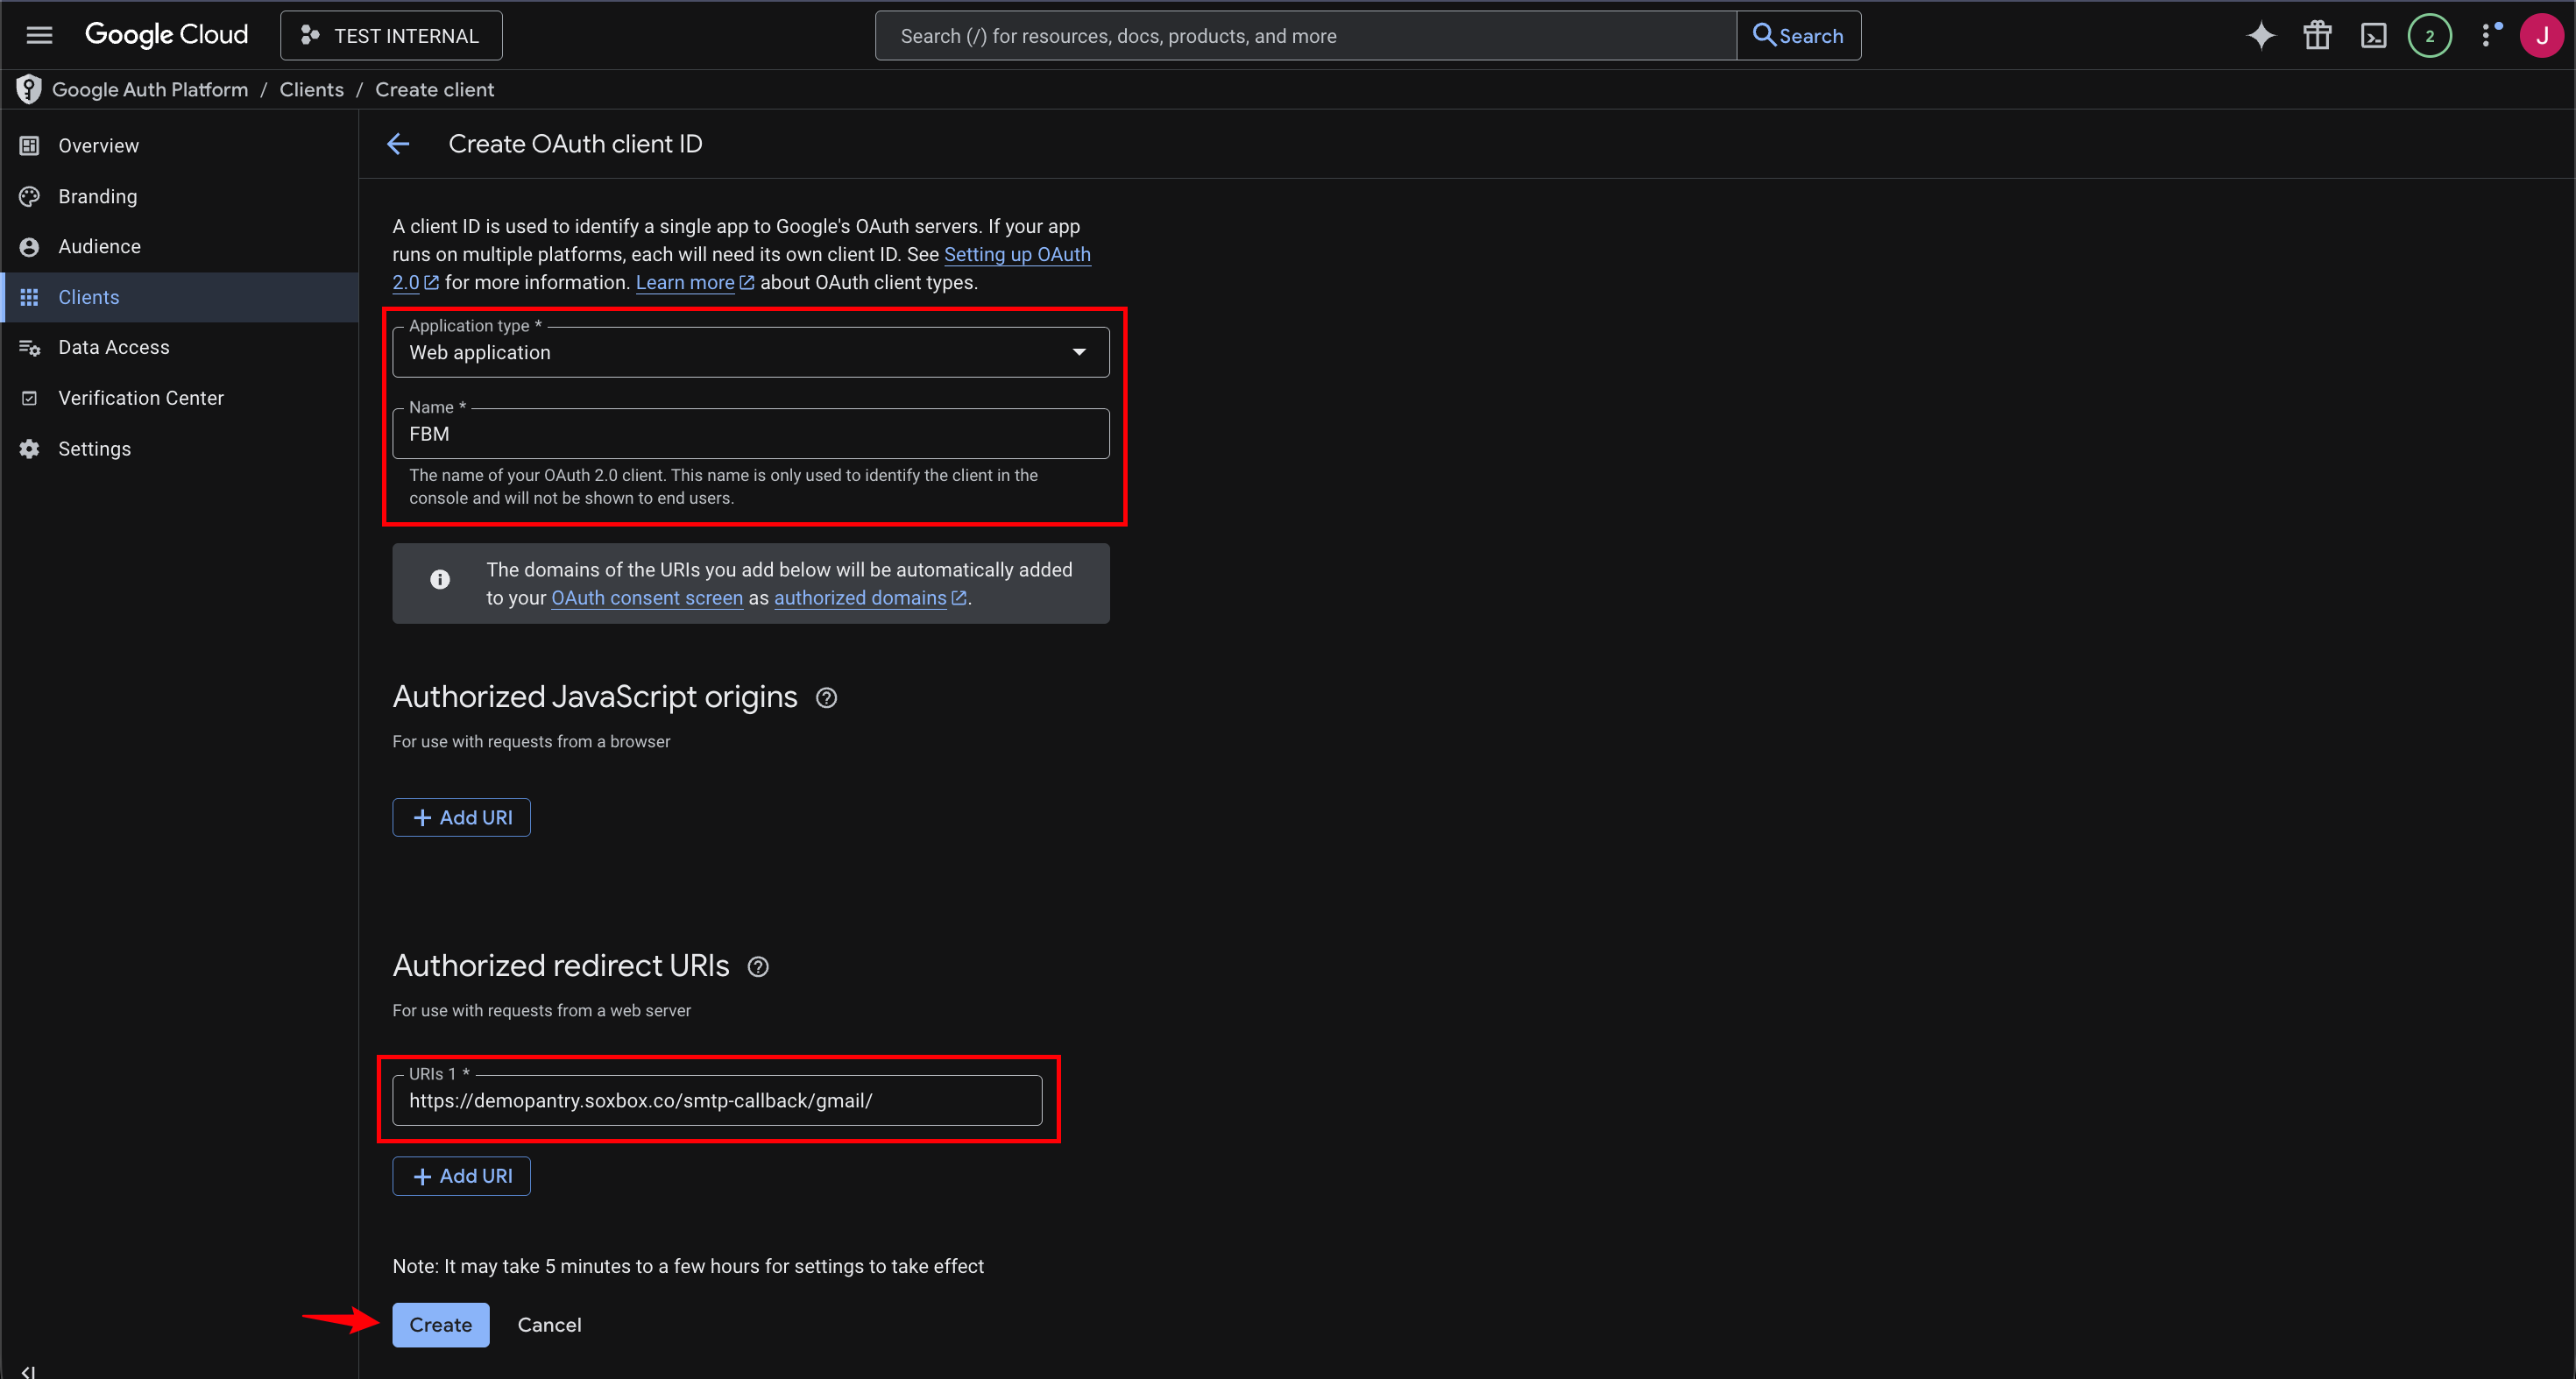
- Set “Application type” to “Web application”
- Set a name
- Go to “Authorized redirect URIs” and enter the following information:
- https://yourdomainname.soxbox.co/smtp-callback/gmail/ (replace yourdomainname with your actual fbm pantry url name)
- Click Create
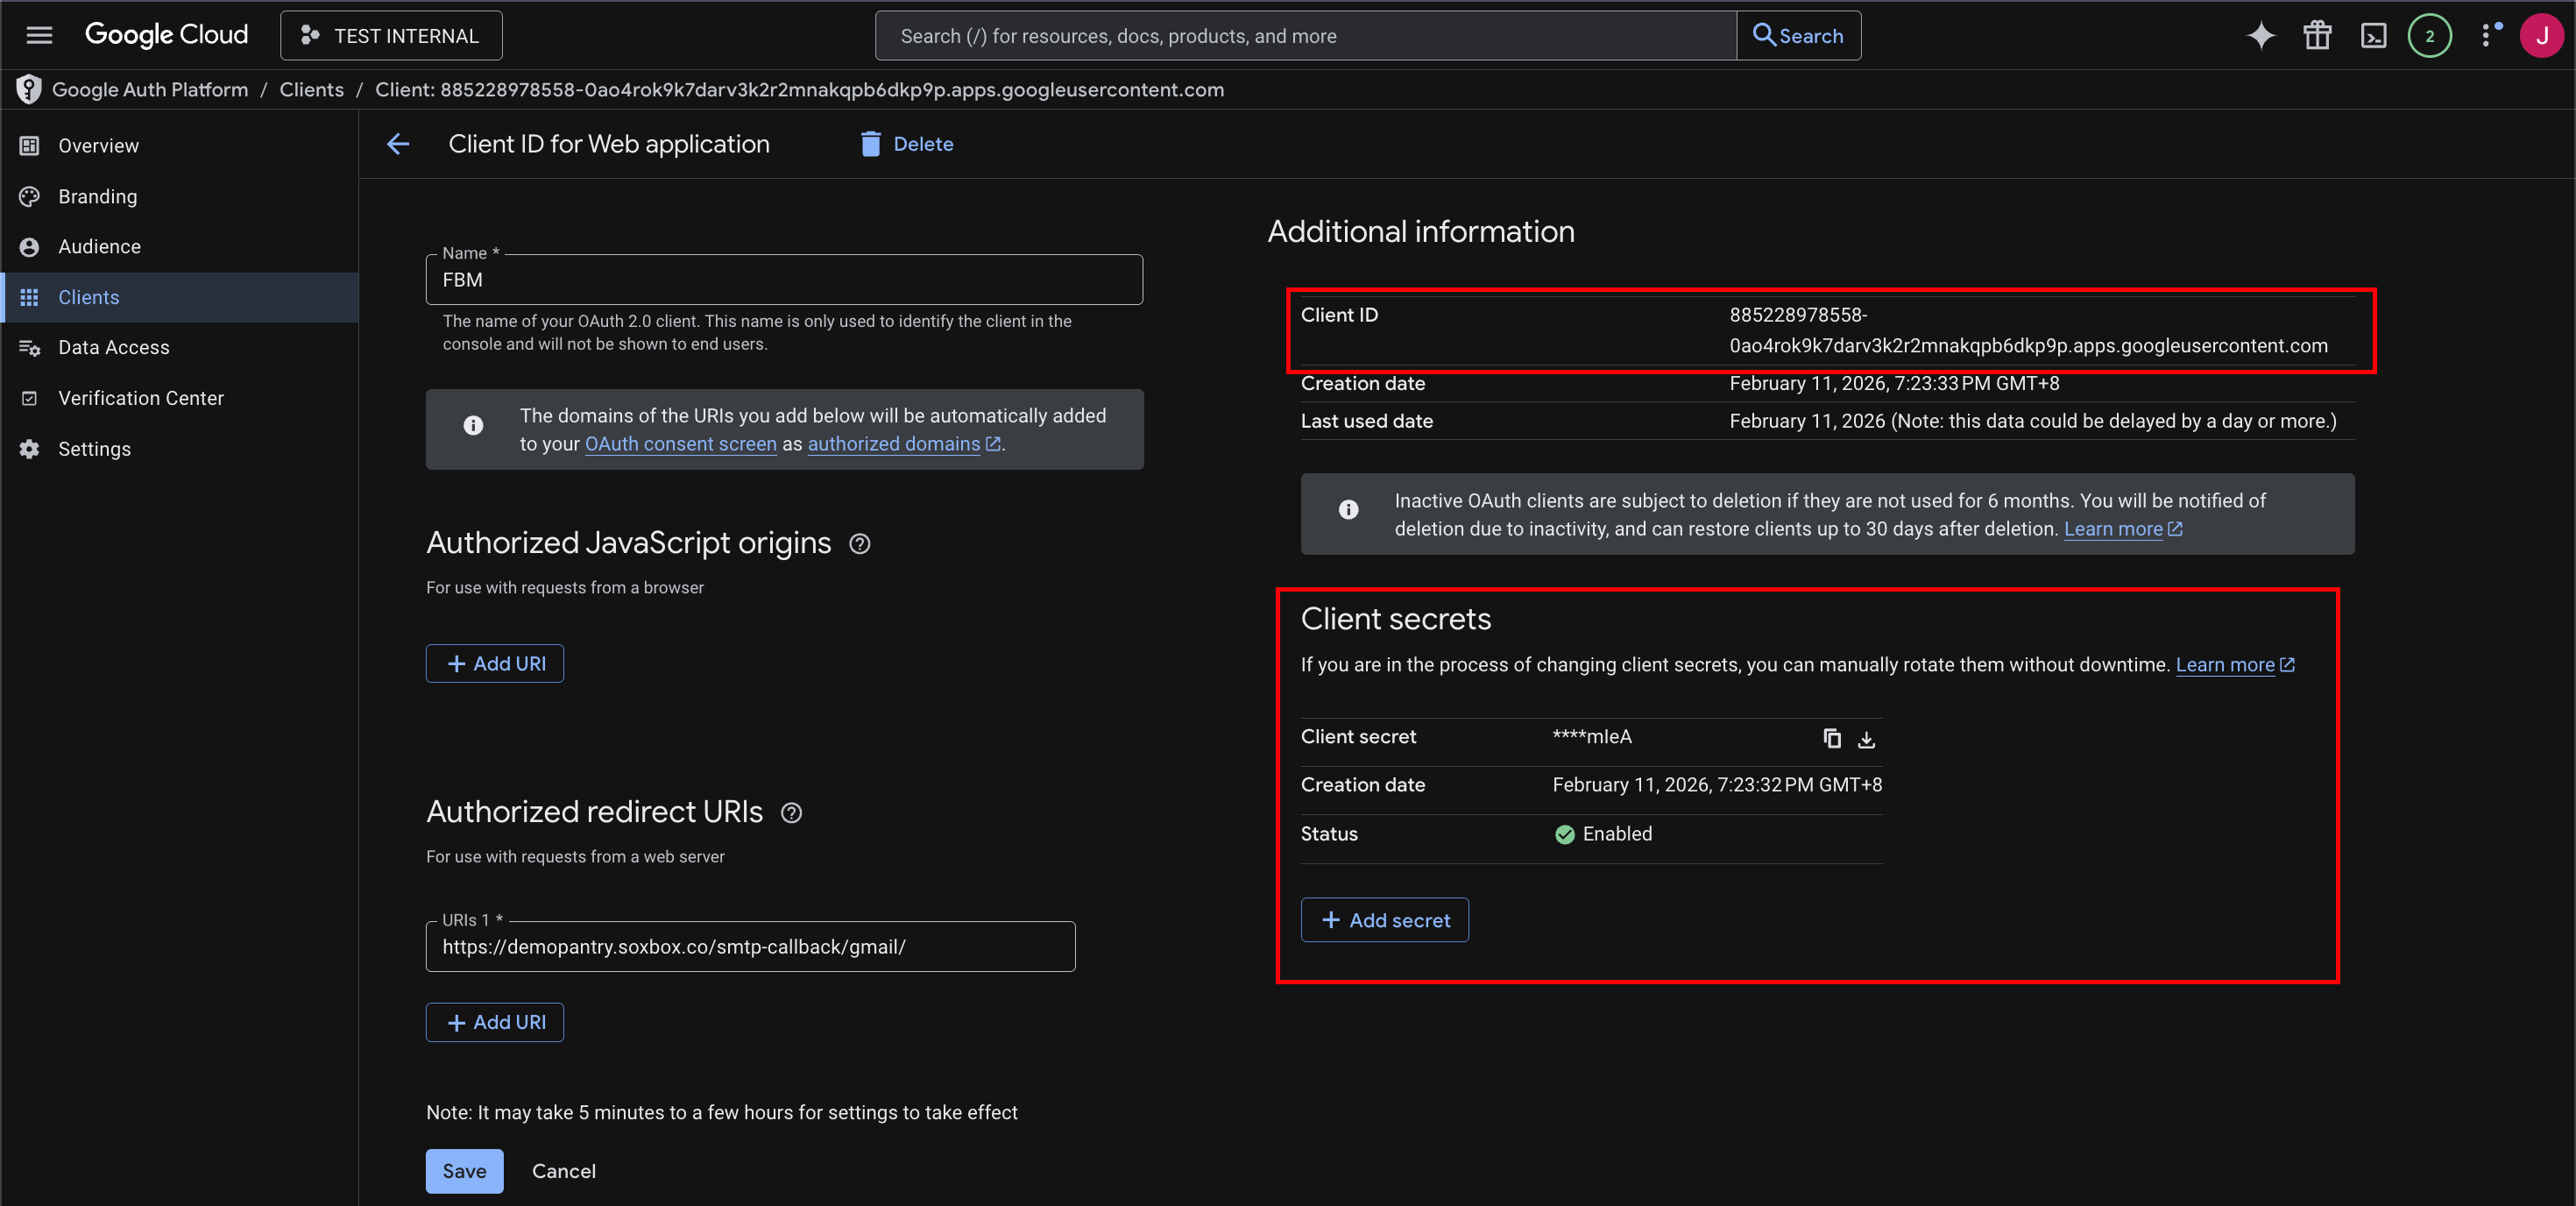
A popup will appear showing:
- Client ID
- Client Secret
Copy both values and save them somewhere safe. You will need them in FBM .

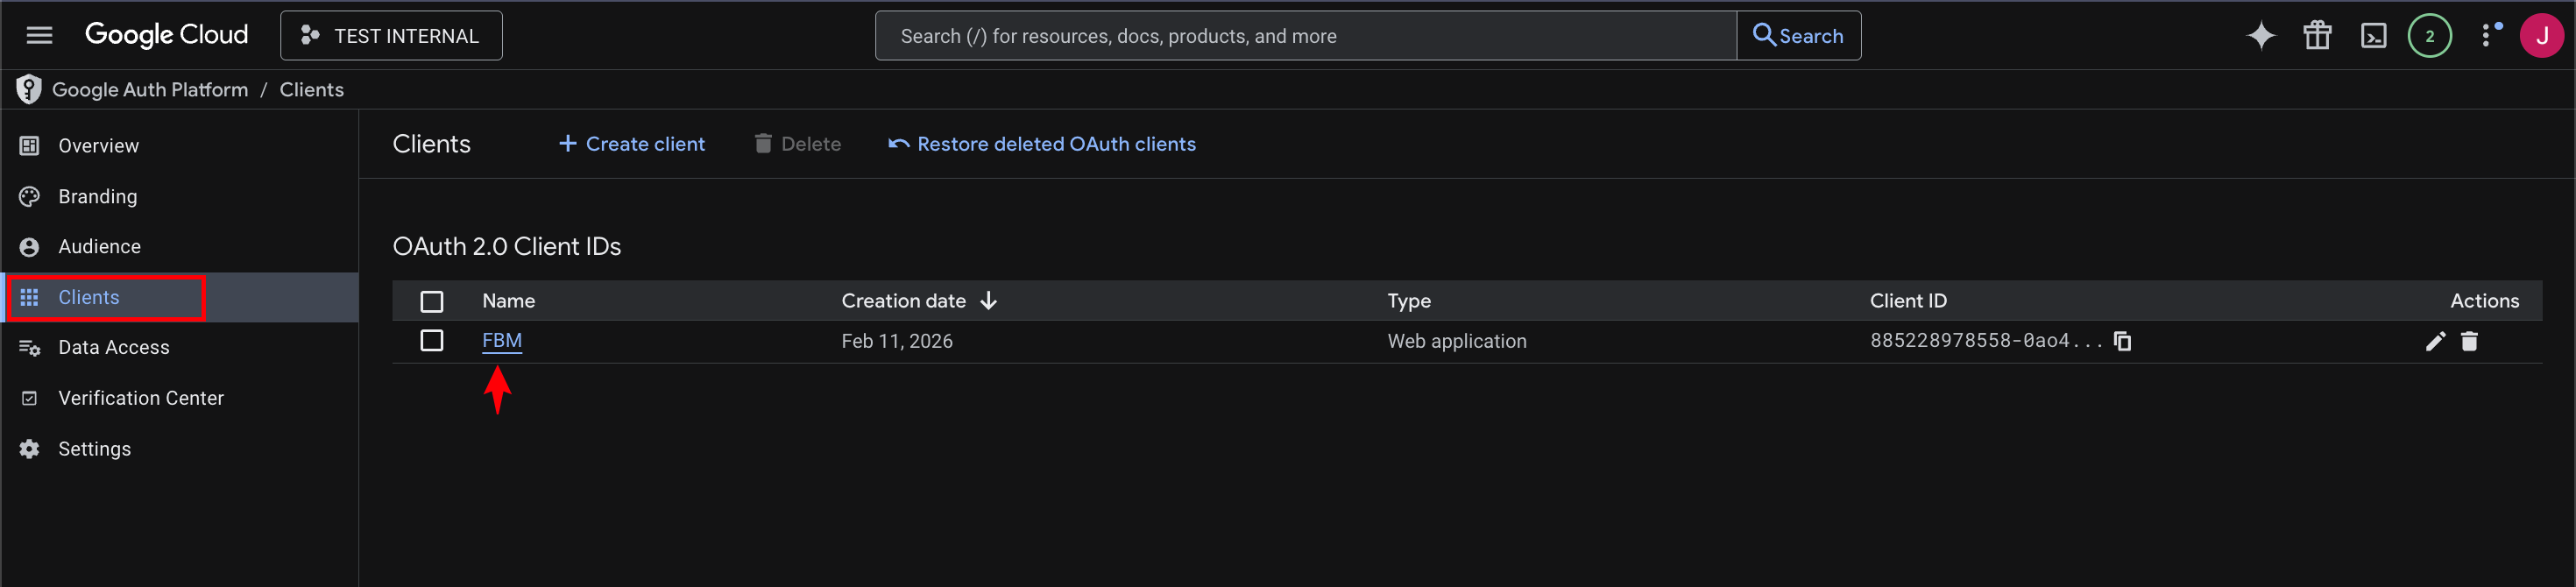
Note: If the Client Secret is not displayed in the popup (like the example above), don’t worry. Simply close the window and navigate to Clients > [Your Project Name] > Additional Information. Both your Client ID and Client Secret will be available there.
Step 6:
Change the Publishing Status
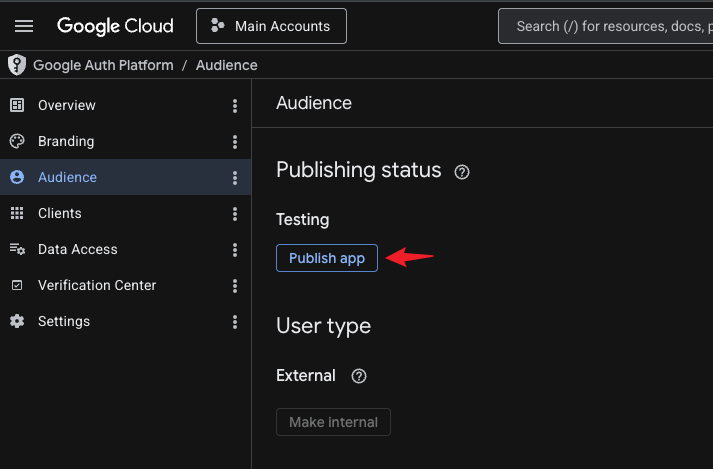
- In the same page, go to the Audience tab (on the left navigation panel)
- Click on Publish app
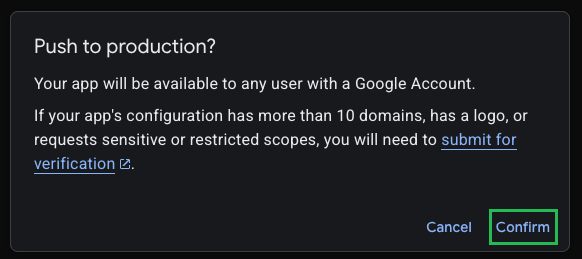
3. Click Confirm on the pop-up confirmation window
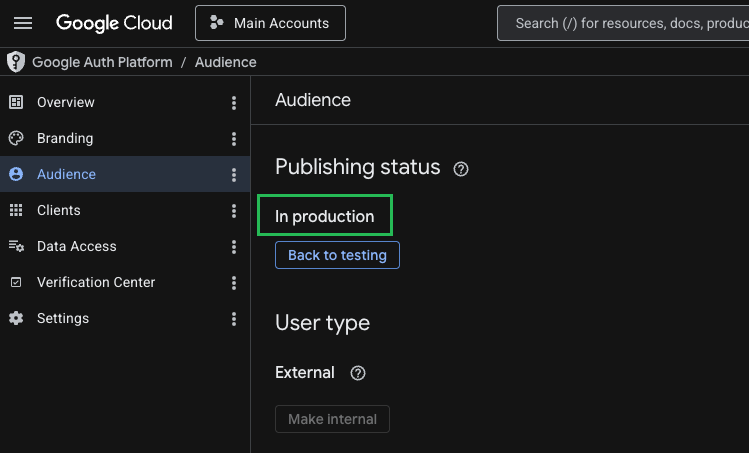
4. Confirm the status shows "In production"
Once published, the status will update to In production. A "Back to testing" button will also appear, confirming the change was successful.
Step 7:
Enter Details in FBM
- Go to Settings > Portal > SMTP Account
- Enter the values for your Client ID and Client Secret from Step 5
- Click Submit

4. Continue with the succeeding steps on Google
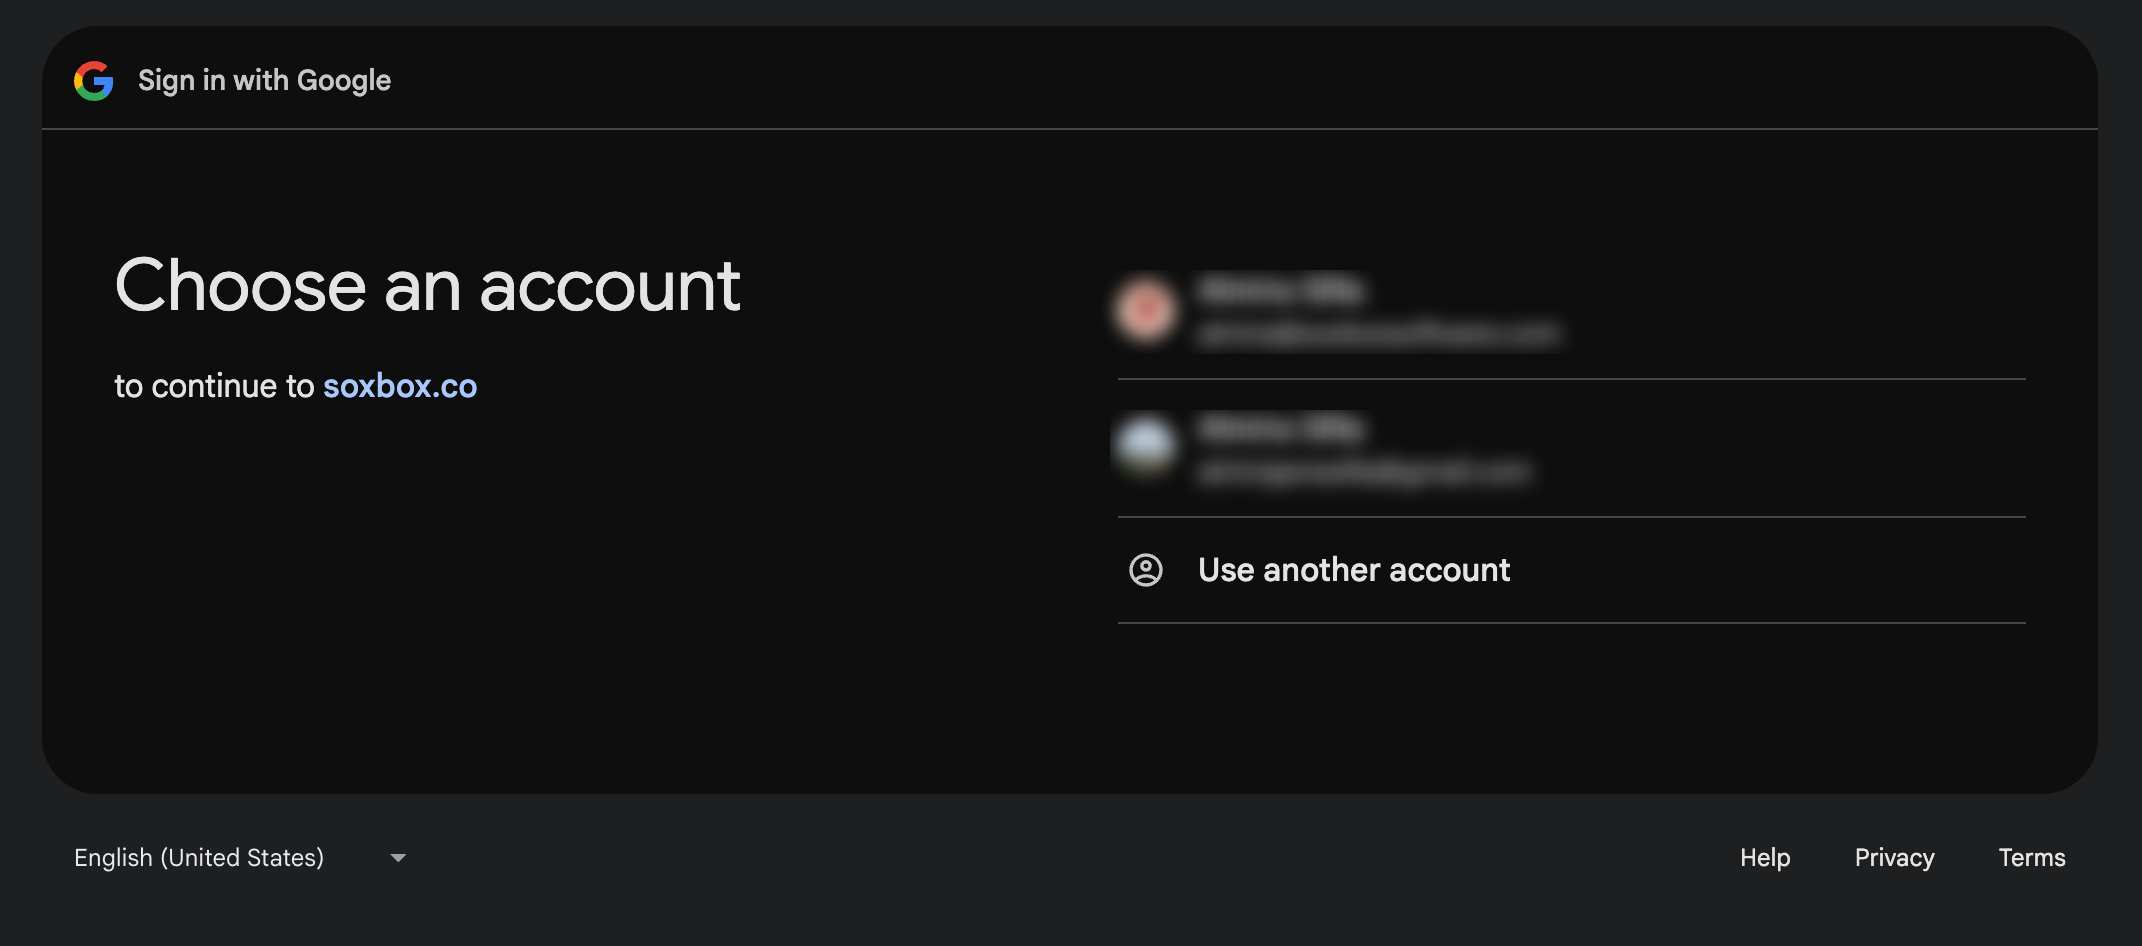
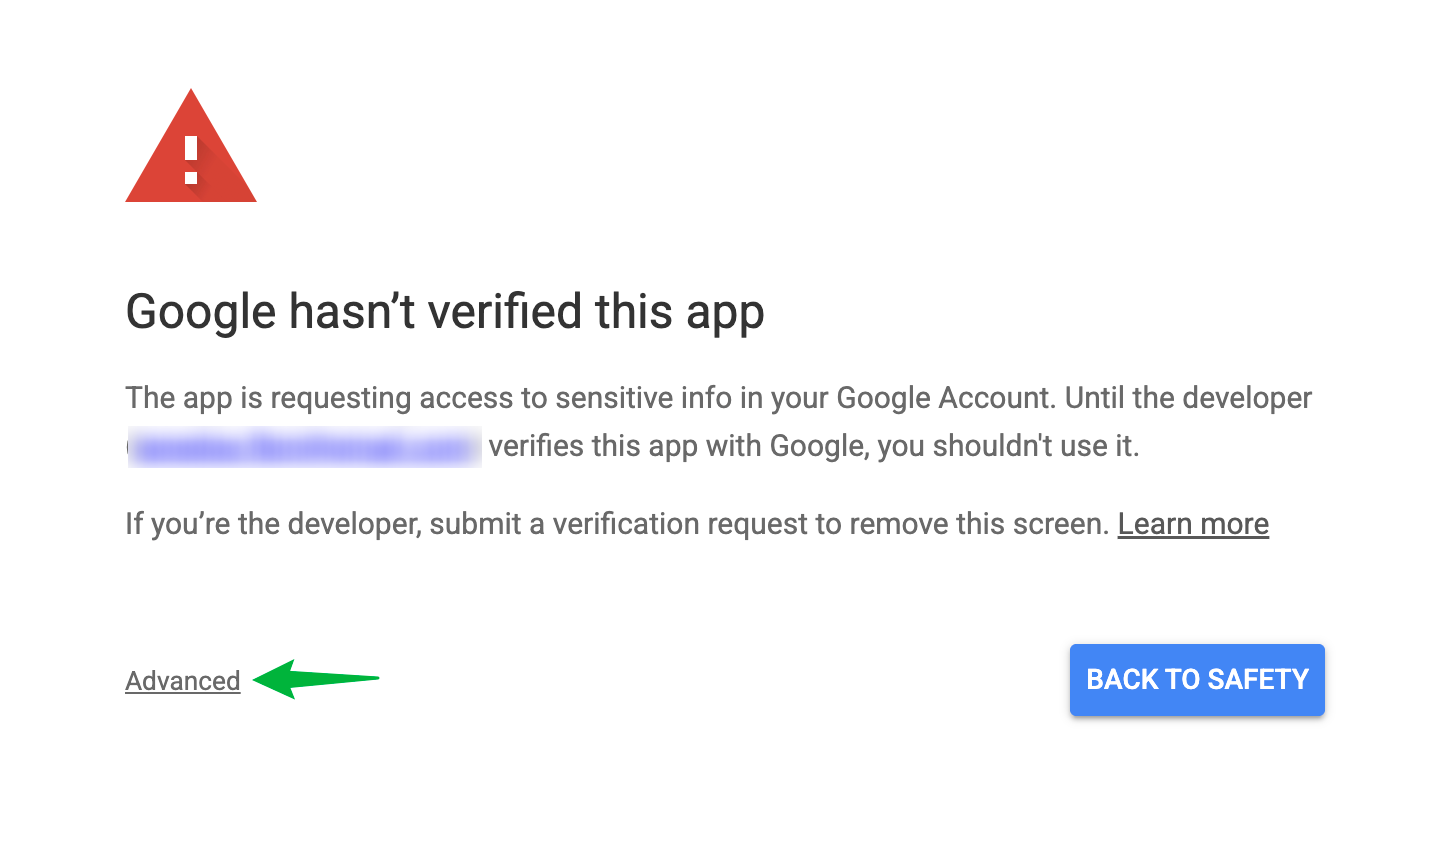
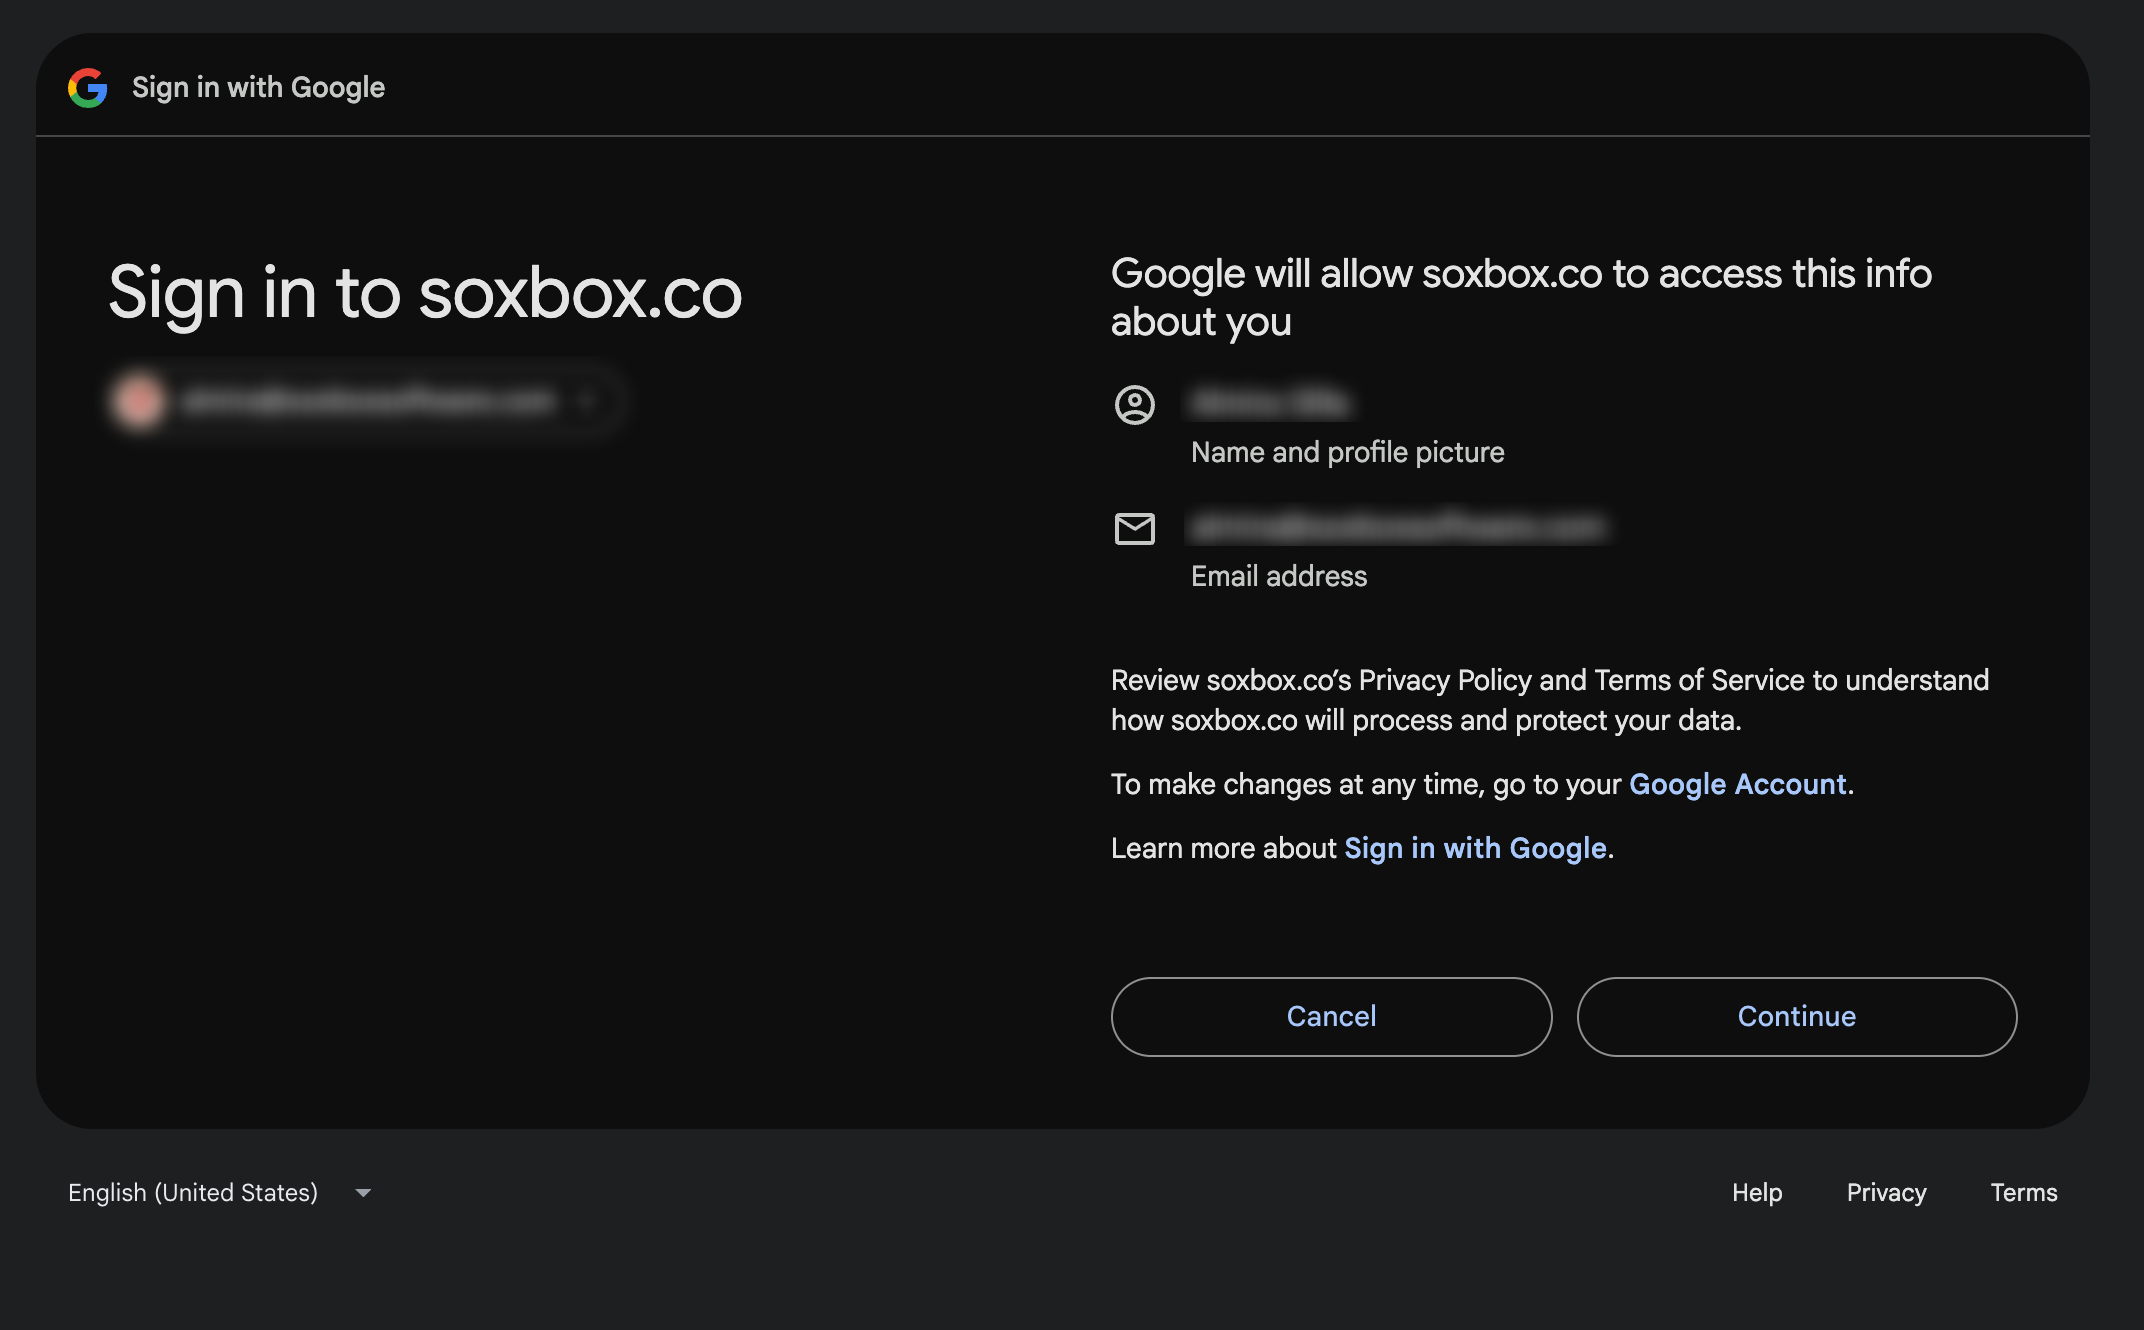
⚠️ You may see a Google security warning — this is expected

When reconnecting your Gmail account, Google may display a warning that says "Google hasn't verified this app." This appears because the app is in the process of being verified by Google and does not mean anything is wrong with your account or with FBM.

To continue, click "Advanced" and then "Go to soxbox.co (unsafe)." Despite the wording, this is safe to proceed with — you are simply granting your own app access to your own Gmail account.

If you see a second screen asking you to confirm trust in the app, click "Continue" to finish the reconnection.

Once completed, your SMTP account will be active and emails will resume as normal.

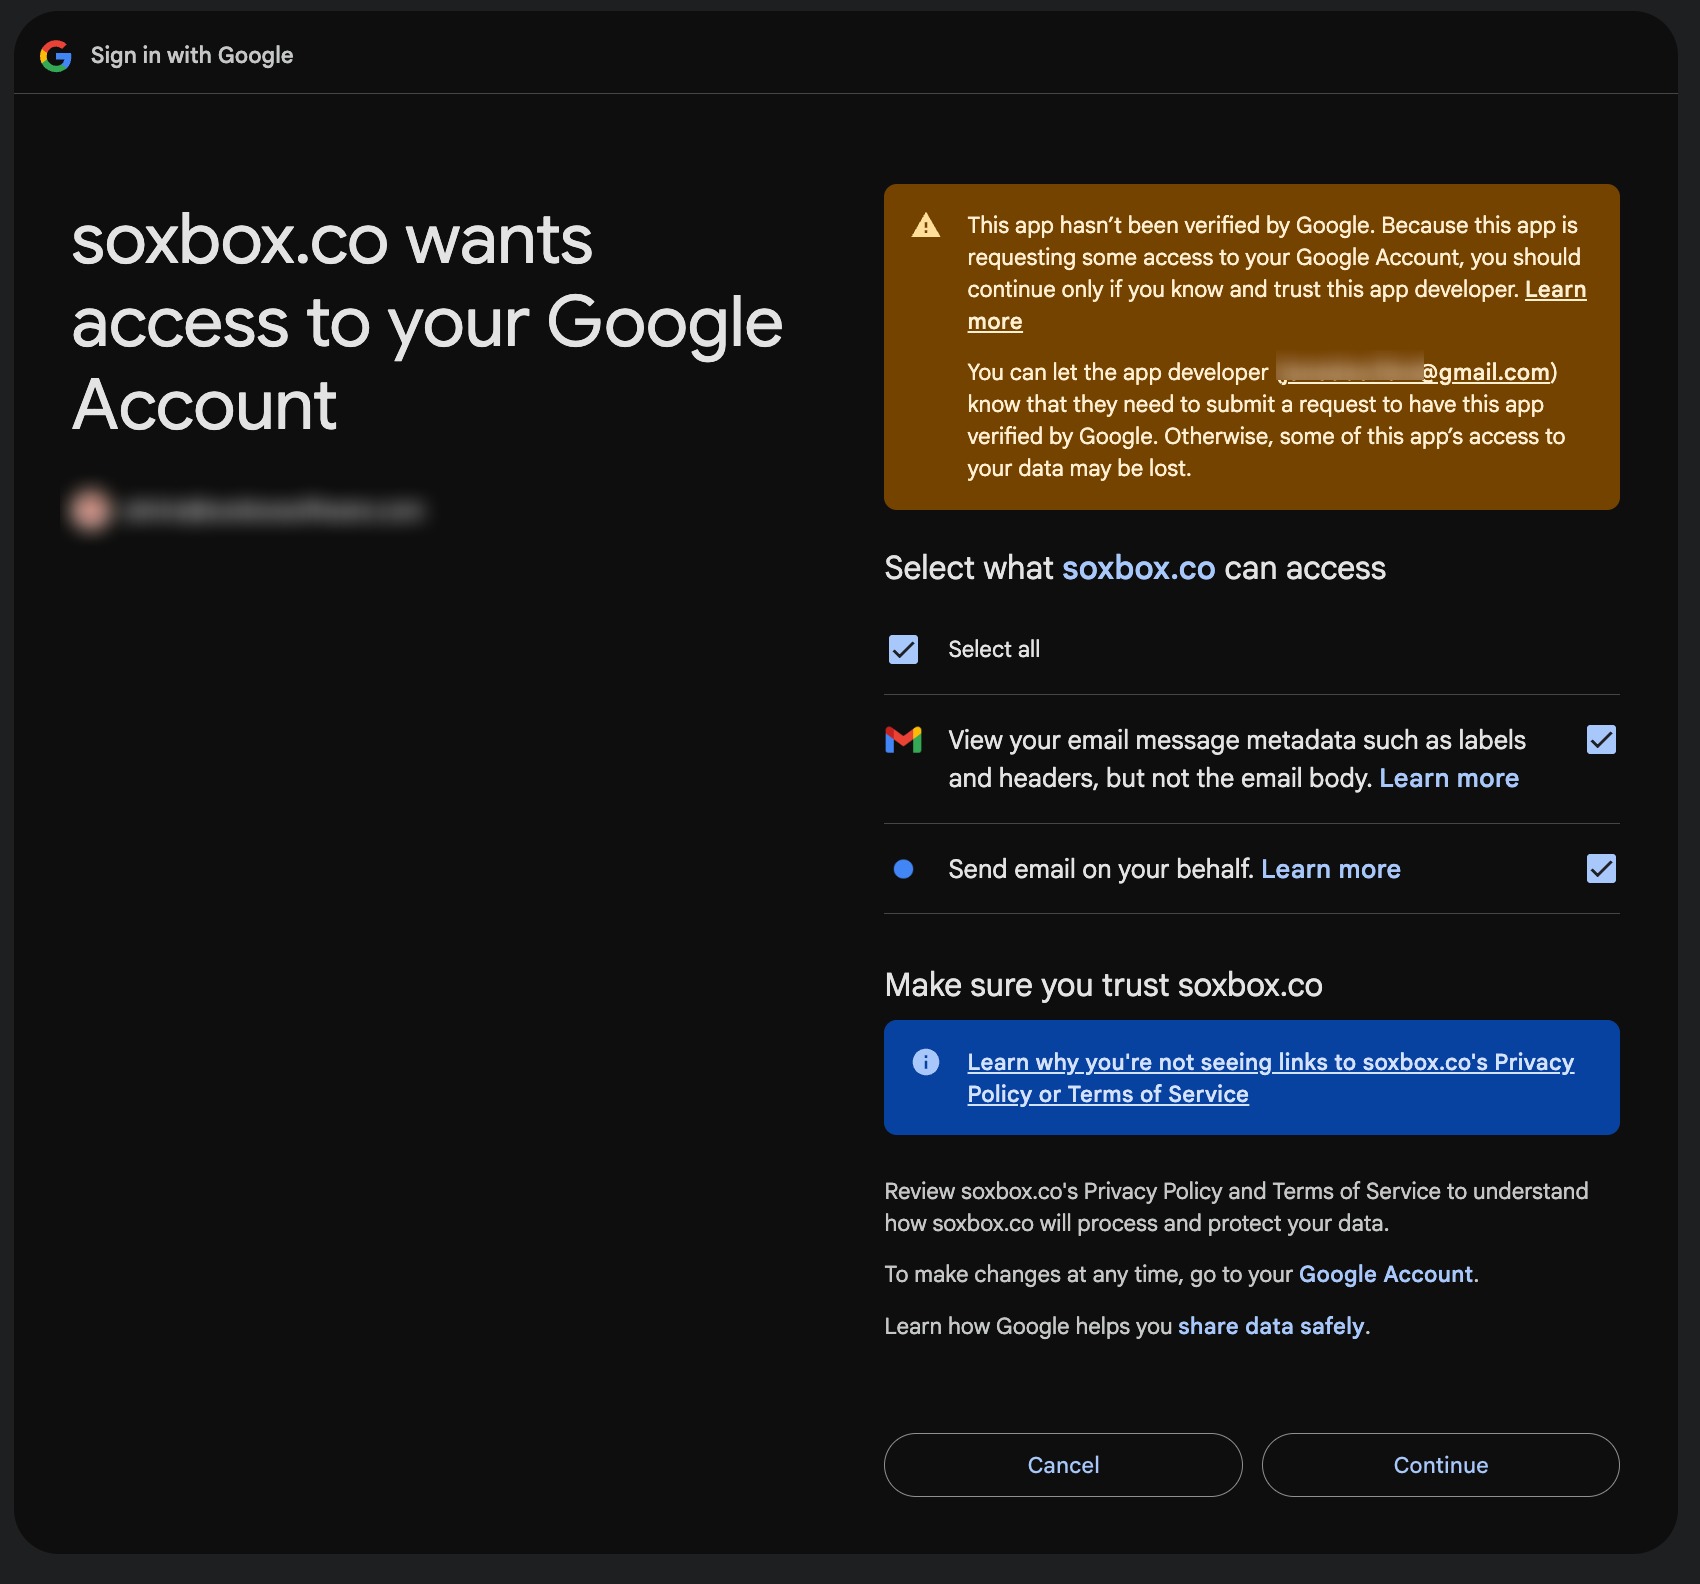
5. Grant Required Permissions
To ensure the email integration works properly, you must select “Select all” when granting permissions.
Our SMTP integration requires all listed permissions because:
- View email metadata – This allows the system to verify delivery status, confirm headers, and properly track outgoing messages.
- Send email on your behalf – This enables the system to send reservation confirmations, notifications, and other automated emails directly from your connected email address.
If any required permission is not granted, the integration may fail or certain email features (such as automated notifications) may not work correctly.
We only use these permissions strictly for sending system-generated emails and verifying delivery. We do not access or read your email content.
Once you complete the Google steps, you will be redirected back to the SMTP Account page. A success message will appear confirming that your Gmail account has been successfully linked.
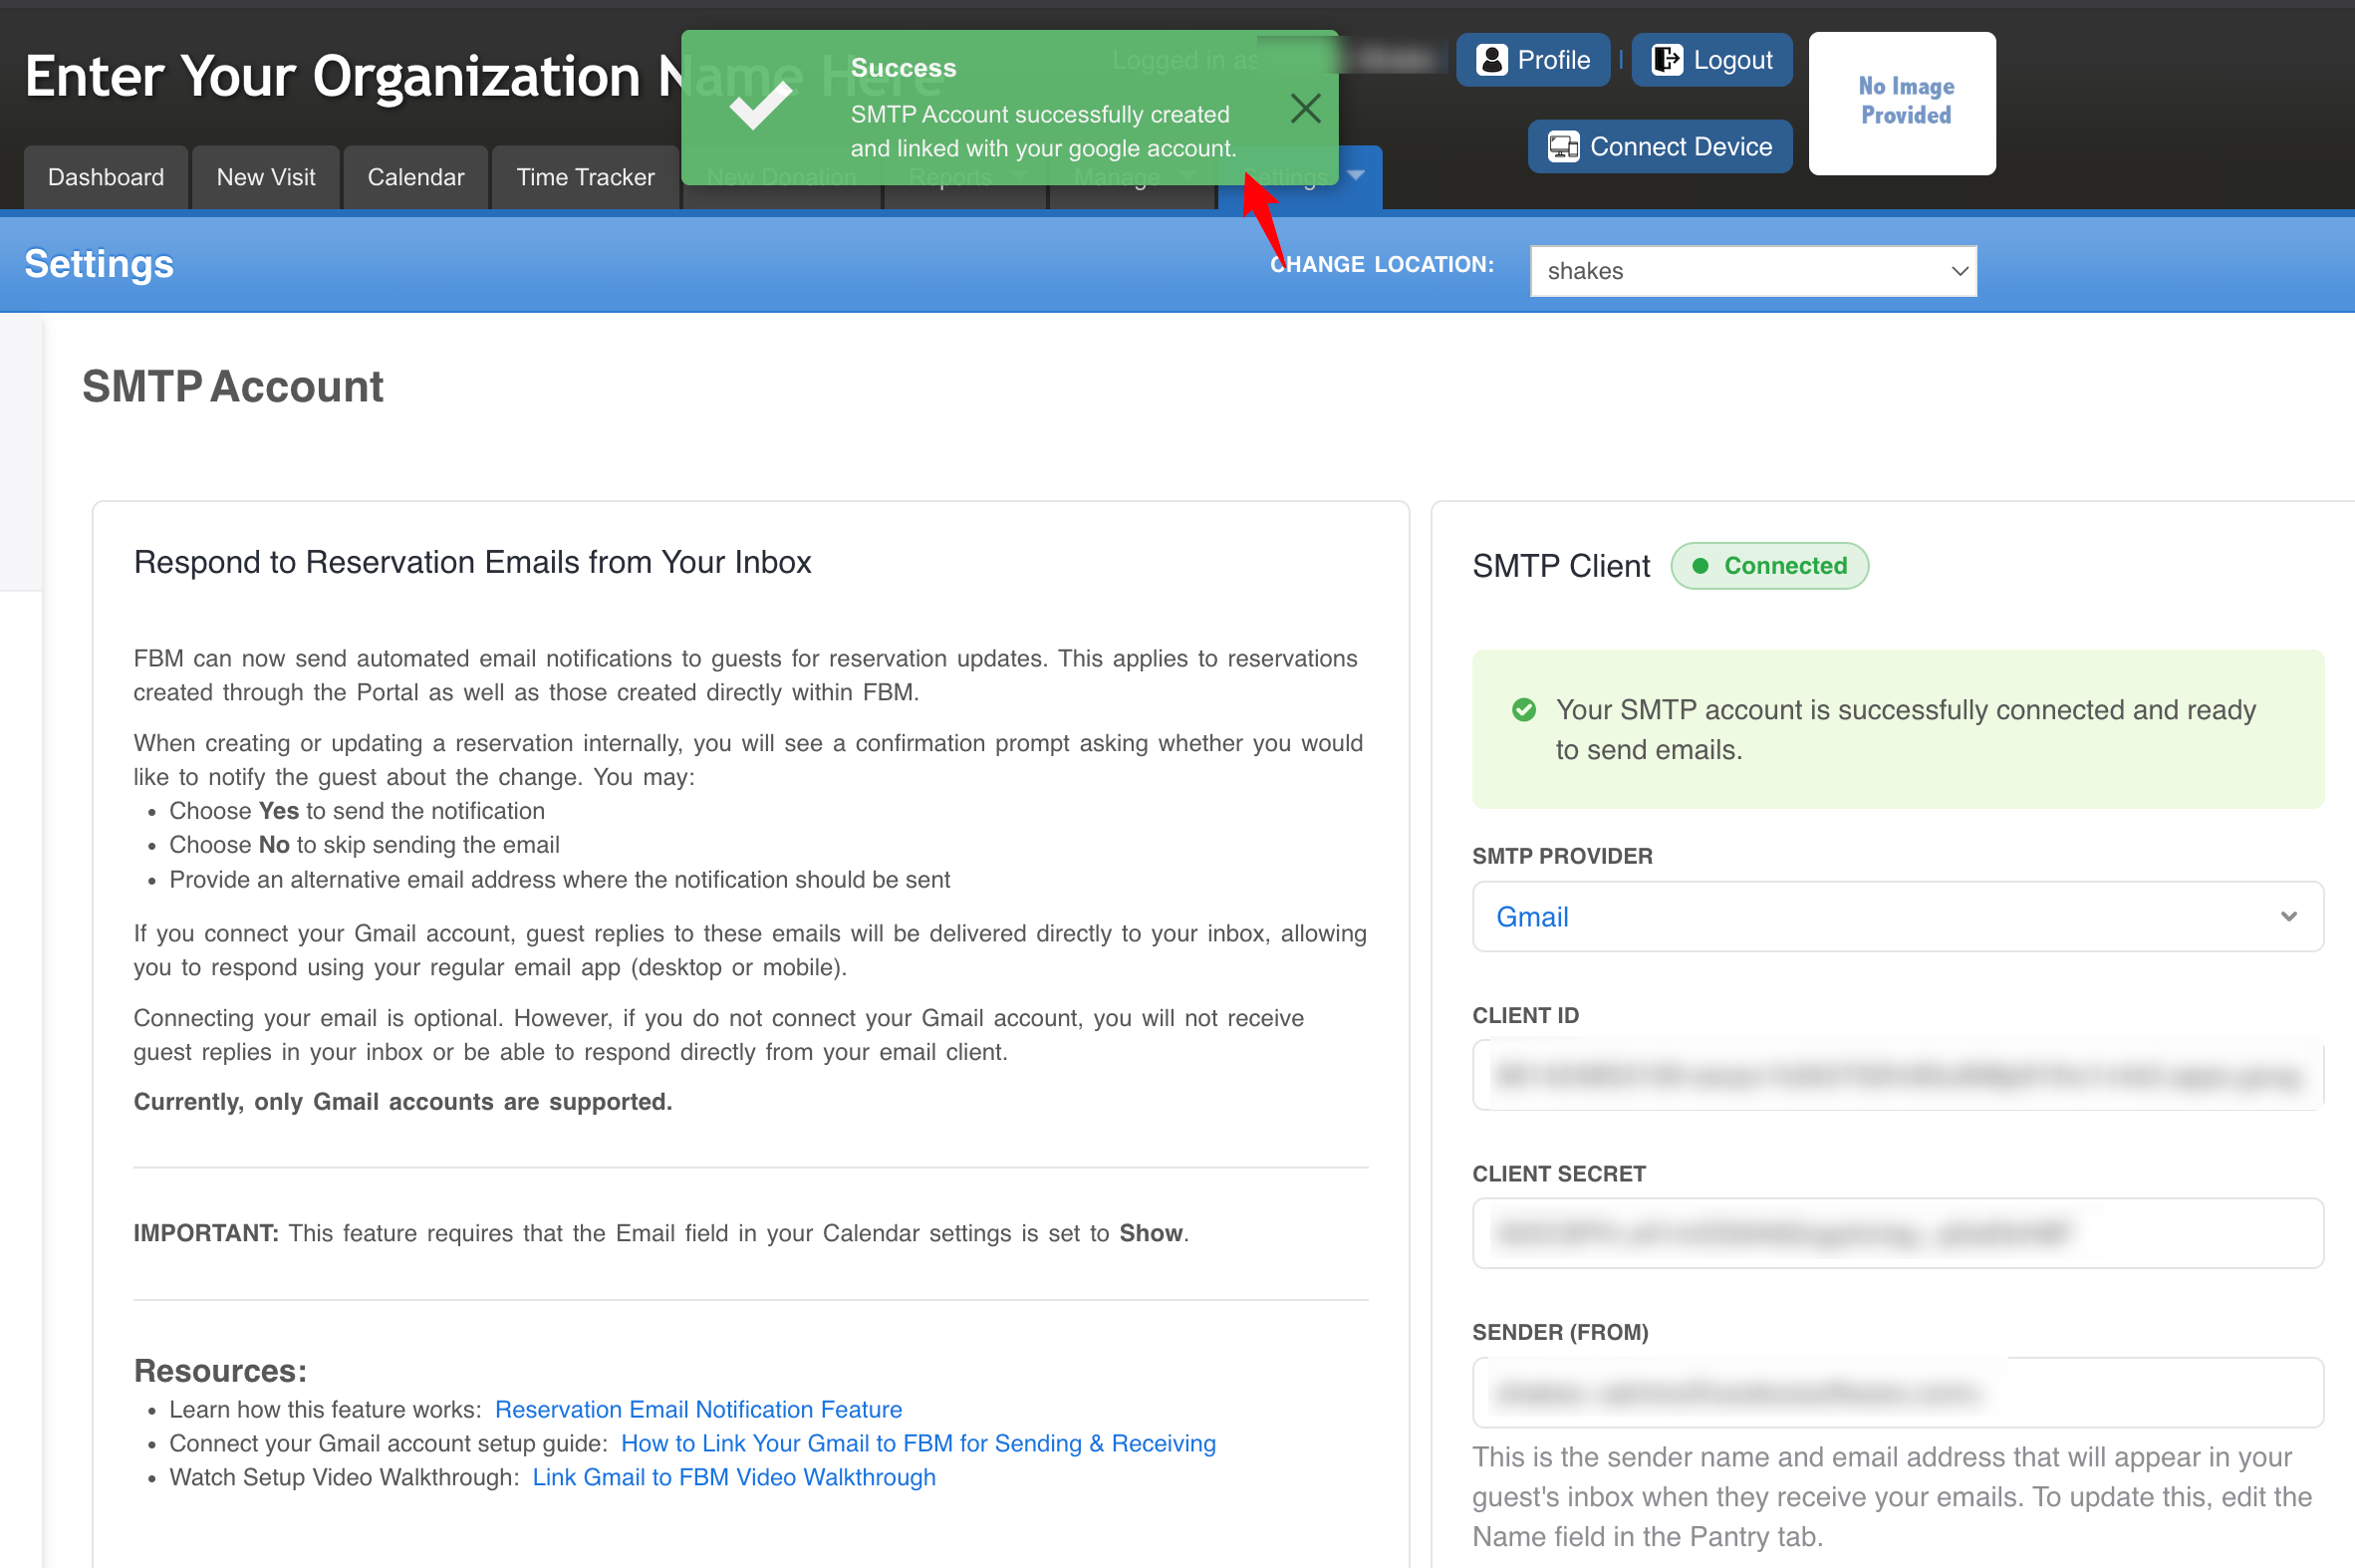
Completion
Your Gmail is now connected. Guest replies to automated emails will go straight to your Gmail inbox, where you can respond directly.
Important:
Gmail Daily Sending Limits
FBM uses Gmail (via SMTP) to send notifications. Gmail enforces daily sending limits and temporary restrictions if those limits are exceeded.
If limits are reached:
• Email notifications may be delayed.
• Sending access may be temporarily restricted by Google.
• Delivery will resume once Google resets the limit.
For full details about Gmail sending limits and recommendations for higher-volume sending, please refer to: Gmail Sending Limit Behavior (Rolling 24-Hour Window) article
Was this article helpful?
That’s Great!
Thank you for your feedback
Sorry! We couldn't be helpful
Thank you for your feedback
Feedback sent
We appreciate your effort and will try to fix the article